Read Sharp AR-PE1 (serv.man39) Technical Bulletin online
Sharp Electronics (UK) Ltd., NIS Systems Support
NIS Bulletin 024.doc
Page: 1 of 4
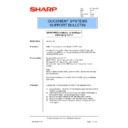
ARPE1 System Software Installation &
System Software Patch
Model Name:
ARPE1 Fiery Controller
This bulletin fully explains how to install the system software and the process
that is performed during an ARPE1 system software installation. The
installation and the purpose of the v1.01 system software patch are also
covered.
that is performed during an ARPE1 system software installation. The
installation and the purpose of the v1.01 system software patch are also
covered.
Procedure:
Installing the System Software from CD
The ARPE1 Fiery Controller is shipped with v1.0 system software. If for any
reason a re-installation of the system software is required, the system
software CD can be used and the process will take approximately 35
minutes.
reason a re-installation of the system software is required, the system
software CD can be used and the process will take approximately 35
minutes.
To install the system software from CD perform the following:
(a) Insert the System Software CD in to the ARPE1.
(b) Close down the ARPE1
(c) Power on the ARPE1
(d) Confirm “YES” when prompted that all data will be deleted.
(e) Remove the CD when prompted and then recycle the power to the AR-
(b) Close down the ARPE1
(c) Power on the ARPE1
(d) Confirm “YES” when prompted that all data will be deleted.
(e) Remove the CD when prompted and then recycle the power to the AR-
PE1.
(f) Leave the ARPE1 to install the NT system and specific Fiery files. When
completed the ARPE1 will arrive at an idle condition.
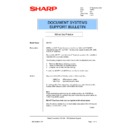
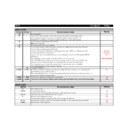
In order for you to fully understand the actions that are performed during the
system software installation, a table on the following page has been
produced. It shows the sequence of the system software installation,
approximate timings for each process and the messages that are displayed
on the ARPE1 LCD Screen and external monitor (If connected).
system software installation, a table on the following page has been
produced. It shows the sequence of the system software installation,
approximate timings for each process and the messages that are displayed
on the ARPE1 LCD Screen and external monitor (If connected).
Please Note:
Although it’s impossible to interact with the Windows NT system of the
ARPE1 without the additional option of the Fiery Advanced ControlIer
Interface Kit (FACI Kit – Keyboard/Monitor & mouse). A monitor can still be
connected to the ARPE1 to view the system software installation process on
screen.
Although it’s impossible to interact with the Windows NT system of the
ARPE1 without the additional option of the Fiery Advanced ControlIer
Interface Kit (FACI Kit – Keyboard/Monitor & mouse). A monitor can still be
connected to the ARPE1 to view the system software installation process on
screen.
Date: 10th
April
2000
Model: ARPE1
Ref:
Ref:
004
Colour Code:
Orange (C)
Page:
1 of 4
NIS SYSTEMS SUPPORT
BULLETIN
Sharp Electronics (UK) Ltd., NIS Systems Support
NIS Bulletin 024.doc
Page: 2 of 4
Action Performed by the ARPE1 Fiery Controller during a CD System Software Installation
Start Time For each
Action
(Minutes)
Action Being Performed
ARPE1 LCD Panel Display
Connected Monitor Display
Insert the System Software CD in to the ARPE1 and re-boot the
ARPE1.
Select Yes and click the button next to OK.
All data will be deleted. Continue ? Yes/No
Starting MS-DOS
0
A Ghost Image is copied from the CD to the ARPE1 hard disk.
Installing
Ghost software displays that a ghost image is being loaded on to the ARPE1
8
The ARPE1 automatically reboots itself.
Starting MS-DOS
9
Interrupts / hardware / and memory are tested at re-boot and then the
specific Fiery files are copied onto the ARPE1hard disc.
Copying Files
The Z:\fiery\data.z file and others are copied to the ARPE1 hard disc.
11
Remove the CD and power off/on the ARPE1.
To complete the install. Remove the CD and recycle the power.
C:\
12
Interrupts / hardware / and memory are tested at re-boot and then the
“D” drive is checked for any errors by the NT Operating system
Loading
Standard NT Load up screens
(NTDetect, OSLoader, Blue boot up screen)
13
The ARPE1 automatically reboots itself.
14
Interrupts / hardware / and memory are tested at re-boot and then the
“E” drive is checked for any errors by the NT Operating system
Loading
Standard NT Load up screens
(NTDetect, OSLoader, Blue boot up screen)
19
The specific Fiery/ARC150 files that were loaded on to the ARPE1
hard drive above are now uncompressed and setup.
Initialising System
The NT Logo is displayed and then the setup of the Fiery ARC150 specific
software is displayed.
20
The ARPE1 automatically reboots itself.
21
Interrupts / hardware / and memory are tested at re-boot.
Loading
Standard NT Load up screens
(NTDetect, OSLoader, Blue boot up screen)
29
A Backup Ghost Image is now copied from the hard drive to a separate
partition on the ARPE1 hard disc.
Creating System Backup
Ghost software displays that the backup image is being loaded on to the ARPE1
hard disc. (The ghost image software runs twice).
30
The ARPE1 automatically reboots itself.
Interrupts / hardware / and memory are tested at re-boot.
Standard NT Load up screens
(NTDetect, OSLoader, Blue boot up screen)
X4 Background is displayed and CTRL-ALT-Delete for logon.
Loading
31
The NT System boots to a logon screen and updates the system.
Updating System
Service Control Manager highlights that a service has failed to load.
32
The ARPE1 automatically reboots itself.
33
Interrupts / hardware / and memory are tested at re-boot.
Loading
Standard NT Load up screens
(NTDetect, OSLoader, Blue boot up screen)
34
The ARPE1 system software is now installed and the ARPE1 will be in
an idle ready condition.
Idle
Fiery X4 Background Picture
Sharp Electronics (UK) Ltd., NIS Systems Support
NIS Bulletin 024.doc
Page: 3 of 4
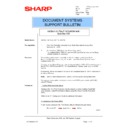
Reloading the System Software Using the Ghost Backup Image
During a system software installation, a ghost image of the system is placed on the “D” partition of the
ARPE1’s hard disc. This complete ghost image of the ARPE1 system, can be used as an alternative
to reloading from the system software CD. Reloading from the Ghost backup image takes
approximately 10 minutes.
ARPE1’s hard disc. This complete ghost image of the ARPE1 system, can be used as an alternative
to reloading from the system software CD. Reloading from the Ghost backup image takes
approximately 10 minutes.
To re-install the system software from the ghost backup image, perform the following:
(a) Reboot the ARPE1 and hold down the lower right button of the ARPE1 LCD panel at power up.
(b) The service menu will be displayed. From here you will have the following options.
(b) The service menu will be displayed. From here you will have the following options.
Install Software
Restore Backup
Install Option
Start Server
(c) Click the OK button next to “Restore Backup”.
(d) You are now asked if you wish to “Restore the Backup Configuration”. Select Yes and click OK.
(e) You are now prompted “All data will be deleted”. Select Yes and click OK.
(f) The ghost image is now taken from the ARPE1 “D” drive and the system software is re-installed.
(d) You are now asked if you wish to “Restore the Backup Configuration”. Select Yes and click OK.
(e) You are now prompted “All data will be deleted”. Select Yes and click OK.
(f) The ghost image is now taken from the ARPE1 “D” drive and the system software is re-installed.
When completed the ARPE1 will arrive at an idle condition.
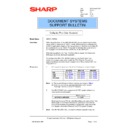
Again, a table on the following page has been produced to help you fully understand the actions that
are performed during the system software installation from the ghost image.
are performed during the system software installation from the ghost image.
System Software Patch v1.01
Since the ARPE1’s have been produced, a potential issue has been highlighted, because of this an
additional system software update patch CD is provided with all ARPE1’s. This CD includes a system
patch, which will overcome the potential symptom explained below and update the system software to
v1.01. The patch file is also available from the sharp Technical Web in the Copier-AR Products-
ARPE1 area.
Symptom:
If a multiple set print job is sent to the sorter and the copier runs out of paper, the copier will display
an out of paper condition. The ARPE1 however will not highlight this condition. Even If paper is
subsequently placed in to the copier, printing is not resumed. This print job will require cancelling
before further printing can be performed. The already printed portion of the previous job will have to
be abandoned. A re-boot of the AR-C150 and ARPE1 may be required.
How to upgrade the System Software Patch
(a) Use the Fiery Downloader program to download the 101.ps file to the ARPE1 Direct Queue.
(b) Wait until the patch file has been spooled and ripped.
(c) Power down the ARPE1 and re-boot the system.
(d) The ARPE1 LCD panel should now confirm that the system software has been patched to v1.01.
(b) Wait until the patch file has been spooled and ripped.
(c) Power down the ARPE1 and re-boot the system.
(d) The ARPE1 LCD panel should now confirm that the system software has been patched to v1.01.
Please note that the ghost image is not updated if the system software is patched. This means that if
a system is restored using the ghost image, the system will then have to be re-patched.
a system is restored using the ghost image, the system will then have to be re-patched.
Sharp Electronics (UK) Ltd., NIS Systems Support
NIS Bulletin 024.doc
Page: 4 of 4
Action Performed by the ARPE1 Fiery Controller during a Ghost Image System Software Re-Installation
Start Time For each
Action
(Minutes)
Action Being Performed
ARPE1 LCD Panel Display
Connected Monitor Display
Hold down the right lower button whilst powering on the ARPE1. From
the service menu, select “Restore Backup”
Select Yes and click the button next to OK.
Restore backup Configuration ? Yes/No
Starting MS-DOS
Select Yes and click the button next to OK.
All data will be deleted. Continue ? Yes/No
Starting MS-DOS
0
A Ghost Image is copied from the “D” drive of the ARPE1 to the other
partitions of the ARPE1
Restoring System
Ghost software displays that a ghost image is being loaded on to the ARPE1.
(The ghost image software runs twice).
5
The ARPE1 automatically reboots itself.
6
Interrupts / hardware / and memory are tested at re-boot and then the
Loading
Standard NT Load up screens
(NTDetect, OSLoader, Blue boot up screen)
7
The ARPE1 automatically reboots itself.
7
Interrupts / hardware / and memory are tested at re-boot and then the
Standard NT Load up screens
(NTDetect, OSLoader, Blue boot up screen)
X4 Background is displayed and CTRL-ALT-Delete for logon.
9
The NT System boots to a logon screen.
Loading
Service Control Manager highlights that a service has failed to load.
10
in an idle ready condition.
Idle
Fiery X4 Background Picture

