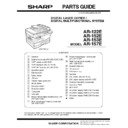
Read Sharp AR-122E (serv.man55) User Guide / Operation Manual online
26
This chapter describes misfeed removal and troubleshooting.
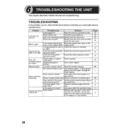
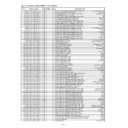
TROUBLESHOOTING
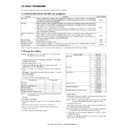
If any problem occurs, check the list below before contacting your authorised service
representative.
representative.
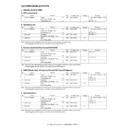
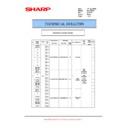
Problem
Possible cause
Solution
Page
Unit does not
operate.
operate.
Unit plugged in?
Plug the unit into a grounded outlet.
12
Power switch on?
Turn the power switch on.
12
Side cover closed securely? Gently close the side cover.
23
Front cover closed?
Gently close the front cover and then
close the side cover.
close the side cover.
23
Blank copies
Is the original placed face
down on the original table?
down on the original table?
Place the original face down on the
original table.
original table.
14
Copies are too
dark or too light.
dark or too light.
Is original image too dark or
too light?
too light?
Adjust the exposure manually.
15
Is the unit in the automatic
exposure mode?
exposure mode?
Adjust the automatic exposure level.
16
Is the unit in the photo
exposure mode?
exposure mode?
Cancel the photo exposure mode.
15
Dust, dirt,
smudges appear
on copies.
smudges appear
on copies.
Original table or original
cover dirty?
cover dirty?
Clean regularly.
24
Original smudged or
blotchy?
blotchy?
Use a clean original.
–
Striped copies
Is transfer charger clean?
Clean the transfer charger.
25
Paper misfeeds
frequently.
frequently.
Non-standard paper used? Use standard paper. If using special
papers, feed the paper through the
single bypass.
single bypass.
7
Paper curled or damp?
Store paper flat in the wrapper in a
dry location.
dry location.
–
Pieces of paper inside unit? Remove all pieces of misfed paper.
28
Paper guides in the paper
tray not set properly?
tray not set properly?
Set the guides properly depending on
the paper size.
the paper size.
8
Too much paper in the
paper tray?
paper tray?
Remove excessive paper from the
tray.
tray.
8
Images rub off the
copy easily.
copy easily.
Is the paper too heavy?
Use paper within the specified range.
7
Paper damp?
Replace with dry paper. If the unit is
not used for long time, remove the
paper from the paper tray and store it
in its wrapper in a dry location.
not used for long time, remove the
paper from the paper tray and store it
in its wrapper in a dry location.
2
6
TROUBLESHOOTING THE UNIT
27
6
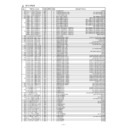
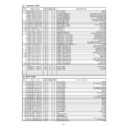
STATUS INDICATORS
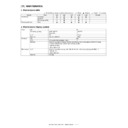
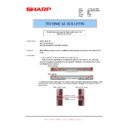
When the following indicators light up or blink on the operation panel or the following
alphanumeric codes appear in the display, solve the problem immediately referring
to both the table below and the relevant page.
alphanumeric codes appear in the display, solve the problem immediately referring
to both the table below and the relevant page.
Be sure to use only genuine SHARP parts and supplies.
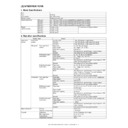
Indication
Cause and remedy
Page
Developer
replacement
required indicator
replacement
required indicator
Steadily
lit
lit
Developer is required. contact your authorised
service representative.
service representative.
31
Toner cartridge
replacement
required indicator
replacement
required indicator
Steadily
lit
lit
Replacement of Toner cartridge will be needed
soon. Prepare a new cartridge. (AR-152T)
soon. Prepare a new cartridge. (AR-152T)
21
Blinking
Toner cartridge must be replaced. Replace it
with a new one. (AR-152T)
with a new one. (AR-152T)
21
Misfeed indicator
Blinking
A misfeed has occurred. Remove the misfed
paper referring to the description of "MISFEED
REMOVAL".
paper referring to the description of "MISFEED
REMOVAL".
28
Maintenance
indicator
indicator
Steadily
lit
lit
Service by an authorised SHARP service
technician is required.
technician is required.
31
Power save indicator is
steadily lit.
steadily lit.
The unit is in the preheat mode. Press any key to
cancel the preheat mode.
cancel the preheat mode.
18
The unit is in the auto power shut-off mode.
Press the start (
Press the start (
) key to cancel the auto power
shut-off mode.
18
The paper tray indicator is
blinking.
blinking.
The paper tray is not installed properly. Push the
tray into the unit securely.
tray into the unit securely.
–
"CH" is blinking in the
display.
display.
The toner cartridge is not installed. Check if the
cartridge is installed. If "CH" is blinking even if a
cartridge is installed properly, contact your
SHARP service centre immediately.
cartridge is installed. If "CH" is blinking even if a
cartridge is installed properly, contact your
SHARP service centre immediately.
21
"CH" is steadily lit in the
display.
display.
Side cover is open. Close the side cover
securely by pressing the round projections near
the side cover open button.
securely by pressing the round projections near
the side cover open button.
–
"P" is blinking in the display.
The paper tray is empty.
Load paper.
Load paper.
8
A misfeed has occurred in the paper tray, single
bypass. Remove the misfed paper.
bypass. Remove the misfed paper.
28
Paper tray is not securely installed. Push the tray
in securely.
in securely.
–
A letter and a number appear
alternately.
alternately.
The scan head locking switch is locked. Unlock
the scan head locking switch and turn the power
switch off/on.
the scan head locking switch and turn the power
switch off/on.
–
A letter and a number appear
alternately.
alternately.
The unit will not function. Turn the power switch
off and then switch it on, and if there is again an
error, remove the power cord from the outlet, and
contact your authorized service representative.
off and then switch it on, and if there is again an
error, remove the power cord from the outlet, and
contact your authorized service representative.
–
A letter and a number appear
alternately.
alternately.
You will not be able to use the toner cartridge
anymore (Toner Cartridge End of life). Contact
your authorised service representative.
anymore (Toner Cartridge End of life). Contact
your authorised service representative.
–
28
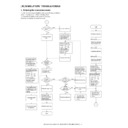
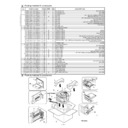
MISFEED REMOVAL
When the misfeed (
) indicator blinks or
blinks in the display, the unit will
stop because of a misfeed.
1
Open the side cover, in that order.
To open the side cover, see "TONER CARTRIDGE REPLACEMENT"
(p.21).
(p.21).
2
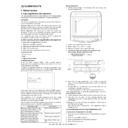
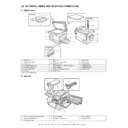
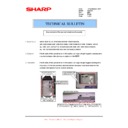
Check the misfeed location. Remove the misfed paper
following the instructions for each location in the illustration
below. If the misfeed (
following the instructions for each location in the illustration
below. If the misfeed (
) indicator blinks, proceed to "A:
Misfeed in the paper feed area" (p.29).
If paper is misfed here, proceed to "A:
Misfeed in the paper feed area". (p.29)
Misfeed in the paper feed area". (p.29)
If paper is misfed here, proceed to "B:
Misfeed in the fusing area". (p.29)
Misfeed in the fusing area". (p.29)
If the misfed paper is seen from
this side, proceed to "C: Misfeed
in the transport area". (p.30)
this side, proceed to "C: Misfeed
in the transport area". (p.30)
29
6
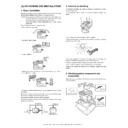
A: Misfeed in the paper feed area
1
Gently remove the misfed paper from the paper feed area as
shown in the illustration. When the misfeed (
shown in the illustration. When the misfeed (
) indicator
blinks, and the misfed paper is not seen from the paper feed
area, pull out the paper tray and remove the misfed paper. If the
paper cannot be removed, proceed to "B: Misfeed in the fusing
area".
area, pull out the paper tray and remove the misfed paper. If the
paper cannot be removed, proceed to "B: Misfeed in the fusing
area".
2
Close the side cover by pressing the round projections near
the side cover open button. The misfeed (
the side cover open button. The misfeed (
) indicator will go
out and the start (
) indicator will light up.
B: Misfeed in the fusing area
1
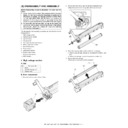
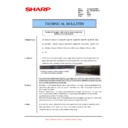
Lower the fusing unit release
lever.
lever.
The fusing unit is hot. Do not touch the fusing unit when
removing misfed paper. Doing so may cause a burn or other
injury.
removing misfed paper. Doing so may cause a burn or other
injury.
Do not touch the photoconductive drum (green portion) when
removing the misfed paper. Doing so may cause smudges on
copies.
removing the misfed paper. Doing so may cause smudges on
copies.
Fusing unit release lever

