Read Sharp AR-122E (serv.man54) User Guide / Operation Manual online
32
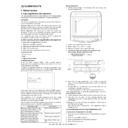
The procedure for installing the software for the optional Printer/Scanner Expansion
Kit (AL-12PKM) and the operation of the printer/scanner is explained here.
Information on how to use the online manual is also provided. For the procedure for
installing the AL-12PKM, see the setup guide that accompanies the AL-12PKM.
Illustrations of driver screens and other computer screens show the screens that
appear in Windows XP Home Edition. Some of the names that appear in these
illustrations may differ slightly from the screens that appear in other operating
systems.
The following term is used in this chapter.
CD-ROM
Means the supplied CD-ROM with the SHARP Personal MFP series software.
SOFTWARE FOR THE SHARP PERSONAL MFP
SERIES
SERIES
The supplied CD-ROM includes software for this unit.
MFP driver
Scanner driver
Permits you to operate scanning function of this unit with TWAIN-compliant and
WIA-compliant application.
WIA-compliant application.
Printer driver
Enables you to use the printer function of this unit with your computer.
Print Status Window
The print state and information on current printing are displayed on the status
monitor window.
monitor window.
Sharpdesk
Button Manager
Button Manager enabling the SCANNER (
) key located on the unit.
The scanning feature is only available with Windows 98/Me/2000/XP
using a USB connection. For users running Windows 95/NT 4.0 or using
a parallel connection, only printing is available.
using a USB connection. For users running Windows 95/NT 4.0 or using
a parallel connection, only printing is available.
7
OPTIONAL EQUIPMENT (AL-12PKM)
33
7
HARDWARE AND SOFTWARE REQUIREMENTS
Check the following hardware and software requirements in order to install the software.
*
1
Compatible with Windows 98, Windows Me, Windows 2000 Professional, Windows XP
Professional or Windows XP Home Edition preinstalled model with USB interface
equipped as standard.
Professional or Windows XP Home Edition preinstalled model with USB interface
equipped as standard.
*
2
Printing is unavailable in MS-DOS mode.
*
3
The administrator's authorisation is required to install this software using this installer.
BEFORE INSTALLATION
The following table shows the drivers and software that can be installed for each
version of Windows and interface connection method.
version of Windows and interface connection method.
*
1
When the unit is connected through the parallel port, the Print Status Window can only
be used when the parallel port is set to ECP mode. To set the parallel port mode, refer
to your computer manual or ask the manufacturer of your computer.
be used when the parallel port is set to ECP mode. To set the parallel port mode, refer
to your computer manual or ask the manufacturer of your computer.
*
2
Sharpdesk can be installed when using a parallel interface connection, however, the
unit’s scanner function cannot be used.
unit’s scanner function cannot be used.
Computer type
IBM PC/AT or compatible computer equipped with a
USB1.1*
USB1.1*
1
or bi-directional parallel interface (IEEE 1284)
Operating system*
2
Windows 95, Windows 98, Windows Me, Windows NT
Workstation 4.0 (ServicePack 5 or later)*
Workstation 4.0 (ServicePack 5 or later)*
3
, Windows 2000
Professional, Windows XP Professional*
3
, Windows XP
Home Edition*
3
Display
800 x 600dots (SVGA) display with 256 colours (or better)
Hard disk free space 150MB or more
Other requirement
for hardware
Other requirement
for hardware
An environment on which any of the operating systems listed
above can fully operate
above can fully operate
MFP Driver
Button
Manager
Sharpdesk
Printer driver/
Print Status
Window
Scanner driver
Users of Windows
98/Me/2000/XP who
will use the USB
interface connection
98/Me/2000/XP who
will use the USB
interface connection
Available*
1
Available
Available
Available
Users of Windows
98/Me/2000/XP who
will use the parallel
interface connection
98/Me/2000/XP who
will use the parallel
interface connection
Not Available
Not
Available
Available*
2
Windows 95/NT 4.0
users
users
Is there another GDI printer driver or a Windows Printing System printer
driver already installed? If installed, change the printer port setting. For
the change of the printer port setting, see "USING OTHER INSTALLED
DRIVERS" (p.58).
driver already installed? If installed, change the printer port setting. For
the change of the printer port setting, see "USING OTHER INSTALLED
DRIVERS" (p.58).
34
Flow of installation
Refer to the following table and then begin installation.
Operating
system
Interface
Reference pages for how to install
Windows XP
USB/
Parallel
Installing onto Windows XP (USB/parallel interface)
(p.35)
(p.35)
Windows 98
USB
Installing onto Windows 98/Me/2000 (USB interface) (p.39)
Parallel
Installing onto Windows 95/98/Me/NT4.0/2000
(Parallel interface) (p.42)
(Parallel interface) (p.42)
Windows Me
USB
Installing onto Windows 98/Me/2000 (USB interface) (p.39)
Parallel
Installing onto Windows 95/98/Me/NT4.0/2000
(Parallel interface) (p.42)
(Parallel interface) (p.42)
Windows 2000
USB
Installing onto Windows 98/Me/2000 (USB interface) (p.39)
Parallel
Installing onto Windows 95/98/Me/NT4.0/2000
(Parallel interface) (p.42)
(Parallel interface) (p.42)
Windows 95/
NT 4.0
Parallel
Installing onto Windows 95/98/Me/NT4.0/2000
(Parallel interface) (p.42)
(Parallel interface) (p.42)
35
7
INSTALLING THE SOFTWARE
The following term is used in this section.
MFP
Means the unit as a printer and scanner.
Installing onto Windows XP (USB/parallel interface)
Before starting the installation, make sure the USB or parallel interface cable is not
connected to the MFP.
connected to the MFP.
1
Insert the supplied CD-ROM into your CD-ROM drive.
2
Click the "start" button, click "My Computer" (
), and then
double-click the CD-ROM (
) icon.
3
Double-click the "setup" (
) icon.
4
Select the software packages to be
installed, and then click the "Next"
button.
installed, and then click the "Next"
button.
The software packages with checkmark (
)
on the list on the screen will be installed.
Click the "Display README" button to show
the information on the selected package.
Click the "Display README" button to show
the information on the selected package.
•
For this description, it is assumed that the mouse is configured for
right hand operation.
right hand operation.
•
To print or scan, the MFP must be in the online state.
•
The scanner feature only works when using a USB interface cable.
•
If any error message appears, solve the problem following the
instructions on the screen. After your problem is solved, the installing
procedure will be continued. Depending on your problem, you may
have to exit the installer. In this case, click the "Cancel" button to exit
the installer. After solving your problem, reinstall the software from the
beginning.
instructions on the screen. After your problem is solved, the installing
procedure will be continued. Depending on your problem, you may
have to exit the installer. In this case, click the "Cancel" button to exit
the installer. After solving your problem, reinstall the software from the
beginning.
When any of "Found New Hardware Wizard" messages appear during
the software installation, be sure to click the "Cancel" button.
the software installation, be sure to click the "Cancel" button.
If the language selection screen appears after you double click the
"setup" icon, select the language you wish to use and click the "Next"
button. (Normally, the correct language is selected automatically.)
"setup" icon, select the language you wish to use and click the "Next"
button. (Normally, the correct language is selected automatically.)

