|
|
MX-FNX1 (serv.man2)
Complete Manual .
Service Manual
|
80
|
16.43 MB
|
|
|
MX-FNX1 (serv.man3)
Front and Rear Covers .
Service Manual
|
6
|
822.45 KB
|
|
|
MX-FNX1 (serv.man4)
Section -1 - Product Overview .
Service Manual
|
1
|
476.38 KB
|
|
|
MX-FNX1 (serv.man5)
Section -2 - Specifications .
Service Manual
|
2
|
139.47 KB
|
|
|
MX-FNX1 (serv.man6)
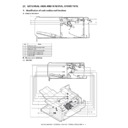
Section -4 - Outside View and Internal Structure .
Service Manual
|
5
|
416.18 KB
|
|
|
MX-FNX1 (serv.man7)
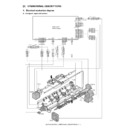
Section -5 - Operational Descriptions .
Service Manual
|
9
|
1.73 MB
|
|
|
MX-FNX1 (serv.man9)
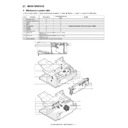
Section -7 - Maintenance .
Service Manual
|
1
|
314.66 KB
|
|
|
MX-FNX1 (serv.man10)
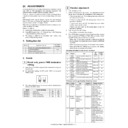
Section -8 - Adjustments .
Service Manual
|
2
|
216.16 KB
|
|
|
MX-FNX1 (serv.man11)
Section -9 - Self Diagnosis and Trouble codes .
Service Manual
|
3
|
117.13 KB
|
|
|
MX-FNX1 (serv.man12)
Section 10 - Electrical Section .
Service Manual
|
16
|
1.31 MB
|
|
|
MX-FNX10
MX-FN10 Service Manual (Complete)
Service Manual
|
56
|
17.37 MB
|
|
|
MX-FNX10 (serv.man2)
Parts Guide (Revised July 2017).
Parts Guide
|
72
|
11.09 MB
|
|
|
MX-FNX1 (serv.man13)
Revised November 11
Parts Guide
|
28
|
4.92 MB
|
|
|
MX-FNX1
Specifications .
Specification
|
2
|
139.47 KB
|
|
|
MX-FNX10 (serv.man40)
F1-43 TROUBLE CAUSED BY LOCKED ADJUSTMENT PLATE
Technical Bulletin
|
2
|
197.65 KB
|
|
|
MX-FNX10 (serv.man17)
ARE-1123 MXFN10 Firmware Upgrade B88 V01.14.02.00 Model specific separate folders inside (Bulletin Only)
Technical Bulletin
|
1
|
81.26 KB
|
|
|
MX-FNX10 (serv.man18)
MX-FNX9 FN10 FN11 FN18 PNX6 ROM CHANGE FOR VIRGO 2 MODELS - MX-4140 4141 5140 5141N - BULLETIN ONLY
Technical Bulletin
|
1
|
19.73 KB
|
|
|
MX-FNX10 (serv.man19)
IMPROVEMENT OF STRENGTH OF SADDLE STITCH GEAR
Technical Bulletin
|
2
|
206.51 KB
|
|
|
MX-FNX10 (serv.man20)
ENHANCEMENT FOR JAM CAUSED BY WORN OUT TRANSPORT RIBS ON TOP COVER
Technical Bulletin
|
2
|
66.14 KB
|
|
|
MX-FNX10 (serv.man21)
CCE-1099 - ENHANCEMENT FOR PAPER MISALIGNMENT OF FOLDING DUE TO SKEW AT SADDLE
Technical Bulletin
|
1
|
125 KB
|
|
|
MX-FNX10 (serv.man22)
MACHINE NOISE REDUCED DURING INITIAL OPERATION
Technical Bulletin
|
2
|
141.44 KB
|
|
|
MX-FNX10 (serv.man23)
F1-43 TROUBLE CODE OCCURRENCE RESULTING FROM SADDLE ALIGNMENT GLITCH WHEN POWER IS ON
Technical Bulletin
|
3
|
356.31 KB
|
|
|
MX-FNX10 (serv.man24)
SUPPORT FOR JAMMING (FPPD2_S, ETC.) IN THE SADDLE OPENING
Technical Bulletin
|
3
|
619.27 KB
|
|
|
MX-FNX10 (serv.man25)
IMPROVED PAPER FEEDING PERFORMANCE THROUGH THE SADDLE FOR A3 SIZE, ETC.
Technical Bulletin
|
2
|
88.14 KB
|
|
|
MX-FNX10 (serv.man26)
LASTING SUPPORT FOR THE STAPLER UNIT OPERATION LOCK (F1-08 ERROR CODE)
Technical Bulletin
|
2
|
104.06 KB
|
|
|
MX-FNX10 (serv.man27)
DELIVERY SENSOR LEVER OF THE MAIN UNIT COMING LOOSE WHEN THE RELAY UNIT (MX-RBX3) IS PULLED
Technical Bulletin
|
2
|
114.32 KB
|
|
|
MX-FNX10 (serv.man16)
ELIMINATION REDUCTION OF SPRINGS FOR PRODUCTIVITY IMPROVEMENT.
Technical Bulletin
|
2
|
178.66 KB
|
|
|
MX-FNX10 (serv.man28)
F1-08 ERROR CAUSED BY AN OPERATION LOCK OF THE STAPLER UNIT
Technical Bulletin
|
3
|
293.47 KB
|
|
|
MX-FNX10 (serv.man29)
GUIDE SR-SG-GP-F R NOT OPENING CAUSING ANGLED PAPER EJECTION
Technical Bulletin
|
2
|
87.18 KB
|
|
|
MX-FNX10 (serv.man30)
FPDD_S JAMMING CAUSED BY THE SPRING OF THE UDG ARM SHAFT BREAKING
Technical Bulletin
|
2
|
84.58 KB
|
|
|
MX-FNX10 (serv.man31)
IMPROVED PAPER FEEDING PERFORMANCE THROUGH THE SADDLE FOR A3 SIZE (FPPD3_N)
Technical Bulletin
|
2
|
114.12 KB
|
|
|
MX-FNX10 (serv.man32)
INCREASE TO THE PAPER SKEW DURING SWITCHBACK TRANSPORT
Technical Bulletin
|
2
|
72.23 KB
|
|
|
MX-FNX10 (serv.man33)
FN10 ROM UPGRADE ... (5).FIX FOR FPDD_S JAMS
Technical Bulletin
|
1
|
26.16 KB
|
|
|
MX-FNX10 (serv.man34)
PART DISCONTINUATION AND PROFILE CHANGE DUE TO PRODUCTION EFFICIENCY INCREASE
Technical Bulletin
|
2
|
106.98 KB
|
|
|
MX-FNX10 (serv.man35)
SADDLE STAPLE JAM (FPPD3_N) NORMALLY A3
Technical Bulletin
|
3
|
240.66 KB
|
|
|
MX-FNX10 (serv.man36)
IMPROVEMENTS TO SADDLE STITCH FINISHER (MX-FN10)
Technical Bulletin
|
4
|
290.66 KB
|
|
|
MX-FNX10 (serv.man37)
ROM UPGRADE ... (2) TO (3)
Technical Bulletin
|
2
|
39.67 KB
|
|
|
MX-FNX10 (serv.man38)
IMPROVEMENT OF SADDLE FINISHER (MX-FN10)
Technical Bulletin
|
16
|
1.14 MB
|
|
|
MX-FNX10 (serv.man39)
ROM UPGRADE 1
Technical Bulletin
|
1
|
18.63 KB
|
|
|
MX-FNX10 (serv.man14)
CCE-1402 ADDITION OF PROTECTOR SHEET FOR FALL PREVENTION OF A SENSOR PREVENTION OF F1-31
Technical Bulletin
|
2
|
197.35 KB
|
|
|
MX-FNX1 (serv.man16)
CCE-1308 COUNTERMEASURE FOR JAM DUE TO DETERIORATION OF CUSHION
Technical Bulletin
|
5
|
630.32 KB
|
|
|
MX-FNX1 (serv.man17)
Countermeasure For Paper Jam POD1_S POD2_S Around Entrance Of Finisher.
Technical Bulletin
|
5
|
661.7 KB
|
|
|
MX-FNX1 (serv.man18)
COUNTERMEASURE FOR PAPER JAM (POD2_S) AROUND ENTRANCE SECTION OF INNER FINISHER
Technical Bulletin
|
3
|
289.5 KB
|
|
|
MX-FNX1 (serv.man19)
COUNTERMEASURE FOR JAM (POD1_S ETC) CAUSED BY PAPER BEING TOUCHED TO ENTER GATE WHEN PERFORMING 2-SIDED PRINT WITH A3 PAPER
Technical Bulletin
|
1
|
114.33 KB
|
|
|
MX-FNX1 (serv.man20)
ENHANCEMENT TO PREVENT MISFEED DUE TO BUNCH ROLLER PRESSURE LEVER BECOMING DETACHED
Technical Bulletin
|
2
|
128.86 KB
|
|
|
MX-FNX1 (serv.man21)
IMPROVED STRAIGHT-AHEAD PAPER MOVEMENT DUE TO BELT COLLAR UNIT ON TRANSPORT SECTION BEING CHANGED IN SHAPE
Technical Bulletin
|
2
|
96.04 KB
|
|
|
MX-FNX1 (serv.man22)
BREAKAGE OF STAPLER NEEDLE FIXING LEVER.
Technical Bulletin
|
2
|
93.85 KB
|
|
|
MX-FNX1 (serv.man23)
INDICATION OF TROUBLE CODE (e.g. F1-10) CAUSED BY STAPLING UNIT HARNESS
Technical Bulletin
|
3
|
117.58 KB
|
|
|
MX-FNX1 (serv.man24)
Staple cartridge As Service Part
Technical Bulletin
|
1
|
45.97 KB
|
|
|
MX-FNX1 (serv.man25)
001-Firmware UPGRADE .(1)
Technical Bulletin
|
2
|
70.76 KB
|
|
|
MX-FNX1 (serv.man26)
001-IMPROVE INNER FINISHER CONSISTENCY
Technical Bulletin
|
2
|
121.97 KB
|
|
|
MX-FNX10 (serv.man13)
Firmware update (14).
Technical Bulletin
|
1
|
55.04 KB
|
|
|
MX-FNX10 (serv.man15)
SETUP OF NEW SERVICE PARTS FOR SADDLE STAPLER AS SINGLE ITEM.
Technical Bulletin
|
2
|
132.15 KB
|

|
MX-FNX10 (serv.man3)
Firmware update (14). File contains model specific folders and Technical Bulletin.
Driver / Update
|
|
2.75 MB
|

|
MX-FNX10 (serv.man4)
ARE-1123 MXFN10 Firmware Upgrade B88 V01.14.02.00 Model specific separate folders inside (Bulletin Embedded)
Driver / Update
|
|
2.3 MB
|

|
MX-FNX10 (serv.man5)
For MX4140N-5141N Models -Production Run September 2013
Driver / Update
|
|
267.89 KB
|

|
MX-FNX10 (serv.man6)
Special firmware for F1-08 problems
Driver / Update
|
|
1.53 MB
|

|
MX-FNX10 (serv.man7)
For MXM283 363N and MX453 503N Production Run Date July 2010 - FIX FOR FPDD_S JAMS
Driver / Update
|
|
223.59 KB
|

|
MX-FNX10 (serv.man8)
For MX4100 1N and MX5000 1N Production Run Date July 2010 - FIX FOR FPDD_S JAMS
Driver / Update
|
|
224.46 KB
|

|
MX-FNX10 (serv.man9)
For MX2600N and MX3100N Production Run Date July 2010 - FIX FOR FPDD_S JAMS
Driver / Update
|
|
224.47 KB
|

|
MX-FNX10 (serv.man10)
For MXM283 363N and MX453 503N Production Run Date May 2009
Driver / Update
|
|
285.45 KB
|

|
MX-FNX10 (serv.man11)
For MX4100N and MX5000N Production Run Date May 2009
Driver / Update
|
|
286.33 KB
|

|
MX-FNX10 (serv.man12)
For MX2600N and MX3100N Production Run Date May 2009
Driver / Update
|
|
286.33 KB
|

|
MX-FNX1 (serv.man15)
Pastel_INFIN_01.06.00_A Please refer to Bulletin 004
Driver / Update
|
|
96.53 KB
|

|
MX-FNX1 (serv.man14)
C-Jupiter_INFIN_01.06.00_A Please refer to Bulletin 004
Driver / Update
|
|
96.53 KB
|

