Read Sharp R-90GCK (serv.man7) Service Manual online
18
R-90GCK
Solid-state relay
2
1
4
3
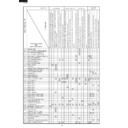
TEST PROCEDURES
PROCEDURE
LETTER
COMPONENT TEST
Z
PROCEDURES TO BE TAKEN WHEN THE FUSE 1 ON THE PRINTED WIRING BOARD
(PWB) IS OPEN AND TOUCH CONTROL TRANSFORMER TEST.
(PWB) IS OPEN AND TOUCH CONTROL TRANSFORMER TEST.
5. Remove the outer case and check voltage between Pin Nos. 1 and 9 of the 5 pin connector (CN-
D) on the control unit with an A.C. voltmeter. The meter should indicate the rated voltage, if not
check oven circuit.
check oven circuit.
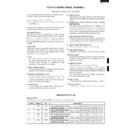
Shut-off, Cook and Heater Relays Test
These relays are operated by D.C. voltage
Check voltage at the relay coil with a D.C. voltmeter during the microwave cooking operation, grill,
dual1, dual2, preheating, or convection cooking condition.
DC. voltage indicated ............... Defective relay.
DC. voltage not indicated ......... Check diode which is connected to the relay coil. If diode is
good, control unit is defective.
RELAY SYMBOL
OPERATIONAL VOLTAGE
CONNECTED COMPONENTS
RY1
Approx. 18V D.C.
Oven lamp / Turntable motor
RY2 (COOK)
Approx. 18V D.C.
High voltage transformer
RY3
Approx. 24V D.C.
Convection motor
RY4
Approx. 24V D.C.
Damper motor
RY5
Approx. 24V D.C.
Fan motor
RY6
Approx. 24V D.C.
Convection motor
6. CARRY OUT 4R CHECKS.
1. CARRY OUT 3D CHECKS.
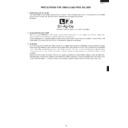
2. Disconnect the wire leads from the solid-state relay.
3. Measure the resistance between the terminals as described in the following table, with an
2. Disconnect the wire leads from the solid-state relay.
3. Measure the resistance between the terminals as described in the following table, with an
ohmmeter.
Terminals
Resistance
Between 1 and 2
Approx. 50M
Ω
Between 3 and 4
Approx. 1.3M
Ω
4. If the meter does not indicate above resistance, replace the solid-state relay.
5. CARRY OUT 4R CHECKS.
Y
SOLID-STATE RELAY TEST
1) CARRY OUT 3D CHECKS.
2) If the Fuse 1 is blown, replace the power unit.
3) Make a visual inspection of the varistor. Check for burned damage and examine the touch
2) If the Fuse 1 is blown, replace the power unit.
3) Make a visual inspection of the varistor. Check for burned damage and examine the touch
control transformer with a tester for the presence of layer short-circuit (check the primary coil
resistance which is approximately 275
resistance which is approximately 275
Ω
±
10%). If any abnormal condition is detected, replace
the touch control transformer or power unit.
4) CARRY OUT 4R CHECKS.
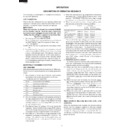
2. Follow the troubleshooting guide given below, if indicator does not light up after above check and
repairs are finished.
1) CARRY OUT 3D CHECKS.
2) Disconnect the leads to the primary of the high voltage transformer.
3) Ensure that these leads remain isolated from other components and oven chassis by using
1) CARRY OUT 3D CHECKS.
2) Disconnect the leads to the primary of the high voltage transformer.
3) Ensure that these leads remain isolated from other components and oven chassis by using
insulation tape.
4) After that procedure, re-connect the power supply cord.
5) Follow the troubleshooting guide given below for repair.
5) Follow the troubleshooting guide given below for repair.
STEPS
OCCURRENCE
CAUSE OR CORRECTION
1
The rated AC voltage is not present to power
Check supply voltage and oven power cord.
terminal of CPU connecter (CN-D).
2
The rated AC voltage is present at primary
Low voltage transformer or secondary circuit defective.
side of low voltage transformer.
Check and repair.
6) CARRY OUT 4R CHECKS.

