Read Sharp R-90GCK (serv.man8) Service Manual online
19
R-90GCK
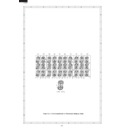
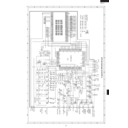
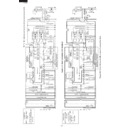
TOUCH CONTROL PANEL ASSEMBLY
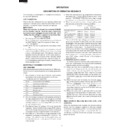
OUTLINE OF TOUCH CONTROL PANEL
The touch control section consists of the following units
as shown in the touch control panel circuit.
as shown in the touch control panel circuit.
(1) Tact switch circuit on the CPU unit.
(2) Control Unit (The control unit consists of Power unit
(2) Control Unit (The control unit consists of Power unit
and CPU unit.)
The principal functions of these units and the signals
communicated among them are explained below.
communicated among them are explained below.
Tact Switch Circuit
The tact switch circuit is composed of a matrix, signals
AN0-AN7 generated in the LSI are sent to the tact switches.
When a tact switch is touched, a signal is completed
through the tact switch circuit and passed back to the LSI
through PB0-PB3 to perform the function that was re-
quested.
The tact switch circuit is composed of a matrix, signals
AN0-AN7 generated in the LSI are sent to the tact switches.
When a tact switch is touched, a signal is completed
through the tact switch circuit and passed back to the LSI
through PB0-PB3 to perform the function that was re-
quested.
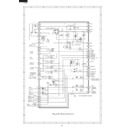
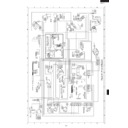
Control Unit
Control unit consists of LSI, power source circuit, synchro-
nizing signal circuit, reset circuit, buzzer circuit, tempera-
ture measurement circuit, relay watching circuit, input
voltage circuit and indicator circuit.
Control unit consists of LSI, power source circuit, synchro-
nizing signal circuit, reset circuit, buzzer circuit, tempera-
ture measurement circuit, relay watching circuit, input
voltage circuit and indicator circuit.
1) LSI
This LSI controls the temperature measurement signal,
tact switch strobe signal, relay driving signal and
indicator signal. And also LSI watches the relay
operation and the primary input voltage.
tact switch strobe signal, relay driving signal and
indicator signal. And also LSI watches the relay
operation and the primary input voltage.
2) Power Source Circuit
This circuit generates the voltages necessary for the
control unit from the AC line voltage.
control unit from the AC line voltage.
3) Synchronizing Signal Circuit
The power source synchronizing signal is available in
order to compose a basic standard time in the clock
circuit. It incorporates a very small error because it
works on commercial frequency.
order to compose a basic standard time in the clock
circuit. It incorporates a very small error because it
works on commercial frequency.
4) Reset Circuit
A circuit to generate a signals which resetting the LSI
to the initial state when power is applied.
to the initial state when power is applied.
5) Buzzer Circuit
The buzzer is responds to signals from the LSI to emit
noticing sounds (tact switch touch sound and completion
sound).
noticing sounds (tact switch touch sound and completion
sound).
6) Temperature Measurement Circuit : (OVEN
THERMISTOR)
The temperature in the oven cavity is sensed by the
thermistor. The variation of resistance according to sensed
temperature is detected by the temperature measurement
circuit and the result applied to LSI. The LSI uses this
information to control the relay and display units.
The temperature in the oven cavity is sensed by the
thermistor. The variation of resistance according to sensed
temperature is detected by the temperature measurement
circuit and the result applied to LSI. The LSI uses this
information to control the relay and display units.
7) Relay Operation Watching Circuit
This circuit watches so that the three (3) relays for the
top heating element, the side heating element and the
power transformer do not operate at the same time.
top heating element, the side heating element and the
power transformer do not operate at the same time.
8) Input Voltage Watching Circuit
This circuit watches the primary input voltage.
9) Door Sensing Switch
A switch to inform the LSI if the door is open or closed.
10) Relay Circuit
To drive the magnetron, heating element, fan motor,
convection motor, damper motor, turntable motor and
light the oven lamp.
convection motor, damper motor, turntable motor and
light the oven lamp.
11) Indicator Circuit
Indicator element is a Fluorescent Display.
Basically, a Fluorescent Display is triode having a
cathode, a grid and an anode. Usually, the cathode of
a Fluorescent Display is directly heated and the filament
serves as cathode.
The Fluorescent Display has 10-digits, 42-segments
are used for displaying figures.
Basically, a Fluorescent Display is triode having a
cathode, a grid and an anode. Usually, the cathode of
a Fluorescent Display is directly heated and the filament
serves as cathode.
The Fluorescent Display has 10-digits, 42-segments
are used for displaying figures.
12) LED Circuit
A circuit to drive the Light-emitting diodes ( LD1-LD11).
13) Damper Switch
A switch to tell the LSI if the damper is open or close.
DESCRIPTION OF LSI
LSI(IXA183DR):
The I/O signals of the LSI(IXA183DR) are detailed in the following table.
The I/O signals of the LSI(IXA183DR) are detailed in the following table.
Pin No.
Signal
I/O
Description
2
AN4
OUT
Tact switch strobe signal. ....................... Signal applied to tact switch section.
LED driving signal. ....... Signal is applied to the Light-emitting diodes (LD4-5).
LED driving signal. ....... Signal is applied to the Light-emitting diodes (LD4-5).
3
AN3
OUT
Tact switch strobe signal. ....................... Signal applied to tact switch section.
LED driving signal. ............ Signal is applied to the Light-emitting diode (LD3).
LED driving signal. ............ Signal is applied to the Light-emitting diode (LD3).
4
AN2
OUT
Tact switch strombe signal. .................... Signal applied to tact switch section.
5
AN1
OUT
Tact switch strobe signal. ....................... Signal applied to tact switch section.
LED driving signal. ............ Signal is applied to the Light-emitting diode (LD2).
LED driving signal. ............ Signal is applied to the Light-emitting diode (LD2).
6
AN0
OUT
Tact switch strobe signal. ....................... Signal applied to tact switch section.
LED driving signal. ............ Signal is applied to the Light-emitting diode (LD1).
LED driving signal. ............ Signal is applied to the Light-emitting diode (LD1).
20
R-90GCK
Pin No.
Signal
I/O
Description
7
AN15
IN
Primary input voltage watching terminal.
The LSI is watching the primary input voltage through this terminal.
The LSI is watching the primary input voltage through this terminal.
8-10
AN14-AN12
IN
Input terminal to change the specification according to the model.
11
AN11
IN
Temperature measurement input: OVEN THERMISTOR.
By inputting DC voltage corresponding to the temperature detected by the thermistor,
this input is converted into temperature by the A/D converter built into the LSI.
By inputting DC voltage corresponding to the temperature detected by the thermistor,
this input is converted into temperature by the A/D converter built into the LSI.
12
AN10
IN
Input signal which communicates the door open/close information to LSI.
Door closed; “H” level signal(0V).
Door opened; “L” level signal(-5V).
Door opened; “L” level signal(-5V).
13
AN9
IN
Input signal which communicates the damper open/close information to LSI.
Damper closed; “H” level signal(0V:GND).
Damper opened; “L” level signal(-5V).
Damper opened; “L” level signal(-5V).
14
AN8
IN
Relay operation watching terminal.
The LSI is watching so that the three (3) relays for the top heating element, the side
heating element and the power transformer do not operate at the same time.
The LSI is watching so that the three (3) relays for the top heating element, the side
heating element and the power transformer do not operate at the same time.
15
P83
OUT
Timing signal output terminal for temperature measurement(OVEN THER-
MISTOR).
MISTOR).
“L” level (-5V) : Thermistor OPEN timing.
“H” level (GND): Temperature measuring timing.(Convection cooking,Speed grill
“H” level (GND): Temperature measuring timing.(Convection cooking,Speed grill
cooking, Speed roast cooking, Speed bake cooking or preheat)
16
P82
OUT
Oven lamp and turntable motor driving signal. (Square Waveform : 50Hz)
To turn on and off the shut-off relay(RY1).
The square waveform voltage is delivered
to the relay(RY1) driving circuit.
to the relay(RY1) driving circuit.
17
CNVSS
IN
Power source voltage: -5V.
VC voltage of power source circuit input.
VC voltage of power source circuit input.
18
RESET
IN
Auto clear terminal.
Signal is input to reset the LSI to the initial state when power is applied. Temporarily
set to “L” level the moment power is applied, at this time the LSI is reset. Thereafter
set at “H” level.
Signal is input to reset the LSI to the initial state when power is applied. Temporarily
set to “L” level the moment power is applied, at this time the LSI is reset. Thereafter
set at “H” level.
19
P81
OUT
Top heating element driving signal.
To operate the solid-state relay for driving the top heating element.
To operate the solid-state relay for driving the top heating element.
20
P80
OUT
Side heating element driving signal.
To operate the solid-state relay for driving the top heating element.
To operate the solid-state relay for driving the top heating element.
21
VSS
IN
Power source voltage: -5V.
VS voltage of power source circuit input.
VS voltage of power source circuit input.
22
XIN
IN
Internal clock oscillation frequency setting input.
The internal clock frequency is set by inserting the ceramic filter oscillation circuit
with respect to XOUT terminal.
The internal clock frequency is set by inserting the ceramic filter oscillation circuit
with respect to XOUT terminal.
23
XOUT
OUT
Internal clock oscillation frequency control output.
Output to control oscillation input of XIN.
Output to control oscillation input of XIN.
24
VCC
IN
Power source voltage: 0V.
VC voltage of power source circuit input. Connected to GND.
VC voltage of power source circuit input. Connected to GND.
25
P77
OUT
Signal to sound buzzer.
A: Tact switch touch sound.
B: Completion sound.
C: When the oven stops so that the food
can be checked in Automatic cooking
mode.
mode.
26
P76
OUT
Magnetron high-voltage circuit driving signal.
To turn on and off the cook relay(RY2). In
P-HI operation, the signals holds “L” level
during microwave cooking and “H” level
while not cooking. In other cooking modes
(70%, 50%, 30%, 10%) the signal turns to
“H” level and “L” level in repetition accord-
ing to the power level.
P-HI operation, the signals holds “L” level
during microwave cooking and “H” level
while not cooking. In other cooking modes
(70%, 50%, 30%, 10%) the signal turns to
“H” level and “L” level in repetition accord-
ing to the power level.
During cooking
L
H
20 msec.
A
B
C
H: GND
L
0.1 sec
2.0 sec
1.0 sec
1.0 sec
VARI MODE
ON TIME OFF TIME ON TIME OFF TIME
approx. 70% power
24 sec.
8 sec.
36sec.
12sec.
approx. 50% power
18 sec.
14 sec.
26sec.
22sec.
approx. 30% power
12 sec.
20 sec.
16sec.
32sec.
approx. 10% power
6 sec.
26 sec.
8sec.
40sec.
Microwave cooking mode
Microwave cooking with
other cooking mode
other cooking mode
21
R-90GCK
27
P75
OUT
Cooling fan motor driving signal.
To turn on and off shut-off relay(RY5). “L” level
during both microwave and convection cooking;
“H” level otherwise
To turn on and off shut-off relay(RY5). “L” level
during both microwave and convection cooking;
“H” level otherwise
28
P74
OUT
Damper motor relay driving signal.
To turn on and off shut-off relay(RY4).
To turn on and off shut-off relay(RY4).
29
P73
OUT
Convection motor driving signal.
To turn on and off shut-off relay(RY3). “L”level
during CONVECTION, GRILL, DUAL1, DUAL2
or PREHEAT; “H” level otherwise
To turn on and off shut-off relay(RY3). “L”level
during CONVECTION, GRILL, DUAL1, DUAL2
or PREHEAT; “H” level otherwise
30
P72
OUT
Control signal to turn over the rotatory direction of the convection motor.
31
P71
IN
Signal to synchronize LSI with commercial power source frequency.
This is the basic timing for all real time
processing of LSI.
This is the basic timing for all real time
processing of LSI.
32
P70
IN/OUT
Memory (EEPROM) data input/output.
33
P67
OUT
Terminal to input the program to LSI.
34
P66
IN
Terminal to input the program to LSI.
35
P65
OUT
Memory (EEPROM) clock out.
36
P64
IN/OUT
Terminal to input the program to LSI.
37-88
FLD51-FLD0
OUT
Segment data signals.
The relation between signals and indicator are as follows:
The relation between signals and indicator are as follows:
Signal
Segment
Signal
Segment
Signal
Segment
(Pin No.)
(Pin No.)
(Pin No.)
(Pin No.)
(Pin No.)
(Pin No.)
FLD 0 (88) ---------- 10G(45)
FLD 18 (70) ------------- P9 (67)
FLD 36 (52) ------------- P30 (19)
FLD 1 (87) ----------- 9G (46)
FLD 19 (69) ----------- P10 (68)
FLD 37 (51) ------------- P29 (20)
FLD 2 (86) ----------- 8G (47)
FLD 20 (68) ----------- P11 (69)
FLD 38 (50) ------------- P28 (21)
FLD 3 (85) ----------- 7G (48)
FLD 21 (67) ----------- P12 (70)
FLD 39 (49) ------------- P27 (22)
FLD 4 (84) ----------- 6G (49)
FLD 22 (66) ----------- P13 (71)
FLD 40 (48) ------------- P26 (23)
FLD 5 (83) ----------- 5G (50)
FLD 23 (65) ----------- P14 (72)
FLD 41 (47) ------------- P25 (24)
FLD 6 (82) ----------- 4G (51)
FLD 24 (64) ------------- P42 (7)
FLD 42 (46) ------------- P24 (25)
FLD 7 (81) ----------- 3G (52)
FLD 25 (63) ------------- P41 (8)
FLD 43 (45) ------------- P23 (26)
FLD 8 (80) ----------- 2G (53)
FLD 26 (62) ------------- P40 (9)
FLD 44 (44) ------------- P22 (27)
FLD 9 (79) ----------- 1G (54)
FLD 27 (61) ----------- P39 (10)
FLD 45 (43) ------------- P21 (28)
FLD10 (78) ---------- P1 (59)
FLD 28 (60) ----------- P38 (11)
FLD 46 (42) ------------- P20 (29)
FLD11 (77) ---------- P2 (60)
FLD 29 (59) ----------- P37 (12)
FLD 47 (41) ------------- P19 (30)
FLD12 (76) ---------- P3 (61)
FLD 30 (58) ----------- P36 (13)
FLD 48 (40) ------------- P18 (31)
FLD13 (75) ---------- P4 (62)
FLD 31 (57) ----------- P35 (14)
FLD 49 (39) ------------- P17 (32)
FLD14 (74) ---------- P5 (63)
FLD 32 (56) ----------- P34 (15)
FLD 50 (38) ------------- P16 (33)
FLD15 (73) ---------- P6 (64)
FLD 33 (55) ----------- P33 (16)
FLD 51 (37) ------------- P15 (34)
FLD16 (72) ---------- P7 (65)
FLD 34 (54) ----------- P32 (17)
FLD17 (71) ---------- P8 (66)
FLD 35 (53) ----------- P31 (18)
89
VEE
IN
Anode (segment) of Fluorescent Display light-up voltage: -30V.
VEE voltage of power source circuit input.
VEE voltage of power source circuit input.
90
PB6
OUT
Terminal not used.
91
PB5
OUT
LED driving signal.
Signal is applied to the light-emitting diodes (LD1, LD2, LD3, LD5, LD7, LD9 and
LD11).
Signal is applied to the light-emitting diodes (LD1, LD2, LD3, LD5, LD7, LD9 and
LD11).
92
PB4
OUT
LED driving signal.
Signal is applied to the light-emitting diodes (LD4, LD6, LD8 and LD10).
Signal is applied to the light-emitting diodes (LD4, LD6, LD8 and LD10).
93-96
PB3-PB0
IN
Signal coming from tact switch.
97
AVSS
IN
A/D converter power source voltage.
The power source voltage to drive the A/D converter in the LSI.
The power source voltage to drive the A/D converter in the LSI.
98
VREF
IN
Reference voltage input terminal.
A reference voltage applied to the A/D converter in the LSI. Connected to
GND.(0V)
GND.(0V)
Pin No.
Signal
I/O
Description
ON
OFF
During
cooking
L
GND
H.
ON
OFF
H : GND
L
ON
OFF
During
cooking
L
GND
H.
(Convection)
20 msec.
H : GND
L (-5V)
22
R-90GCK
Pin No.
Signal
I/O
Description
99
AN7
OUT
Tact switch strobe signal. ....................... Signal applied to tact switch section.
LED driving signal. .... Signal is applied to the Light-emitting diodes (LD10-11).
LED driving signal. .... Signal is applied to the Light-emitting diodes (LD10-11).
100
AN6
OUT
Tact switch strobe signal. ....................... Signal applied to tact switch section.
LED driving signal. ........ Signal is applied to the Light-emitting diodes (LD8-9).
LED driving signal. ........ Signal is applied to the Light-emitting diodes (LD8-9).
TOUCH CONTROL PANEL SERVICING
A. On some models, the power supply cord between the
touch control panel and the oven itself is so short that the
two can’t be separated. For those models, check and
repair all the controls (sensor-related ones included) of
the touch control panel while keeping it connected to the
oven.
two can’t be separated. For those models, check and
repair all the controls (sensor-related ones included) of
the touch control panel while keeping it connected to the
oven.
B. On some models, the power supply cord between the
touch control panel and the oven proper is long enough
that they may be separated from each other. For those
models, it is possible to check and repair the controls of
the touch control panel while keeping it apart from the
oven proper; in this case you must short both ends of the
door sensing switch (on PWB) of the touch control panel
with a jumper, which activates an operational state that is
equivalent to the oven door being closed. As for the
sensor-related controls of the touch control panel, check-
ing them is possible if dummy resistor(s) with resistance
equal to that of the controls are used.
(2) Servicing the touch control panel with power sup-
ply from an external power source:
Disconnect the touch control panel completely from the
oven proper, and short both ends of the door sensing
switch (on PWB) of the touch control panel, which acti-
vates an operational state that is equivalent to the oven
door being closed. Connect an external power source to
the power input terminal of the touch control panel, then
it is possible to check and repair the controls of the touch
control panel it is also possible to check the sensor-
related controls of the touch control panel by using the
dummy resistor(s).
3. Servicing Tools
Tools required to service the touch control panel assem-
bly.
bly.
1) Soldering iron: 60W
(It is recommended to use a soldering iron with a ground-
ing terminal.)
ing terminal.)
2) Oscilloscope: Single beam, frequency range: DC-10MHz
type or more advanced model.
3) Others: Hand tools
4. Other Precautions
1) Before turning on the power source of the control unit,
remove the aluminium foil applied for preventing static
electricity.
electricity.
2) Connect the connectors of the key unit to the control unit
being sure that the lead wires are not twisted.
3) After aluminium foil is removed, be careful that abnormal
voltage due to static electricity etc. is not applied to the
input or output terminals.
input or output terminals.
4) Attach connectors, electrolytic capacitors, etc. to PWB,
making sure that all connections are tight.
5) Be sure to use specified components where high preci-
sion is required.
approx. 1M ohm
1. Precautions for Handling Electronic Components
This unit uses CMOS LSI in the integral part of the circuits.
When handling these parts, the following precautions
should be strictly followed. CMOS LSI have extremely
high impedance at its input and output terminals. For this
reason, it is easily influenced by the surrounding high
voltage power source, static electricity charge in clothes,
etc. and sometimes it is not fully protected by the built-in
protection circuit.
In order to protect CMOS LSI.
1) When storing and transporting, thoroughly wrap them in
aluminium foil. Also wrap all PW boards containing them
in aluminium foil.
in aluminium foil.
2) When soldering, ground the technician as shown in the
figure and use grounded soldering iron and work table.
2. Servicing of Touch Control Panel
We describe the procedures to permit servicing of the
touch control panel of the microwave oven and the pre-
cautions you must take when doing so. To perform the
servicing, power to the touch control panel is available
either from the power line of the oven itself or from an
external power source.
touch control panel of the microwave oven and the pre-
cautions you must take when doing so. To perform the
servicing, power to the touch control panel is available
either from the power line of the oven itself or from an
external power source.
(1) Servicing the touch control panel with power sup-
ply of the oven:
CAUTION:
THE HIGH VOLTAGE TRANSFORMER OF THE MI-
CROWAVE OVEN IS STILL LIVE DURING SERVIC-
ING AND PRESENTS A HAZARD.
CAUTION:
THE HIGH VOLTAGE TRANSFORMER OF THE MI-
CROWAVE OVEN IS STILL LIVE DURING SERVIC-
ING AND PRESENTS A HAZARD.
Therefore, before checking the performance of the touch
control panel,
1) Disconnect the power supply cord, and then remove
control panel,
1) Disconnect the power supply cord, and then remove
outer case.
2) Open the door and block it open.
3) Discharge high voltage capacitor.
4) Disconnect the leads to the primary of the power
3) Discharge high voltage capacitor.
4) Disconnect the leads to the primary of the power
transformer.
5) Ensure that these leads remain isolated from other
components and oven chassis by using insulation
tape.
tape.
6) After that procedure, re-connect the power supply cord.
After checking the performance of the touch control panel,
1) Disconnect the power supply cord.
2) Open the door and block it open.
3) Re-connect the leads to the primary of the power
After checking the performance of the touch control panel,
1) Disconnect the power supply cord.
2) Open the door and block it open.
3) Re-connect the leads to the primary of the power
transformer.
4) Re-install the outer case (cabinet).
5) Re-connect the power supply cord after the outer case
5) Re-connect the power supply cord after the outer case
is installed.
6) Run the oven and check all functions.

