Read Sharp MX-4140N / MX-4141N / MX-5140N / MX-5141N (serv.man7) Service Manual online
MX-5141N ADJUSTMENTS AND SETTINGS 5 – 84
* If a tone gap occurs on part of high density, set 0 to item A and B
The density of high density part decreases. However, the tone
gap is better.
gap is better.
* In case of more increase of the density on high density part, set 1
to item A and B.
The tone gap may occur in high density part.
NOTE: If the setting values of item C, D, E and F are changed,
density of the high density part is changed.
When these values are changed, be sure to perform the
printer color balance and density adjustment. (Automatic
adjustment)
printer color balance and density adjustment. (Automatic
adjustment)
11-F
(3)
Printer gamma adjustment for each dither
(Automatic adjustment)
(No need to adjust normally)
Printer gamma adjustment for each dither
(Automatic adjustment)
(No need to adjust normally)
a. General
This adjustment is used to adjust the color balance and the density
in the monochrome mode, the heavy paper mode, and the gloss
paper mode.
in the monochrome mode, the heavy paper mode, and the gloss
paper mode.
This simulation is used to improve image quality in these modes
and images.
and images.
b. Adjustment procedures
1)
Enter the SIM67-54 mode.
2)
Press [EXECUTE] key.
A4/11" x 8.5" or A3/11" x 17" paper is automatically selected.
The color patch image (adjustment pattern) is printed out.
The color patch image (adjustment pattern) is printed out.
3)
Set the color patch image (adjustment pattern) printed in the
procedure 2) on the document table so that the thin lines on
the printed color patch image (adjustment pattern) are on the
left side. Place 5 sheets of white paper on the printed color
patch image (adjustment pattern).
procedure 2) on the document table so that the thin lines on
the printed color patch image (adjustment pattern) are on the
left side. Place 5 sheets of white paper on the printed color
patch image (adjustment pattern).
4)
Press [EXECUTE] key.
The color balance adjustment is automatically performed.
The adjustment pattern is printed out. Check it for any abnor-
mality.
mality.
5)
Press [OK] key.
The list of the adjustment items (for each dither) is displayed.
6)
Select an adjustment item (for each dither).
7)
Press [EXECUTE] key.
A4/11" x 8.5" or A3/11" x 17" paper is automatically selected.
The color patch image (adjustment pattern) is printed out.
8)
Set the color patch image (adjustment pattern) printed in the
procedure 7) on the document table so that the thin lines on
the printed color patch image (adjustment pattern) are on the
left side. Place 5 sheets of white paper on the printed color
patch image (adjustment pattern).
procedure 7) on the document table so that the thin lines on
the printed color patch image (adjustment pattern) are on the
left side. Place 5 sheets of white paper on the printed color
patch image (adjustment pattern).
9)
Press [EXECUTE] key.
The color balance adjustment is automatically performed, and
the machine goes to the state of procedure 6).
the machine goes to the state of procedure 6).
10) When [OK] key is pressed, the adjustment result is registered
and the adjustment mode is terminated. When [EXECUTE]
key is pressed, the adjustment result is registered and the
screen is shifted to the other item (Mode/Image) select menu.
key is pressed, the adjustment result is registered and the
screen is shifted to the other item (Mode/Image) select menu.
To execute the adjustment of the other item (Mode/Image),
press [EXECUTE] key.
press [EXECUTE] key.
After completion of all the adjustments of the items (Mode/
Image), press [OK] key, and the adjustment results are regis-
tered.
Image), press [OK] key, and the adjustment results are regis-
tered.
11) Make a print, and check the print image quality.
(Refer to the item of the printer color balance and density
check.)
check.)
NOTE: Use SIM67-52 to reset the adjustment values to the default
values.
D
MAGENTA MAX
TARGET
Scanner target value for
MAGENTA maximum density
correction
MAGENTA maximum density
correction
0 - 999
500
E
YELLOW MAX
TARGET
Scanner target value for
YELLOW maximum density
correction
YELLOW maximum density
correction
0 - 999
500
F
BLACK MAX
TARGET
Scanner target value for
BLACK maximum density
correction
BLACK maximum density
correction
0 - 999
500
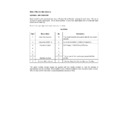
Display/Item
Content
Setting
range
Default
PRINTER CALIBRATION
Select item
(Mode/Image)
Content
Heavy Paper
Adjustment item to improve the color balance in the
heavy paper mode
heavy paper mode
B/W
Adjustment item to improve the density and gradation in
the monochrome mode
the monochrome mode
Gloss Paper
Adjustment item to improve the color balance in the
gloss paper mode
gloss paper mode
1200dpi 1bit
Adjustment item to improve the color balance in 1200dpi
mode
mode
PRINTER CALIBRATION

