Read Sharp CD-DVD500 (serv.man7) Service Manual online
– 13 –
CD-DVD500H
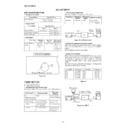
Playing a DVD/CD (DVDs/CDs)
1
Press the DVD/CD button.
2
Press the
OPEN/CLOSE button to
open the disc tray
.
3
Place the DVD(s) or CD(s) on the disc
tray
, label side up.
When loading a third disc, press the
DISC SKIP
button to turn the disc tray
,
then place the DVD or CD in the open
position.
4
Press the
OPEN/CLOSE button to
close the disc tray
.
5
T
o
select the DVD or CD you want to lis-
ten to first, press one of the
1 -
3
buttons.
6
Press the
button to start playback.
12 cm (5”)
8 cm (3”)
Listening to the radio
FM stereo mode indicator
FM stereo receiving indicator
1
Press the TUNER (BAND) button repeat-
edly to select the desired frequency
band (FM or
AM).
2
Press the TUNING/TIME (
or
) but-
ton to tune in to the desired station.
When the TUNING/TIME (
or
) button
is pressed for more than 0.5 seconds,
scanning will start automatically and the
tuner will stop at the first receivable
broadcast station.
T
o
receive an FM stereo transmission:
Press the TUNER (BAND) button to display “ST”.
“
”
will appear when an FM broadcast is in ste-
reo.
Listening to a cassette tape (T
APE 1 or T
APE 2)
TAPE 1
TAPE 2
1
Open the cassette door by pushing the
area marked “
PUSH EJECT”.
2
Load the cassette into the T
APE 1 or
T
APE 2 cassette compartment with the
side to be played facing toward you.
3
Press the T
APE (1
2) button to select
the cassette you want to listen to.
4
Press the
button to start playback.
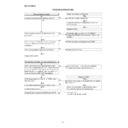
If trouble occurs
, abnormal
supply voltage due to lightning, etc.) or if it is operated incorrectly
, it may malfunction.
If such a problem occurs, do the following:
1.
Set the unit to the stand-by mode and turn the power on again.
2.
Note:
If neither operation above restores the unit, clear all the memory by resetting it.
Clearing all the memory (reset)
1
.
Press the ON/ST
AND-BY button to enter the power stand-by mode.
2
.
Whilst
pressing down the
button and X-BASS/DEMO button, press the ON/ST
AND-BY
button until “CLEAR
AL” appears.
Caution:
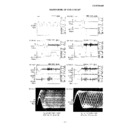
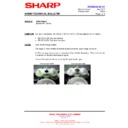
Cleaning the tape-handling parts
Dirty heads, capstans or pinch rollers can cause poor sound and tape jams. Clean these parts with a cotton swab
moistened with commercial head/pinch roller cleaner or isopropyl alcohol.
When cleaning the heads, pinch rollers, etc., unplug the unit which contains high voltages.
After long use, the deck’
s heads and capstans may become
magnetised, causing poor sound. D
emagnetise these
demagnetiser
’s instructions carefully before use.
TAPE 1
TAPE 2
A
C
C
D
E
B
B
A
Playback head
B
Capstan
C
Pinch roller
D
Erase head
E
Recording/Playback head

