Read Harman Kardon SIGNATURE 2.0 (serv.man5) Technical Bulletin online
harman/kardon Incorporated 250 Crossways Park Drive, Woodbury New York 11797 (516) 496-3400
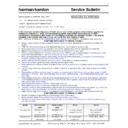
harman/kardon
Service Bulletin
Service bulletin # H/K9904 October 1999
Warranty labor rate: MINOR repair
To:
All harman/kardon Service Centers
Models: Signature 2.0
Subject: DTS Upgrade
The following instructions detail the steps needed to upgrade a Harman Kardon Signature Series 2.0
Processor/Tuner with a new DSP board and operating system EEPROM. These additions will provide significant
improvements in performance, with the following major new advantages:
Processor/Tuner with a new DSP board and operating system EEPROM. These additions will provide significant
improvements in performance, with the following major new advantages:
•
Greatly improved audio decoding in all modes, using the highly regarded Crystal Semiconductor, CS4926,
audio-decoding circuit.
•
DTS processing, along with Dolby Digital, Dolby Pro Logic, and a wide variety of music and movie surround
modes.
•
Easier programming when used with computer-controlled RS-232 remote systems.
•
Faster microprocessor operation for quicker response to remote commands
•
Improved and updated on-screen menus with added features.
1) Order h/k DTS Upgrade kit, part number: SIG2.0 DTS UPGRADE.
2) A new Owner’s manual (h/k part # HA160-0004-Arev1) should be ordered for the 2.0 that covers the
2) A new Owner’s manual (h/k part # HA160-0004-Arev1) should be ordered for the 2.0 that covers the
operation of the DTS upgrade.
3) Following the detailed instructions on the following page.
Model
Serial number (120V)
Serial number (230V)
Status
Action
Signature 2.0
GT0003-01001
to
GT0003-04000
GT0006-01001
to
GT0006-02070
Unmodified
Replace IC305,
DSP board
Supplied with
Upgrade kit
Signature 2.0
GT0003-04001
and above*
GT0006-02071
and above*
Changed by factory
NONE REQUIRED
* Additionally, factory modified units have a yellow label on the outer carton stating “Now with DTS”.
harman/kardon Incorporated 250 Crossways Park Drive, Woodbury New York 11797 (516) 496-3400
Signature 2.0 Upgrade Procedure
WARNING: Please use caution during the removal of the DTS board and EEPROM IC305 from their
protective packages, and during installation. ESD protection is required to assure the parts are not
damaged.
protective packages, and during installation. ESD protection is required to assure the parts are not
damaged.
PART I
REPLACEMENT OF EEPROM IC305
1. Turn the unit off with the Master Power Switch (on/off button on front panel) and unplug it from the AC
power source; remove any input and output cables.
2. Remove all (10) screws holding the cover on; there are two on the right and left sides, three at the rear, and
three at the top near the front of the unit.
3. Remove the top cover by gently lifting it up slightly from the rear, and then pulling it back away from the unit.
4. Remove the two plated screws to the left and right of the S-Video jacks on the rear panel.
5. Remove the two black screws that are between the yellow video jacks.
6. Inside the unit, the video board is secured at the rear by a metal nut attached to a white plastic post on the
4. Remove the two plated screws to the left and right of the S-Video jacks on the rear panel.
5. Remove the two black screws that are between the yellow video jacks.
6. Inside the unit, the video board is secured at the rear by a metal nut attached to a white plastic post on the
corner of the board. Remove this nut.
7. Lift the video board up slightly, and pull it into the unit. Turn the board upside down and rest it carefully
inside the unit. It is not necessary to unplug any additional connectors.
8. Locate the large EEPROM chip (IC305) on the CPU board that is now visible. The IC is in the center of the
board and has a label with the word “Signature” and a revision number. Note there is a notch in the front
edge.
edge.
9. Using an IC Chip Removal & Installation tool (Radio Shack model #276-2101 or equivalent), carefully
remove the IC by gently rocking it from side to side and then pulling straight up.
10. Remove the new EEPROM from the upgrade kit and place it in the socket. When inserting the chip, make
certain that the notched end is facing forward, toward the front of the unit). An outline of the chip with the
notch in the proper position is screened on the board). The new EEPROM will be labeled “2.10a”.
notch in the proper position is screened on the board). The new EEPROM will be labeled “2.10a”.
IMPORTANT NOTE: When inserting the new chip, take extra care to ensure all pins are seated in their
respective holes, and they are not bent or damaged before the IC is seated. If needed, use a small flat-blade
screwdriver to gently align the pins into the socket holes.
respective holes, and they are not bent or damaged before the IC is seated. If needed, use a small flat-blade
screwdriver to gently align the pins into the socket holes.
11. When all the pins are lined up, gently push down on the chip so that it seats firmly in the socket.
12. Replace the video board, pushing the RCA jacks back through the holes in the rear of the chassis and
12. Replace the video board, pushing the RCA jacks back through the holes in the rear of the chassis and
reseating the hole in the back corner of the board on the plastic support post; replace the nut.
13. Replace the two plated screws and the two black screws that secure the video board to the chassis.
PART II
REPLACEMENT OF DSP AUDIO BOARD
14. Remove the plated screw to the right of the optical input jacks (near terminal #6) on the rear panel.
15. Remove the two black screws that are above the digital audio input jacks (#1- 4)
16. Pull the DSP board into the unit, free from the back panel. Remove the white plug at the rear of the board;
15. Remove the two black screws that are above the digital audio input jacks (#1- 4)
16. Pull the DSP board into the unit, free from the back panel. Remove the white plug at the rear of the board;
then remove the ribbon connectors at either side of the DSP board by gently rocking the connector from side
to side, while carefully pulling each connector upwards.
to side, while carefully pulling each connector upwards.
17. Remove the new DSP board from the upgrade kit. (New DSP boards are
≈
5 ½” in length; original DSP
board is much shorter). Replace the three connectors; slide the white connector into the header socket on
the rear of the new board. Replace two ribbon connectors back in their sockets on either side of the board.
The side of the ribbon cable with the red line should face towards the front of the unit. Position each
connector over the socket and press into position.
the rear of the new board. Replace two ribbon connectors back in their sockets on either side of the board.
The side of the ribbon cable with the red line should face towards the front of the unit. Position each
connector over the socket and press into position.
18. Put the new DSP board back into position through the holes in the rear panel.
19. Replace the two black screws above the RCA jacks and the single plated screw.
20. Replace the unit’s cover and (10) screws.
21. Make certain the front panel Master Power On/Off Switch is in the “Off” position; it should extend out
19. Replace the two black screws above the RCA jacks and the single plated screw.
20. Replace the unit’s cover and (10) screws.
21. Make certain the front panel Master Power On/Off Switch is in the “Off” position; it should extend out
beyond the front panel.
22. To test: Before turning the unit On, it is important that the unit be reset. To reset, first hold in the two outer
buttons on the front panel Source? and Mute, then press the Master Power On/Off Switch to the “On”
position; then release the Source? and Mute buttons. The front-panel display should now read “Signature
2.0” and “Initialized.” The unit has been reset and is ready for operation.
position; then release the Source? and Mute buttons. The front-panel display should now read “Signature
2.0” and “Initialized.” The unit has been reset and is ready for operation.
23. Attach a colored label to the bottom of the unit, and on the outer carton (if available), stating “DTS
upgrade”.
Display

