Read Sharp AR-EB7 (serv.man2) Service Manual online
AR-EB7
UNPACKING AND INSTALLATION
– 5 –
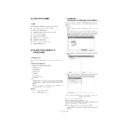
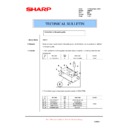
4) Connect the IMC2 PWB to the MCU PWB of the copier.
Connect the flat cables of the IMC2 PWB to the connectors of the
MCU PWB of the copier so that the shorter cable comes inside and
MCU PWB of the copier so that the shorter cable comes inside and
the longer cable comes outside as shown in the illustration.
Be careful about the orientation of the flat cable insertion and check
that both ends of each cable are securely inserted into the connec-
that both ends of each cable are securely inserted into the connec-
tor. (The terminal surface of each flat cable must have contact with
the connector terminals.)
5) Attach the rear cover.
Fit the four pawls of the rear cover to the rear cabinet, slide the
cover to the left until it is locked, and then secure the cover with the
cover to the left until it is locked, and then secure the cover with the
screw.
Insert the power plug of the copier into the power supply outlet
and turn on the power switch. Then, carry out the following proce-
dure.
6) Check the IMC2 PWB.
Press the SORT/GROUP key on the operation panel to check that
the SORT mode indicator lights up.
the SORT mode indicator lights up.
7) Check printing.
For installation of the driver software on the computer, see the oper-
ation manual supplied with the copier.
Connect the USB cable, carry out printing from the computer, and
check that printing can be performed normally.
check that printing can be performed normally.
4. Installation of additional memory
(After installation, proceed to step 5.)
1
Open the two locking clips of the socket.
2
Insert the memory matching the orientation of its notches.
3
Close the locking clips of the socket.
Flat cable (shorter)
Flat cable (longer)
Copier MCU PWB
IMC2 PWB
Connector
Pawl
Pawl
Pawl
Pawl
Pawl for
locking
locking
Rear cabinet
Rear cover
Screw
1
1
2
3
3
As additional memory, use AR-SM5 (sold separately).
Display

