Read Sharp AR-EB7 (serv.man4) Service Manual online
AR-EB7
USER PROGRAMS
– 7 –
[5] USER PROGRAMS
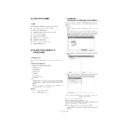
1. List
With the AR-EB7, the following user settings can be made:
[6]
1in1/4in1 solid- and broken-line frame setting
[7]
Rotation copy function setting
[16] Adjustment of frame deletion/center deletion width
[17] Change in 2in1 combination
[18] Change in 4in1 combination
[21] Selection of binding margin position
[22] Adjustment of binding margin
[24] Allocation of memory capacity to printer
[33] Selection of USB2.0 mode
[6] FLASH ROM VERSION UP
PROCEDURE
1. Preparation
Write the download data (the file with the extension dwl) to the main
body.
Necessary files for download
• Maintenance.exe (Maintenance software)
• ProcPegasus.mdl
• ProcPegasus.ini
• ProcPegasus.fmt
• Pegasus.inf
• Usbscan.sys
• Download file:***.dwl
Note:
• The Download file(***.dwl ) and the like that are to be downloaded
should be copied, in advance, into folders that have a maintenance
program.
program.
• When creating a folder for a maintenance tool in the PC, be sure
that no lengthy folder name is included in the path.
(Example)
2. Initialization
(Procedures for setting the serial number)
Set the serial number on the side of the PC for download. It is not nec-
essary to set the serial number again at a later time, even if software is
restarted.
essary to set the serial number again at a later time, even if software is
restarted.
1) PC side:
Start the "Maintenance.exe" and select the model icon of main
body.
(Connection with the main body is not necessary for setting the
serial number only. However, for the set serial number to be
reflected into the main body, a connection should be made between
the PC and the main body in download mode for download.)
body.
(Connection with the main body is not necessary for setting the
serial number only. However, for the set serial number to be
reflected into the main body, a connection should be made between
the PC and the main body in download mode for download.)
2) Select the "Option" in the menu bar and click on the "Serial Number
Setting".
3) Make the setting of the serial number following the instructions below.
Enter the number three "3" for service.
ID cord (I): Code number assigned by PC. (0 - 99)
If there is more than one computer that uses "MaintenanceTool.exe",
then assign a different code number to each PC.
If there is more than one computer that uses "MaintenanceTool.exe",
then assign a different code number to each PC.
When the setting is completed, push down the button "OK".
4) The procedures for the change of the serial number has been com-
pleted.
Incorrect c:\Pegasus Download Tool
Correct
c:\Pegasus\Downtool
Place of production code (P): Code number assigned on the basis of a
production place. (0 - 99)
AR-EB7
FLASH ROM VERSION UP PROCEDURE
– 8 –
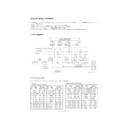
3. Download procedure
1) Main body side:
Executable by performing the Service Simulation No. 49-01 (Flash
Rom program-writing mode).
Rom program-writing mode).
(A word "d" appears on the LCD to denote the download mode status.)
2) Connect the PC and the main body with the download cable (USB
cable).
(Be sure to use a USB cable for connection. USB2.0 of the AR-EB7
(Be sure to use a USB cable for connection. USB2.0 of the AR-EB7
is not applicable.)
3) PC side:
Boot the maintenance program. Select the model icon of main
body.
body.
4) PC side:
Confirm that the "Simulation Command List" tree is displayed on the
maintenance program.
5) PC side:
When the message "the main body has not got started running" is
displayed on the lowest area of the figure below after the "mainte-
nance program" is started up, select the "File" and then "Recon-
nance program" is started up, select the "File" and then "Recon-
nect" in the menu bar.
6) PC side:
Confirm a tree is displayed under the "Special (MCU/IMC2/FAX)"
on the maintenance program". (If no tree is displayed, confirm that
on the maintenance program". (If no tree is displayed, confirm that
the USB is connected and select the "Reconnect" (the above 5)
again.)
7) PC side:
Double click "Special (MCU/MCU2/FAX)" in the main tree item to
develop the sub tree items, and double click "DWL Download" in
the sub tree items.
the sub tree items.
8) PC side:
Specify the download file (*.dwl).
9) PC side:
The download file is specified, download is automatically per-
formed.
The "Automatic paper selection" lamp and "Start" lamp will blink
approximately 15 seconds after the download file is specified.
approximately 15 seconds after the download file is specified.
AR-EB7
FLASH ROM VERSION UP PROCEDURE
– 9 –
10) PC side:
When the message below is displayed, download is completed.
Completion message: DOWNLOAD COMPLETED
Note (Important):
• Be sure that the power is not turned off and the USB cable is not
removed until the word "OFF" appears.
11) Main body side:
Wait until the word "OFF" appears on the operation panel. The
appearance of "OFF" indicates the completion of the download
appearance of "OFF" indicates the completion of the download
(writing into ROM).
Turn the power off.
12) After-process: Terminate the maintenance program, and turn on the
power of the main body.
After the download (data transmission) has been completed, exit the
software program. The USB cable can be removed at this point.
Note:
• For making a second connection with another machine, select the
"File" and "Reconnect" in the menu bar on the maintenance pro-
gram at the time of the USB being re-connected. Repeat the previ-
gram at the time of the USB being re-connected. Repeat the previ-
ous procedures from the above 5).
*
Forbidden actions while downloading (Important)
Failure in the download concerned may not allow you to conduct the
subsequent download procedures. Added care should be taken to avoid
having the situation below arise while downloading.
• Switching off the main body.
• Disconnecting the download cable (USB cable).
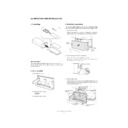
4. Installation procedure
A. USB joint maintenance program installation
The driver is installed by plug and play.
B. Installation procedure on Windows XP
1) Main body side:
Executable by performing the Service Simulation No. 49-01 (Flash
Rom program-writing mode).
(A word "d" appears on the LCD to denote the download mode status.)
2) Connect the machine and the PC with a USB cable.
(Be sure to use a USB cable for connection. USB2.0 of the AR-EB7
is not applicable.)
3) Check that the following display is shown.
Select "Install from a list or the specific location" and press the
NEXT button.
4) Select "Include this location in the serch". If the retrieval area does
not include the folder which includes the maintenance tool driver
(Pegasus.inf), select "Browse".
If the folder path is properly shown, press the NEXT button to go to
procedure 7).
procedure 7).
AR-EB7
FLASH ROM VERSION UP PROCEDURE
– 10 –
5) Select the folder which includes the maintenance tool driver
(Pegasus.inf), and press the OK button.
(When the driver is included in the "C:\Pegasus" folder:)
6) Check that the path to the folder which includes the maintenance
tool driver (Pegasus.inf) is shown, and press the NEXT button.
7) Check that the following display is shown. Press the Continue Any-
way button.
8) When installation is completed, the following display is shown.
Press the Finish button.
The installation procedure (on Windows XP) is completed with the
above operation.
C. Installation procedure on Windows 2000
1) Main body side:
Executable by performing the Service Simulation No. 49-01 (Flash
Rom program-writing mode).
Rom program-writing mode).
(A word "d" appears on the LCD to denote the download mode status.)
2) Connect the machine and the PC with a USB cable.
(Be sure to use a USB cable for connection. USB2.0 of the AR-EB7
is not applicable.)
is not applicable.)
3) Check that the new hardware search wizard is shown. Press the
NEXT button.

