Read Sharp XL-MP35H (serv.man12) Service Manual online
– 9 –
XL-MP35H
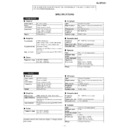
TEST MODE
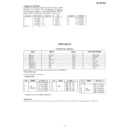
• Setting the Test Mode
Keeping the REW/REV button and BASS/TREBLE button
pressed, turn on POWER. Then, the frequency is initially set
in the memory as shown in Table. Call it with the PRESET
button to use it for adjustment and check of tuner circuit.
Keeping the REW/REV button and BASS/TREBLE button
pressed, turn on POWER. Then, the frequency is initially set
in the memory as shown in Table. Call it with the PRESET
button to use it for adjustment and check of tuner circuit.
Preset No.
FM STEREO
Preset No.
AM
1
87.50 MHz
2
108.00 MHz
3
98.00 MHz
4
90.00 MHz
5
106.00 MHz
11~25
––––
6
531 kHz
7
1,602 kHz
8
990 kHz
9
603 kHz
10
1,404 kHz
Preset No.
FM MONO
26
106.00 MHz
27
90.00 MHz
28
98.00 MHz
29
108.00 MHz
30
87.50 MHz
BAND
11-35
36
FM106.00 MHz
37
FM 90.00 MHz
38
FM
FM 98.00 MHz
39
MONO
FM108.00 MHz
40
FM 87.50 MHz
Europe 1, 2
CH
BAND
1
FM 87.50 MHz
2
FM108.00 MHz
3
FM
FM 98.00 MHz
4
STEREO
FM 90.00 MHz
5
FM106.00 MHz
Europe 1, 2
CH
BAND
6
AM 522 kHz
7
AM1620 kHz
8
AM
AM 990 kHz
9
AM 603 kHz
10
AM1404 kHz
Europe 1, 2
CH
Stations are set according to destination.
KEY1
KEY2
KEY3
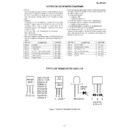
TEST CONTENTS
Memory
Function
Power
Preset clear
Memory
Stop
Power
Preset set
Memory
Play
Power
Display
Memory
Preset up
Power
CD
Memory
Rec
Power
Soft reset
Bass/treble
Function
Power
Volume
Bass/treble
Stop
Power
Tuner aspm
Bass/treble
Play
Power
Timer test
Bass/treble
Rec
Power
All key
Test Mode Key Operation
• Preset clear test
• Preset set test
All test modes can be terminated by turning off the power with POWER key.
All tuner preset stations are cleared.
• Display test
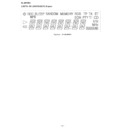
When test mode is activated, the entire display lights up. As the “PLAY” button is pressed, half of the display lights up alternately.
XL-MP35H
– 10 –
• Soft reset test
• VOLUME test
• Tuner aspm test
• TIMER test
• ALL KEY test
All data in RAM is cleared.
Starting from level 23 (default), check all the levels (0 - MAX).
106.50 MHz FM stereo is set by default. Hold down the “ASPM” button (on the remote control) to start scanning from 105.00 MHz. The
unit receives stations and stores them as PS (preset stations).
If no station is received, “0MEMORY” appears.
unit receives stations and stores them as PS (preset stations).
If no station is received, “0MEMORY” appears.
At 1:05, the power turns on to activate the tape function, and turns off after 90 seconds (equivalent to 90 minutes on the unit).
In the test mode, hold down all the buttons on the main unit and then press the “POWER” button. “OK” appears.
If only the “POWER” key is pressed, “ERROR” appears.
If only the “POWER” key is pressed, “ERROR” appears.
• CD test
[cd step 1] Enter test mode.
Hold down the “memory” button
[cd step 2] After some steps, the laser turns on.
Hold down the “memory” button
[cd step 3] After some steps, focus search is performed.
Hold down the “memory” button
[cd step 4] After some steps, CLV rotation is performed.
Hold down the “memory” button
[cd step 5] CD playback starts.
Hold down the “stop” button to return to [cd step 1]
In step 5, hold down the AUX button on the remote control. The tracking servo is switched on/off.
From step 3, the pick up can be moved with the FF/REW button.
Display

