Read Harman Kardon AVR 160 (serv.man5) Service Manual online
harman/kardon
Service Manual
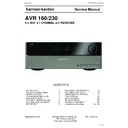
AVR 160/230
5 x 40W 5.1 CHANNEL A/V RECEIVER
CONTENTS
EXPLODED VIEW AND PARTS
12
ELECTRICAL
PARTS
LIST
13
SEMICONDUCTOR PINOUTS
41
PCB DRAWINGS
97
BLOCK DIAGRAM
104
WIRING DIAGRAM
105
AMP BIAS ADJUSTMENT
106
SCHEMATIC DIAGRAMS
107-116
ESD
WARNING
2
FRONT AND REAR PANELS
3
REMOTE
CONTROL
5
TROUBLESHOOTING GUIDE
8
PROCESSOR
RESET
8
TECHNICAL SPECIFICATIONS
9
PACKAGE LISTS AND PARTS
10
DISASSEMBLY
11
Released
EU2010
Harman
Consumer Group, Inc.
Rev 0, 05/2010
8500 Balboa Boulevard
Northridge,
California
91329
harman/kardon
AVR 160/230 Service Manual
1 of 116
Each precaution in this manual should be followed during servicing.
Components identified with the IEC symbol
in the parts list are special significance to safety. When replacing a component identified with
, use only the replacement parts designated, or parts with the same ratings or resistance, wattage, or voltage that are designated in the
parts list in this manual. Leakage-current or resistance measurements must be made to determine that exposed parts are acceptably
insulated from the supply circuit before retuming the product to the customer.
Some semiconductor (solid state) devices can be damaged easily by static electricity. Such components commonly are called
Electrostatically Sensitive (ES) Devices. Examples of typical ES devices are integrated circuits and some field effect transistors and
semiconductor "chip" components.
The following techniques should be used to help reduce the incidence of component damage caused by static electricity.
1. Immediately before handling any semiconductor component or semiconductor-equipped assembly, drain off any electrostatic charge on
your body by touching a known earth ground. Alternatively, obtain and wear a commercially available discharging wrist strap device,
which should be removed for potential shock reasons prior to applying power to the unit under test.
2. After removing an electrical assembly equipped with ES devices, place the assembly on a conductive surface such as aluminum foil, to
prevent electrostatic charge build-up or exposure of the assembly.
3. Use only a grounded-tip soldering iron to solder or unsolder ES devices.
4. Use only an anti-static solder removal device. Some solder removal devices not classified as "anti-static" can generate electrical charges
sufficient to damage ES devices.
5. Do not use freon-propelled chemicals. These can generate electrical change sufficient to damage ES devices.
6. Do not remove a replacement ES device from its protective package until immediately before you are ready to install it. (Most replacement
ES devices are packaged with leads electrically shorted together by conductive foam, aluminum foil or comparable conductive material.)
7. Immediately before removing the protective material from the leads of a replacement ES device, touch the protective material to the
chassis or circuit assembly into which the device will be installed.
Be sure no power is applied to the chassis or circuit, and observe all other safety precautions.
8. Minimize bodily motions when handling unpackaged replacement ES devices. (Otherwise harmless motion such as the brushing together
or your clothes fabric or the lifting of your foot from a carpeted floor can generate static electricity sufficient to damage an ES devices.
CAUTION :
harman/kardon
AVR 160/230 Service Manual
2 of 116
7
L - Audio - R
RDS
Channel
Digital
Set
Tuning
Surr. Mode
K
L
Surr. Select
Optical 3
Coaxial 3
Video
Video 3
K
L
Source
K
L
M
N
160
D
Se
S
ur
e
ENGLISH
FRONT-PANEL CONTROLS
Power indicator
Tuning Mode
Standby/On
Switch
Channel Level
Control
Surround
Modes
USB Port
Headphone
EzSet/EQ
Microphone
Input
Digital
Audio Inputs
(Optical 3 and
Coaxial 3)
Video 3
Analog Audio and
Video Inputs
Tuning
Digital Input
M N
Navigation
Remote IR Sensor
Set
Message Display
Surround Select
Source Selectors
Volume
Power Indicator: This LED has three possible modes:
Main Power Off
•
: When the AVR is unplugged or the Main Power
Switch is off, this LED is off.
Standby
Standby
•
: Amber indicates that the AVR is ready to be turned on.
On
•
: When the AVR is turned on, this LED turns white.
NOTE: If the PROTECT message ever appears, turn off the AVR and unplug
it. Check all speaker wires for a possible short. If none is found, bring the
unit to an authorized Harman Kardon service center for inspection and
repair before using it again.
it. Check all speaker wires for a possible short. If none is found, bring the
unit to an authorized Harman Kardon service center for inspection and
repair before using it again.
Standby/On Switch: This electrical switch turns the receiver on, or places
it in Standby mode for quick turn-on.
RDS: Activates RDS functions for FM Radio
Channel Level Control: Press this button to adjust the output level for
any amplifier channel. It may be necessary to raise or lower the level of a
specific channel to compensate for the placement of the relevant speaker in
the room in relation to the listening position; e.g., the center channel speaker
is further away from the listening position than the front left and right
speakers, so that the dialogue is too soft to hear clearly.
To adjust the level of a channel, press this button once. If the desired channel
is not displayed on screen and in the front-panel Message Display, use the
Tuning Buttons to scroll to it. When the desired channel appears, use the
is not displayed on screen and in the front-panel Message Display, use the
Tuning Buttons to scroll to it. When the desired channel appears, use the
M N
Navigation Buttons to change the level.
It is recommended that you avoid changing the channel levels after you have
run the EzSet/EQ setup procedure described in the Initial Setup section, which
properly adjusts all channel levels. See the Advanced Functions section for
more information on manual speaker setup, including level adjustment.
Remote IR Sensor: This sensor receives infrared (IR) commands from the
remote control. It is important to ensure that it is not blocked. If covering
the sensor is unavoidable, use an optional Harman Kardon HE 1000, or other
infrared receiver, connecting it to the Remote IR Input on the AVR 160’s rear
panel.
Digital Input: To change the audio input for the current source to one
of the six digital audio inputs or the analog input for the source, press this
button and use the
M N
Navigation Buttons to change the input. Although
any digital audio input may be assigned to any source, the analog audio
inputs are all permanently dedicated to the source with which they are
labeled.
inputs are all permanently dedicated to the source with which they are
labeled.
M N
Navigation: These buttons are used to navigate the AVR’s menus.
Set: Press this button to select the currently highlighted item.
Message Display: Various messages appear in this two-line display
in response to commands and changes in the incoming signal. In normal
operation, the current source name appears on the upper line, while the
surround mode is displayed on the lower line. When the on-screen display
menu system (OSD) is in use, the current menu settings appear.
Tuning: Press these buttons to tune a radio station.
harman/kardon
AVR 160/230 Service Manual
3 of 116
9
ENGLISH
Component
Video
Monitor
Output
Component
1& 2
Inputs
HDMI
Monitor
Output
HDMI 1-3
Inputs
6-/8-Channel
Analog Audio
Inputs
Coaxial 1 & 2
Digital Audio
Inputs
Video 2 Audio/
Video Inputs
DVD Audio/
Video Inputs
Video
Monitor
Output
Video 1 Audio/
Video Inputs
& Outputs
AC Power Cord
Subwoofer
Output
Front Speaker
Outputs
Surround Back
Speaker
Outputs
Surround
Speaker
Outputs
Optical 1&2
Digital Audio
Inputs
Tape Audio
Inputs & Outputs
Center
Speaker
Outputs
Coaxial
Digital Audio
Output
Main
Power Switch
FM Antenna
AM Antenna
AUX Input
CD Inputs
AM and FM Antenna Terminals: Connect the included AM and FM
antennas to their respective terminals for radio reception.
Component Video Monitor Output: If you are using one of the
Component Video Inputs and your television or video display is component-
video-capable, connect these jacks to the video display.
antennas to their respective terminals for radio reception.
Component Video Monitor Output: If you are using one of the
Component Video Inputs and your television or video display is component-
video-capable, connect these jacks to the video display.
NOTE: Due to copy-protection restrictions, there is no output at the
Component Video Monitor Outputs for copy-protected sources.
Component Video Monitor Outputs for copy-protected sources.
Component Video 1&2 Inputs: If a video source has analog
component video (Y/Pb/Pr) capability, and if you are not using an HDMI
connection, connect the component video outputs of the source to one of the
sets of component video inputs. Do not make any other video connections to
that source.
component video (Y/Pb/Pr) capability, and if you are not using an HDMI
connection, connect the component video outputs of the source to one of the
sets of component video inputs. Do not make any other video connections to
that source.
NOTE: AVR 160 does not transcode composite video source signals to the
component video format.
component video format.
Video Monitor Output: If any of your sources use composite video
connections, connect this monitor output to the corresponding input on
your video display. Composite video source signals are only available at this
output.
connections, connect this monitor output to the corresponding input on
your video display. Composite video source signals are only available at this
output.
Video 1, Video 2 and DVD Audio/Video Inputs: These jacks may
be used to connect your video-capable source components (e.g., Blu-ray
Disc™ player, DVD player, cable TV box) to the receiver.
be used to connect your video-capable source components (e.g., Blu-ray
Disc™ player, DVD player, cable TV box) to the receiver.
NOTE: If a source is equipped with an HDMI output, it is preferable to
connect it to one of the AVR’s HDMI Inputs. If the source does not have an
HDMI output, use its component or composite video output, and make a
separate audio connection.
connect it to one of the AVR’s HDMI Inputs. If the source does not have an
HDMI output, use its component or composite video output, and make a
separate audio connection.
Video 1 Audio/Video Outputs: These jacks may be used to connect
your DVR, VCR or another recorder.
HDMI Inputs and Output: HDMI (High-Definition Multimedia Interface)
is a connection for transmitting digital audio and video signals between
devices. Connect up to three HDMI-equipped source devices to the HDMI
inputs using a single-cable connection.
your DVR, VCR or another recorder.
HDMI Inputs and Output: HDMI (High-Definition Multimedia Interface)
is a connection for transmitting digital audio and video signals between
devices. Connect up to three HDMI-equipped source devices to the HDMI
inputs using a single-cable connection.
When you connect the HDMI Output to your video display, the AVR 160 will
automatically transcode component video source signals to the HDMI format,
but they will be passed through at the original resolution and will not be
scaled. The AVR’s on-screen menus are visible when the HDMI Output is used,
but only at 576i resolution. The main video source will not be visible.
automatically transcode component video source signals to the HDMI format,
but they will be passed through at the original resolution and will not be
scaled. The AVR’s on-screen menus are visible when the HDMI Output is used,
but only at 576i resolution. The main video source will not be visible.
NOTES: When connecting a DVI-equipped display to one of the HDMI
Outputs:
Outputs:
Use an HDMI-to-DVI adapter.
•
Make sure the display is HDCP-compliant. If it isn’t, do not connect it to
•
an HDMI Output; use an analog video connection instead.
Always make a separate audio connection.
•
REAR-PANEL CONNECTIONS
harman/kardon
AVR 160/230 Service Manual
4 of 116

