Read Sony DCR-PC7 / DCR-PC7E Service Manual online
MICROFILM
SERVICE MANUAL
US Model
Canadian Model
DCR-PC7
AEP Model
UK Model
E Model
DCR-PC7E
Tourist Model
DCR-PC7/PC7E
For MECHANISM ADJUSTMENTS, refer to the
“DV MECHANICAL ADJUSTMENT MANUAL
“DV MECHANICAL ADJUSTMENT MANUAL
I
”
(9-973-815-11).
RMT-806/807
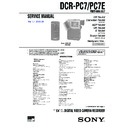
Photo : DCR-PC7
: RMT-808
DIGITAL VIDEO CAMERA RECORDER
SPECIFICATIONS
DCR-PC7/PC7E
D MECHANISM
•
Tourist model of DCR-PC7 is different from US model of DCR-
PC7 only in the accessory and packing materials.
PC7 only in the accessory and packing materials.
•
Tourist model of DCR-PC7E is different from E model of DCR-
PC7E only in the accessory and packing materials.
PC7E only in the accessory and packing materials.
— Continued on next page —
Ver 1.1 2006.09
— 2 —
ATTENTION AU COMPOSANT AYANT RAPPORT
À LA SÉCURITÉ!!
LES COMPOSANTS IDENTIFIÉS PAR UNE MARQUE
!
SUR
LES DIAGRAMMES SCHÉMATIQUES ET LA LISTE DES
PIÈCES SONT CRITIQUES POUR LA SÉCURITÉ DE
FONCTIONNEMENT. NE REMPLACER CES COMPOSANTS
QUE PAR DES PIÈCES SONY DONT LES NUMÉROS SONT
DONNÉS DANS CE MANUEL OU DANS LES SUPPLÉMENTS
PUBLIÉS PAR SONY.
PIÈCES SONT CRITIQUES POUR LA SÉCURITÉ DE
FONCTIONNEMENT. NE REMPLACER CES COMPOSANTS
QUE PAR DES PIÈCES SONY DONT LES NUMÉROS SONT
DONNÉS DANS CE MANUEL OU DANS LES SUPPLÉMENTS
PUBLIÉS PAR SONY.
SAFETY-RELATED COMPONENT WARNING !!
COMPONENTS IDENTIFIED BY MARK
!
OR DOTTED LINE
WITH MARK
!
ON THE SCHEMATIC DIAGRAMS AND IN THE
PARTS LIST ARE CRITICAL TO SAFE OPERATION. REPLACE
THESE COMPONENTS WITH SONY PARTS WHOSE PART
NUMBERS APPEAR AS SHOWN IN THIS MANUAL OR IN SUP-
PLEMENTS PUBLISHED BY SONY.
1.
Check the area of your repair for unsoldered or poorly-soldered
connections. Check the entire board surface for solder splashes
and bridges.
connections. Check the entire board surface for solder splashes
and bridges.
2.
Check the interboard wiring to ensure that no wires are
“pinched” or contact high-wattage resistors.
“pinched” or contact high-wattage resistors.
3.
Look for unauthorized replacement parts, particularly
transistors, that were installed during a previous repair. Point
them out to the customer and recommend their replacement.
transistors, that were installed during a previous repair. Point
them out to the customer and recommend their replacement.
4.
Look for parts which, though functioning, show obvious signs
of deterioration. Point them out to the customer and
recommend their replacement.
of deterioration. Point them out to the customer and
recommend their replacement.
5.
Check the B+ voltage to see it is at the values specified.
6.
Flexible Circuit board Repairing
•
•
Keep the temperature of the soldering iron around 270°C
during repairing.
during repairing.
•
Do not touch the soldering iron on the same conductor of
the circuit board (within 3 times).
the circuit board (within 3 times).
•
Be careful not to apply force on the conductor when
soldering or unsoldering.
soldering or unsoldering.
SAFETY CHECK-OUT
After correcting the original service problem, perform the following
safety checks before releasing the set to the customer:
safety checks before releasing the set to the customer:
— 3 —
SERVICE NOTE
1
Ejecting with the cabinet (L) assembly removed
•
Refer to “2. DISASSEMBLY”, and supply power with the
cabinet (L) assembly removed (however leave the flexible board
connecting the cabinet (L) assembly and main unit connected).
•
cabinet (L) assembly removed (however leave the flexible board
connecting the cabinet (L) assembly and main unit connected).
•
Ejecting:
Operate the CS bracket assembly, open the cassette lid, turn
OFF the CC DOWN SW, and press the Eject button again.
Operate the CS bracket assembly, open the cassette lid, turn
OFF the CC DOWN SW, and press the Eject button again.
•
Loading:
Close the cassette lid.
(Turn ON the CC DOWN SW)
Close the cassette lid.
(Turn ON the CC DOWN SW)
2
Handling the VC. MR board
Never heat the VC and MR boards with hot air. (Malfunctions
may result.)
Also remove after dehumidifying.
may result.)
Also remove after dehumidifying.
3
Special precautions on disconnection of connector
attached to the flexible board
attached to the flexible board
•
Apply force in the arrow direction and disconnect.
•
Do not apply force in the direction as this will cause the solder
(of the pin) to float easily.
(of the pin) to float easily.
•
When touching the pins with the solder iron, do not touch other
parts. (deformation may occur.)
parts. (deformation may occur.)
•
Ensure no folding lines are formed on the flexible board.
(This will cause the internal copper film to cut easily.)
(This will cause the internal copper film to cut easily.)
Slide the CS lock plate in the arrow
direction, and open the cassette lid.
direction, and open the cassette lid.
CC DOWN SW
CS bracket assembly
Connect to the main unit.
OFF
ON
CC DOWN SW
Cassette lid
Connector
Flexible board
*
*
*
2 - 1
SECTION 2
DISASSEMBLY
2-1. REMOVAL OF CABINET (L) ASSEMBLY
DCR-PC7/PC7P
1
Special head screw (M2.6)
7
Screw (M1.7 x 2.5)
9
Screw (M1.7 x 2.5)
!º
Two screws (M1.7 x 2.5)
!¡
Cabinet (L) assembly
2
Grip belt
3
Two screws (K2 x 4)
6
Open the grip cover.
4
Accessory shoe
5
Accessory plate
!™
FZ4800 control switch block
CN6103,5P
MR-36 board
MR-36 board
8
Screw
(M1.7 x 2.5)
(M1.7 x 2.5)
2-2. REMOVAL OF FZ4800 CONTROL SWITCH BLOCK
2
Two screws (M1.7 x 2.5)
4
Two screws (M1.7 x 2.5)
6
Three screws (M1.7 x 2.5)
8
Screw (M1.4 x 1.6)
9
CC DOWN SW (FZ4800)
3
Remove the two claws, and
remove the cassette lid.
7
FZ4800 control switch block
Note : Be careful not to damege the flexible board.
5
Cassette lid bracket assembly and CS bracket assembly.
Note : Be careful not to damage the flexible board
of the CC DOWN SW.
Two claws.
1
Slide the CS lock plate in
the arrow direction, and
open the cassette lid.
open the cassette lid.

