Read Sharp LC-37P50E (serv.man9) Service Manual online
LC-26P50E
LC-32P50E
LC-37P50E
LC-32P50E
LC-37P50E
18
ADJUSTMENT PROCEDURE (Signal line)
The adjustment values are set to their optimum at the factory before shipping. If by any chance a value should
become improper or a readjustment is required due to part replacement, make an adjustment according to the
following procedure.
become improper or a readjustment is required due to part replacement, make an adjustment according to the
following procedure.
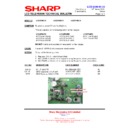
1.After replacement of any PWB and/or IC for repair, note the following.
When replacing the following units, be sure to prepare the new units loaded with updated software.
AV-UNIT
: DUNTKD187WE01/02/03/04/05(LC-26P50E/K/F/I/R)
: DUNTKD187WE07/08/10/11/12(LC-32P50E/K/F/I/R)
: DUNTKD187WE14/16/17/18/19(LC-37P50E/K/F/I/R)
MAIN-UNIT : DUNTKD186FE01(LC-26P50E)
: DUNTKD186FE02(LC-32P50E)
: DUNTKD186FE03(LC-37P50E)
2.Upgrading of each microprocessor software
Note: The details are still undecided.
Caution: Never "POWER OFF" the unit when software upgrade is ongoing.
Otherwise the system may be damaged beyond recovery.
2-1. Upgrading the software version
These models employ the main microprocessor software.
This software can be upgraded by using a general-purpose SD memory card.
Discussed below are the procedures for upgrading the main software.
This software can be upgraded by using a general-purpose SD memory card.
Discussed below are the procedures for upgrading the main software.
2-2. Upgrading the main software version
Get the following ready before you start.
» SD memory card of 8MB or higher capacity
» PC running on Windows 98/98SE/ME/2000/XP operating system
» USB reader/writer for SD memory card as well as PC card adaptor
» SD memory card formatting software
» PC running on Windows 98/98SE/ME/2000/XP operating system
» USB reader/writer for SD memory card as well as PC card adaptor
» SD memory card formatting software
(Downloadable at http://panasonic.jp/support/audio/sd/download/sd_formatter_e.html)
LC-26P50E
LC-32P50E
LC-37P50E
LC-32P50E
LC-37P50E
21
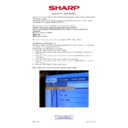
3. Entering and exiting the adjustment process mode
(1) Unplug the AC power cord of running TV set to force off the power.
(2) While holding down the "VOL (–)" and "INPUT" keys on the set at once, plug in the AC power cord to turn
(2) While holding down the "VOL (–)" and "INPUT" keys on the set at once, plug in the AC power cord to turn
on the power. The letter K appears on the screen.
(3) Next, hold down the "VOL (–)" and "P (Ù)" keys on the set at once. Multiple lines of blue characters appear-
ing onscreen indicate that the set is now in the adjustment process mode. If you fail to enter the adjustment
process mode (the display is the same as normal startup), retry the procedure.
process mode (the display is the same as normal startup), retry the procedure.
(4) To exit the adjustment process mode after the adjustment is done, unplug the AC power cord to force off the
power. (When the power is turned off with the remote controller, once unplug the AC power cord and plug it
in again. In this case, wait 10 seconds or so before plugging.)
in again. In this case, wait 10 seconds or so before plugging.)
Caution: Use due care in handling the information described here lest the users should know
how to enter the adjustment process mode. If the settings are tampered with in this
mode, unrecoverable system damage may result.
mode, unrecoverable system damage may result.
(1) Current page /
Total pages
(2) Current page title
(3) Currently selected input
(4) Current color TV system
(5) Destination
Adjustment process menu header
(7) Parameters
MAIN Version
Dev Version
Dev Version
CPLD Version
XX
ERROR STANDBY CAUSE
XX
NORMAL STANDBY CAUSE
1.XX (XX/XX/XXX)
XX
XX
AUTO
AUTO:EURO
TV
1/12
[INFO]
4. Remote controller key operation and description of display in adjustment process mode
(1) Key operation
Remote controller key
Main unit key
Function
P (ù/Ù)
P (ù/Ù)
Moving an item (line) by one (UP/DOWN)
VOL (+/–)
VOL (+/–)
Changing a selected item setting (+1/–1)
Cursor (UP/DOWN)
Turing a page (PREVIOUS/NEXT)
Cursor (LEFT/RIGHT)
Changing a selected line setting (+10/–10)
INPUT SOURCE
INPUT button
Input source switching(toggle switching)
on remote controller
(TV -> EXT1 -> EXT2 -> EXT3 -> EXT4)
OK
Executing a function
`
Input mode is switched automatically when relevant adjustment is started so far as the necessary input
signal is available.
signal is available.
(2) Description of display
LC-26P50E
LC-32P50E
LC-37P50E
LC-32P50E
LC-37P50E
22
Page
Line
Item
Description
Remarks (adjustment detail, etc.)
1/12
[INFO]
1
Main Version
1.xx (xx/xx/xxx)
Main microprocessor version
2
Dev Version
xxxxxx
Video Processor (Trident) version
3
CPLD Version
xxxxxx
CPLD version
4
NORMAL STANDBY CAUSE
xxxxxx
Last status which cause standby.
5
ERROR STANDBY CAUSE xx
Error standby cause
xxHxxM
2/12
[INIT]
1
INDUSTRY INIT
[AUTO/EURO/UK/ITALY/FRANCE/RUSSIA]ENTER
Initialization to factory settings
2
HOTEL MODE
OFF/ON
HOTEL MODE flag setting
3
Center Acutime
xxH xxM
Main operating hours
4
RESET
OFF/ON
Main operating hours reset
5
Backlight Acutime
xxH xxM
Backlight operating hours
6
RESET
OFF/ON
Backlight operating hours reset
7
Picture Read Pos X
0
x-axis setting of picture data
8
Picture Read Pos Y
0
y-axis setting of picture data
9
Picture Read Color
R/G/B
Color setting of picture data
10
Picture Read Signal Type
PAL/COMP/HDMI/RGB
Signal type of picture data
11
Picture Read
ON/OFF
Start/stop of picture data
3/12
[PAL. SECAM. N358]
1
RF-AGC ADJ
ENTER
RF AGC auto adjustment
2
PAL+TUNER ADJ
ENTER
PAL TUNER auto adjustment
3
PAL ADJ
ENTER
PAL auto adjustment
4
SECAM ADJ
ENTER
SECAM auto adjustment
5
N358 ADJ
ENTER
NTSC3.58 auto adjustment
6
TUNER ADJ
ENTER
TUNER auto adjustment
7
CONTRAST PAL
104
PAL contrast adjustment
8
CONTRAST SECAM
95
SECAM contrast adjustment
9
CONTRAST N358
98
NTSC3.58 contrast adjustment
10
TUNER A DAC
168
TUNER DAC adjustment
11
RF AGC
22
RF AGC adjustment
4/12
[COMP 15K]
1
COMP15K ADJ
ENTER
COMP15K auto adjustment
2
COMP15K CONTRAST
56
Contrast adjustment
5/12
[HDTV]
1
HDTV ADJ
ENTER
HDTV auto adjustment
2
HDTV CONTRAST
197
Contrast adjustment
3
HDTV CB GAIN
183
Cb gain adjustment
4
HDTV CR GAIN
186
Cr gain adjustment
5
HDTV Y OFFSET
67
Y offset adjustment
6
HDTV CB OFFSET
510
Cb offset adjustment
7
HDTV CR OFFSET
514
Cr offset adjustment
6/12
[N358 MAIN]
1
HDMI ADJ
ENTER
HDMI auto adjustment
2
HDMI CONTRAST
202
Contrast adjustment
3
HDMI CB GAIN
184
Cb gain adjustment
4
HDMI CR GAIN
191
Cr gain adjustment
5
HDMI Y OFFSET
62
Y offset adjustment
6
HDMI CB OFFSET
511
Cb offset adjustment
7
HDMI CR OFFSET
510
Cr offset adjustment
7/12
[RGB]
1
RGB ADJ
ENTER
RGB auto adjustment
2
R GAIN
128
R gain adjustment
3
G GAIN
128
G gain adjustment
4
B GAIN
128
B gain adjustment
5
R OFFSET
128
R offset adjustment
6
G OFFSET
128
G offset adjustment
7
B OFFSET
128
B offset adjustment
5. Adjustment process mode menu
The character string in brackets [ ] will appear as a page title in the adjustment process menu header.
LC-26P50E
LC-32P50E
LC-37P50E
LC-32P50E
LC-37P50E
23
8/12
[TUNER]
1
TUNER TEST
ENTER
9/12
[M GAMMA INFO]
1
M GAMMA IN 1
98
W/B adjustment, gradation 1 input setting
2
M GAMMA IN 2
136
W/B adjustment, gradation 2 input setting
3
M GAMMA IN 3
248
W/B adjustment, gradation 3 input setting
4
M GAMMA IN 4
324
W/B adjustment, gradation 4 input setting
5
M GAMMA IN 5
396
W/B adjustment, gradation 5 input setting
6
M GAMMA IN 6
448
W/B adjustment, gradation 6 input setting
7
M GAMMA IN WRITE
OFF/ON
EEP writing of adjustment values
8
M GAMMA IN RESET
OFF/ON
Initialization of adjustment values
10/12
[M GAMMA 1-3]
1
M GAMMA R 1
196
W/B adjustment, gradation 1R adjustment value
2
M GAMMA G 1
196
W/B adjustment, gradation 1G adjustment value
3
M GAMMA B 1
196
W/B adjustment, gradation 1B adjustment value
4
M GAMMA R 2
272
W/B adjustment, gradation 2R adjustment value
5
M GAMMA G 2
272
W/B adjustment, gradation 2G adjustment value
6
M GAMMA B 2
272
W/B adjustment, gradation 2B adjustment value
7
M GAMMA R 3
496
W/B adjustment, gradation 3R adjustment value
8
M GAMMA G 3
496
W/B adjustment, gradation 3G adjustment value
9
M GAMMA B 3
496
W/B adjustment, gradation 3B adjustment value
10
M GAMMA WRITE
OFF/ON
EEP writing of adjustment values
11/12
[M GAMMA 4-6]
1
M GAMMA R 4
648
W/B adjustment, gradation 4R adjustment value
2
M GAMMA G 4
648
W/B adjustment, gradation 4G adjustment value
3
M GAMMA B 4
648
W/B adjustment, gradation 4B adjustment value
4
M GAMMA R 5
792
W/B adjustment, gradation 5R adjustment value
5
M GAMMA G 5
792
W/B adjustment, gradation 5G adjustment value
6
M GAMMA B 5
792
W/B adjustment, gradation 5B adjustment value
7
M GAMMA R 6
896
W/B adjustment, gradation 6R adjustment value
8
M GAMMA G 6
896
W/B adjustment, gradation 6G adjustment value
9
M GAMMA B 6
896
W/B adjustment, gradation 6B adjustment value
10
M GAMMA WRITE
OFF/ON
EEP writing of adjustment values
12/12
[ETC]
1
EEP SAVE
OFF/ON
Saving of adjustment values
2
EEP RESTORE
OFF/ON
Restoring of adjustment values
3
STANDBY CAUSE RESET
OFF/ON
Clearing of standby cause
4
AUTO INSTALLATION SW
0/1
0: unfinished 1: finish
5
COUNTRY
AUTO/EURO/UK/ITALY/FRANCE/RUSSIA
Setting of destination

