Read Sharp LC-22SV2E (serv.man6) Service Manual online
8
LC-22SV2E
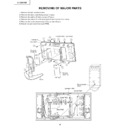
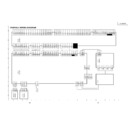
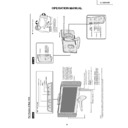
REMOVING OF MAJOR PARTS
1. Remove the two terminal covers.
2. Remove the table stand fixing screws (4 pcs.).
3. Remove the cabinet B fixing screws (17 pcs.).
4. Remove the cabinet B after opening from the direction of an arrow.
5. Remove the reinforcement angle fixing screws (4 pcs.).
6. Detach the connector from each PWB.
1
1
2
3
3
4
4
4
4
4
4
4
4
3
3
3
3
Control Panel (Top Cover)
Cabinet A
Cabinet B
Terminal
Cover (S)
Cover (S)
Terminal
Cover (L)
Cover (L)
Stand
(ME)
SC402
(MB)
P4501
(MC)
SC4701
SC4901
SC4561
(GD)
(GD)
SC4902
P3504
(KK)
SC3501
(MC)
(MA)
SC1401
SC1401
(MA)
P3504
(KK)
SC3501
(MC)
SC1401
(MA)
SC2202
(ME)
P3706
(MB)
P706
(PF)
P6551
P6552
P6553
P6554
(GA)
P3701
P3705(PF)
(GB)
P3702
(RM)
P3503
(RM)
5
6
6
6
6
6
6
6
6
6
6
6
6
6
P130(KK)
P3502
Reinforcement
Angle
Angle
Inverter PWB
Operation PWB
Digital PWB
Main PWB
9
LC-22SV2E
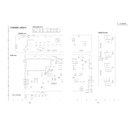
7. Remove the top cover fixing screws (2 pcs.).
8. Remove the control PWB fixing screws (2 pcs.).
9. Remove the digital PWB fixing screws (4 pcs.).
10. Detatch the chassis frame cover fixing hooks (5 pcs.).
11. Remove the 21-pin terminal fixings screws (2 pcs.).
12. Remove the analog PWB fixing screws (3 pcs.).
13. Remove the inverter PWB fixing screws (4 pcs.).
14. Remove the R/C, LED PWB fixing screws (2 pcs.).
9
9
12
13
11
8
14
10
10
7
Digital PWB
Main PWB
Chassis Frame
Inverter PWB
Operation PWB
R/C, LED PWB
Chasis
Frame Cover
Frame Cover
Control Panel
(Top Cover)
(Top Cover)
10
LC-22SV2E
»
Precautions in handling the LCD panels
1. Work in a clean room (with humidities below 50%).
2. Be sure to wear an anti-static armband.
3. Handle the panels on an electroconductive mat.
4. Be careful not to fall, shake and shock the panels.
1. Work in a clean room (with humidities below 50%).
2. Be sure to wear an anti-static armband.
3. Handle the panels on an electroconductive mat.
4. Be careful not to fall, shake and shock the panels.
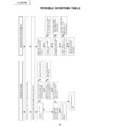
15. Remove the LCD panel unit fixing screws (4 pcs.).
16. Remove the reflection/deflection, prism and diffusion sheets.
17. Remove the ITO earth spring fixing screw (1 pc.).
18. Remove the ITO sheet and diffusion panel.
19. Remove the lamp fixing holder fixing screws (6 pcs.).
20. Detach the lamp clip (4 pcs.).
21. Detach the lamp unit-A/B.
22. Remove the reflection panel fixing screws. (6 pcs.).
22" LCD Panel
Unit
(RLCDTA011WJZZ)
Unit
(RLCDTA011WJZZ)
17
15
20
16
19
19
18
22
21
Reflection / Deflenction Sheet
(PSHEPA003WJZZ)
(PSHEPA003WJZZ)
Prism Sheet
(PSHEPA002WJZZ)
(PSHEPA002WJZZ)
Diffusion Sheet
(PSHEP0294CEZZ)
(PSHEP0294CEZZ)
Diffusion Panel
(PCOVU0108CEZZ)
(PCOVU0108CEZZ)
Lamp Fixing Holder
(LHLDZ2184CEKZ)
(LHLDZ2184CEKZ)
Lamp Clip
(LHLDZ2185CEZZ)
(LHLDZ2185CEZZ)
Lamp Fixing Holder
(LHLDZ2184CEKZ)
(LHLDZ2184CEKZ)
Lamp Unit-B
(KLMP-0127CEZZ)
(KLMP-0127CEZZ)
Lamp Unit-A
(KLMP-0126CEZZ)
(KLMP-0126CEZZ)
Back Sheilding Plate
(PSLDM4699CEFW)
(PSLDM4699CEFW)
ITO Earth Spring
(MSPRP1220CEFW)
(MSPRP1220CEFW)
Reflection Panel
(PMiR-0299CEZZ)
(PMiR-0299CEZZ)
ITO Sheet
(PSHEP0295CEZZ)
(PSHEP0295CEZZ)

