Read Sharp LC-13E1E (serv.man2) Service Manual online
LC-13E1E
LC-15E1E
LC-15E1E
2
12345678901234567890123456789012123456789012345678901234567890121234567890123456789012345678901212
12345678901234567890123456789012123456789012345678901234567890121234567890123456789012345678901212
12345678901234567890123456789012123456789012345678901234567890121234567890123456789012345678901212
12345678901234567890123456789012123456789012345678901234567890121234567890123456789012345678901212
12345678901234567890123456789012123456789012345678901234567890121234567890123456789012345678901212
12345678901234567890123456789012123456789012345678901234567890121234567890123456789012345678901212
SAFETY NOTICE
Many electrical and mechanical parts in LCD television
have special safety-related characteristics.
These characteristics are often not evident from visual
inspection, nor can protection afforded by them be
necessarily increased by using replacement components
rated for higher voltage, wattage, etc.
Replacement parts which have these special safety
characteristics are identified in this manual; electrical
components having such features are identified by “
å
”
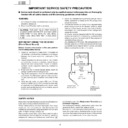
IMPORTANT SERVICE SAFETY PRECAUTION
Ë
Service work should be perfomed only by qualified service technicians who are thoroughly
familiar with all safety checks and the servicing guidelines which follow:
familiar with all safety checks and the servicing guidelines which follow:
and shaded areas in the
Replacement Parts Lists and
Schematic Diagrams.
For continued protection, replacement parts must be
identical to those used in the original circuit.
The use of a substitute replacement parts which do not
have the same safety characteristics as the factory
recommended replacement parts shown in this service
manual, may create shock, fire or other hazards.
WARNING
1. For continued safety, no modification of any circuit
should be attempted.
2. Disconnect AC power before servicing.
TO EXPOSED
METAL PARTS
METAL PARTS
CONNECT TO
KNOWN EARTH
GROUND
KNOWN EARTH
GROUND
•
Use an AC voltmeter having with 5000 ohm per volt, or
higher, sensitivity or measure the AC voltage drop
across the resisor.
higher, sensitivity or measure the AC voltage drop
across the resisor.
•
Connect the resistor connection to all exposed metal
parts having a return to the chassis (antenna, metal
cabinet, screw heads, knobs and control shafts,
escutcheon, etc.) and measure the AC voltage drop
across the resistor.
All checks must be repeated with the AC cord plug
connection reversed. (If necessary, a nonpolarized
adaptor plug must be used only for the purpose of
completing these checks.)
Any reading of 0.75V peak (this corresponds to 0.5
milliamp. peak AC.) or more is excessive and indicates
a potential shock hazard which must be corrected
before returning the monitor to the owner.
BEFORE RETURNING THE RECEIVER
(Fire & Shock Hazard)
(Fire & Shock Hazard)
Before returning the receiver to the user, perform
the following safety checks:
the following safety checks:
1. Inspect all lead dress to make certain that leads are
not pinched, and check that hardware is not lodged
between the chassis and other metal parts in the
receiver.
between the chassis and other metal parts in the
receiver.
2. Inspect all protective devices such as non-metallic
control knobs, insulation materials, cabinet backs,
adjustment and compartment covers or shields,
isolation resistor-capacitor networks, mechanical
insulators, etc.
adjustment and compartment covers or shields,
isolation resistor-capacitor networks, mechanical
insulators, etc.
3. To be sure that no shock hazard exists, check for
leakage current in the following manner.
•
Plug the AC cord directly into a 110~240 volt AC outlet,
and connect the DC power cable into the receiver's
DC jack. (Do not use an isolation transformer for this
test).
and connect the DC power cable into the receiver's
DC jack. (Do not use an isolation transformer for this
test).
•
Using two clip leads, connect a 50k ohm, 10 watt
resistor paralleled by a 0.15µF capacitor in series with
all exposed metal cabinet parts and a known earth
ground, such as electrical conduit or electrical ground
connected to an earth ground.
resistor paralleled by a 0.15µF capacitor in series with
all exposed metal cabinet parts and a known earth
ground, such as electrical conduit or electrical ground
connected to an earth ground.
CAUTION: FOR CONTINUED PROTECTION
AGAINST A RISK OF FIRE REPLACE ONLY WITH
SAME TYPE F1(1.25A, 250V), F2(1.25A, 250V),
F6500 (1.25A, 250V) AND F6501 (1.25A, 250V)
FUSE.
AGAINST A RISK OF FIRE REPLACE ONLY WITH
SAME TYPE F1(1.25A, 250V), F2(1.25A, 250V),
F6500 (1.25A, 250V) AND F6501 (1.25A, 250V)
FUSE.
DVM
AC SCALE
50k ohm
10W
0.15 F
TEST PROBE
LC-13E1E
LC-15E1E
LC-15E1E
4
CH
MENU
TV/VIDEO
Volume (–)/(+)
POWER/STANDBY
indicator
A green indicator lights when the power is on and a red
indicator lights when in the standby mode (the indicator
will not light when the main power is off).
Speaker
Remote sensor window
Remote sensor indicator
A red indicator blinks when the TV set receives the
remote control signal.
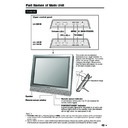
Upper control panel
The screen can be adjusted
backwards to an angle between 12
degrees and 35 degrees. The screen
cannot be set up straight. When
changing the angle, make sure to
hold the stand and adjust the screen
to the best viewable angle.
Controls
Note:
•
TV/VIDEO
,
CH(
)/(
),
Volume (–)/(+)
and
MENU
on the main unit have the same functions as the same buttons
on the remote control. Fundamentally, this operation manual provides a description based on operation using the
remote control.
•
The LC-13E1E, LC-15E1E have different external dimensions and the positions where the names
of the buttons
are displayed also differ but the same operating procedures are followed for all three models.
LC-13E1E
LC-15E1E
CH (
)/(
)
MENU
TV/VIDEO
(MAIN POWER)
35
°
12
°
Adjustable range
AV
-I
N
1
R
G
B
A
V-
IN
2
S
-V
ID
E
O
V
ID
EO
L
R
A
U
D
IO
P
O
W
E
R
IN
P
U
T
D
C
1
2
V
L
R
A
U
D
IO
O
U
T
L
R
A
UD
IO
O
UT
A
V
-IN
1
R
G
B
A
V
-IN
2
S
-V
ID
E
O
V
IDE
O
L
R
A
U
D
IO
P
O
WE
R
IN
P
U
T
D
C
1
3V
Carrying handle
POWER INPUT
(DC 12V : LC-13E1E/
LC-15E1E)
(DC 13V : LC-20E1E)
AV-IN 1
(21pin Euro-SCART)
S-VIDEO
VIDEO
AUDIO (L
)
AUDIO (R)
AV-IN 2
Antenna
AUDIO OUT (L)
AUDIO OUT (R)
Headphones
Rear view
Terminals
Operation Manual
LC-13E1E
LC-15E1E
LC-15E1E
5
E
CH
TV/VIDEO
REVEAL
H
OLD
EN
D
M
MENU
SOUND
SU
B
TIT
LE
OK
OK, Programme Tabl
e
SUBTITLE
Displays the Teletext
Subtitle directly.
HOLD
Temporarily holds the
current Teletext page.
Mute
Switches the sound on and off.
Yellow,
Timer function Menu
Cyan, Status Display
Turns on the status display
when the menu is not
displayed.
TV/VIDEO
Switches the input source
between AV1, AV2 and
TV mode.
Channel Select
MENU
Displays the
TV menu.
Volume (+)/(
-
)
Flashback
Returns to the previous
channel.
Red, Picture Menu
Upwards
/Downwards
Selection, zoom display
function
(Teletext mode)
)
END
Returns to normal screen.
)
TEXT
Displays the
T
e
letext mode
screen.
(Power)
SOUND
Switches the sound
mode.
REVEAL
Displays hidden informatio
n
such as solutions to riddles
and puzzles.
Right /
Left
Selection
SUBPAGE
Displays the
T
e
letext
Subpage directly
.
ROTATE
Rotates the display in ever
y
direction.
BRIGHT
Selects the brightness
of the display.
Green, Sound Menu
SUBPAGE
TE
X
T
ROTATE
B
R
IG
H
T
T
CH (
)/(
)
Displays previous/next page.
(Teletext mode)
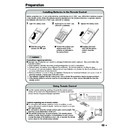
Installing Batteries in the Remote Control
Before using the LCD TV set for the first time, install the two R-03 (“AAA” size, UM/SUM-4) batteries supplied
in the remote control. When the batteries become depleted and the remote control fails to operate, replace
the batteries with new R-03 (“AAA” size, UM/SUM-4) batteries.
1
Open the battery cover.
2
Insert two R-03 (“AAA” size,
UM/SUM-4) batteries.
3
Replace the battery cover.
Ë
Position the positive and
negative ends of the
batteries as indicated in
the compartment.
Caution!
Precautions regarding batteries
Ë
Improper use of batteries can result in a leakage of chemicals and/or explosion. Be sure to follow the
instructions below.
•
Place batteries with their terminals corresponding to the (+) and (–) indications.
•
Different types of batteries have different characteristics. Do not mix batteries of different types.
•
Do not mix old and new batteries. Mixing old and new batteries can shorten the life of new batteries and/
or cause old batteries to leak chemicals.
•
Remove batteries as soon as they are depleted. Chemicals that leak from batteries can cause a rash. If
chemical leakage is found, wipe it off with a cloth.
•
The batteries supplied with the product may have a shorter life expectancy due to storage conditions.
•
If the remote control is not to be used for an extended period of time, remove the batteries from the
remote control.
Ë
Engaging the lower
claw with the remote
control, close the
cover.
Ë
Slide the cover while
pressing the
(
) part.
|
LC-13E1E
LC-15E1E
LC-15E1E
6
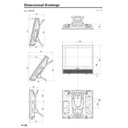
Dimensions
Unit: mm
LC-13E1E

