Read Sharp XV-Z3100 (serv.man11) User Guide / Operation Manual online
XV-Z3100U/XV-Z3100/XV-Z3300/DT-510
1 – 1
XV-Z3100U
Service Manual
CHAPTER 1.
OPERATION MANUAL
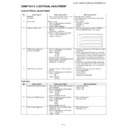
[1] Specifications
Projector
XV-Z3100U, XV-Z3100, XV-Z3300, DT-510
NTSC3.58/NTSC4.43/PAL/PAL-M/PAL-N/PAL-60/SECAM/DTV480 /DTV480P/
DTV540P/DTV576 /DTV576P/DTV720P/DTV1035 /DTV1080 /DTV1080 -50
DLP chip
Panel size: 0.62"ı
Drive method: Digital Light Processing (DLP )
No. of dots:921,600 dots (1280 [H] 720 [V])
1
XV-Z3100U, XV-Z3100, XV-Z3300, DT-510
NTSC3.58/NTSC4.43/PAL/PAL-M/PAL-N/PAL-60/SECAM/DTV480 /DTV480P/
DTV540P/DTV576 /DTV576P/DTV720P/DTV1035 /DTV1080 /DTV1080 -50
DLP chip
Panel size: 0.62"ı
Drive method: Digital Light Processing (DLP )
No. of dots:921,600 dots (1280 [H] 720 [V])
1
−1.15 x zoom lens, F2.4−2.6, f = 19.0−21.9 mm
220 W DC lamp
RCA connector
Y: 1.0 Vp-p, sync negative, 75
RCA connector
Y: 1.0 Vp-p, sync negative, 75
Ω terminated
P
B
(C
B
): 0.7 Vp-p, 75
Ω terminated
P
R
(C
R
): 0.7 Vp-p, 75
Ω terminated
4-pin mini DIN connector
Y (luminance signal): 1.0 Vp-p, sync negative, 75
Y (luminance signal): 1.0 Vp-p, sync negative, 75
Ω terminated
C (chrominance signal): Burst 0.286 Vp-p, 75
Ω terminated
RCA connector: VIDEO, composite video, 1.0 Vp-p, sync negative, 75
Ω
terminated
15-pin mini D-sub connector
RGB separate/sync on green type analog input: 0
15-pin mini D-sub connector
RGB separate/sync on green type analog input: 0
−0.7 Vp-p, positive, 75 Ω terminated
HORIZONTAL SYNC. SIGNAL: TTL level (positive/negative)
VERTICAL SYNC. SIGNAL: Same as above
HDMI terminal (video signal only)
VERTICAL SYNC. SIGNAL: Same as above
HDMI terminal (video signal only)
720 TV lines (DTV720P)
45
45
−85 Hz
15
−70 kHz
12
−85 MHz
9-pin mini DIN connector (XV-Z3100U, XV-Z3100, XV-Z3300)
Power jack: DC 12V output (XV-Z3100U, XV-Z3100, XV-Z3300)
AC 100
Power jack: DC 12V output (XV-Z3100U, XV-Z3100, XV-Z3300)
AC 100
−240 V
3.1 A
50/60 Hz
303 W (Lamp Setting "Bright")/
234 W (Lamp Setting "Eco + Quiet") with AC 100 V
293 W (Lamp Setting "Bright")/
228 W (Lamp Setting "Eco + Quiet") with AC 240 V
4 W (AC 100 V)
50/60 Hz
303 W (Lamp Setting "Bright")/
234 W (Lamp Setting "Eco + Quiet") with AC 100 V
293 W (Lamp Setting "Bright")/
228 W (Lamp Setting "Eco + Quiet") with AC 240 V
4 W (AC 100 V)
− 5 W (AC 240 V)*
1
1,140 BTU/hour (Lamp Setting "Bright")/
1,100 BTU/hour (Lamp Setting "Eco + Quiet") with AC 100 V
880 BTU/hour (Lamp Setting "Bright")/
860 BTU/hour (Lamp Setting "Eco + Quiet") with AC 240 V
41 F to 95 F (+5 C to +35 C)
1,100 BTU/hour (Lamp Setting "Eco + Quiet") with AC 100 V
880 BTU/hour (Lamp Setting "Bright")/
860 BTU/hour (Lamp Setting "Eco + Quiet") with AC 240 V
41 F to 95 F (+5 C to +35 C)
− 4 F to 140 F (− 20 C to +60 C)
Plastic
38 kHz
12
38 kHz
12
13
/
32
" x 4 ı
19
/
64
" xı11
1
/
32
" (315 (W) x 109 (H) x 280 (D) mm) (main body only)ı
12
13
/
32
" xı4
47
/
64
" xı11
37
/
64
" (315 (W) x 120 (H) x 294 (D) mm) (including adjust-ı
ment foot and projecting parts)
8.8 lbs. (4.0 kg)
Remote control, Power cord, 21 pin RCA conversion adaptor (except for U.S.A.
and Canada), Video cable (except for U.S.A. and Canada), Operation manual
8.8 lbs. (4.0 kg)
Remote control, Power cord, 21 pin RCA conversion adaptor (except for U.S.A.
and Canada), Video cable (except for U.S.A. and Canada), Operation manual
Product type
Model
Video system
Display method
Lens
Projection lamp
Component input signal
(INPUT1/2)
S-video input signal
(INPUT 3)
Video input signal
(INPUT 4)
Computer RGB/
Component input signal
(INPUT 5)
HDMI input signal
(INPUT 6)
Horizontal resolution
Vertical frequency
Horizontal frequency
Pixel clock
RS-232C terminal
TRIGGER terminal
Rated voltage
Input current
Rated frequency
Power consumption
Power consumption (standby)
Heat dissipation
Operating temperature
Storage temperature
Cabinet
I/R carrier frequency
Dimensions (approx.)
Weight (approx.)
Replacement parts
*
1
When STANDBY Mode is set to "Eco"
As a part of policy of continuous improvement, SHARP reserves the right to make design and
specification changes for product improvement without prior notice. The performance specifica-
tion figures indicated are nominal values of production units. There may be some deviations from
these values in individual units.
specification changes for product improvement without prior notice. The performance specifica-
tion figures indicated are nominal values of production units. There may be some deviations from
these values in individual units.
R
R
XV-Z3100U/XV-Z3100/XV-Z3300/DT-510
1 – 2
[2] Parts Name and Basic Operation
Top View
STANDBY/ON
button
For turning the
power on and
putting the
projector into
standby mode.
button
For turning the
power on and
putting the
projector into
standby mode.
Lamp indicator
Temperature warning
indicator
indicator
Adjustment buttons
( / / / )
For selecting menu items.
( / / / )
For selecting menu items.
ENTER button
For setting
items selected
or adjusted on
the menu.
For setting
items selected
or adjusted on
the menu.
MENU button
For displaying
adjustment and
setting screens.
For displaying
adjustment and
setting screens.
Front View
Focus ring
For adjusting
the focus.
For adjusting
the focus.
INPUT buttons ( / )
For switching input mode
1, 2, 3, 4, 5 or 6.
For switching input mode
1, 2, 3, 4, 5 or 6.
Remote control
sensor (front)
sensor (front)
HEIGHT
ADJUST
lever
ADJUST
lever
Projector
RESIZE button
For switching
the screen
size.
For switching
the screen
size.
Intake vent
Power
indicator
indicator
Zoom ring
For enlarging/
reducing the picture.
For enlarging/
reducing the picture.
Push both sides of the lens cap
to attach or remove.
to attach or remove.
Part Names and Functions
XV-Z3100U/XV-Z3100/XV-Z3300/DT-510
1 – 3
Rear View
Remote control
sensor (rear)
sensor (rear)
Rear adjustment
foot
foot
Kensington
Security Standard
connector
Security Standard
connector
AC socket
Connect the
supplied Power cord.
Connect the
supplied Power cord.
Intake vent
Exhaust vent
6
5
4
1
2
3
7
Terminals
Terminal
Description
1
2
3
INPUT 3 terminal
Connecting video equipment with S-video output terminal (VCR, DVD
player, etc.).
Connecting video equipment with S-video output terminal (VCR, DVD
player, etc.).
4
INPUT 4 terminal
Connecting video equipment without S-video output terminal.
Connecting video equipment without S-video output terminal.
ı
Connecting the computer.
5
INPUT 5 terminal
Connecting video equipment with component output terminal
(DVD player, DTV decoder, DVD recorder with hard disc, etc.).
(DVD player, DTV decoder, DVD recorder with hard disc, etc.).
TRIGGER terminal (only XV-Z3100U, XV-Z3100, XV-Z3300)
When the projector is turned on, a control signal (DC 12V) outputs from this
terminal. If an electric screen or other compatible device is connected, it
can be turned on when the projector is turned on.
When the projector is turned on, a control signal (DC 12V) outputs from this
terminal. If an electric screen or other compatible device is connected, it
can be turned on when the projector is turned on.
RS-232C terminal
Connecting the computer to control the projector.
Connecting the computer to control the projector.
6
7
INPUT 6 terminal
Connecting video equipment with HDMI output terminal.
Connecting video equipment with HDMI output terminal.
INPUT 1, 2 terminal
Connecting video equipment with component output terminal (DVD
player, DTV decoder, DVD recorder with hard disc, etc.).
Connecting video equipment with component output terminal (DVD
player, DTV decoder, DVD recorder with hard disc, etc.).
XV-Z3100U/XV-Z3100/XV-Z3300/DT-510
1 – 4
STANDBY button
For putting the
projector into the
standby mode.
For putting the
projector into the
standby mode.
KEYSTONE button
For entering the
Keystone Correction
mode.
For entering the
Keystone Correction
mode.
RETURN button
For returning to the
previous menu screen
during menu operations.
For returning to the
previous menu screen
during menu operations.
RGB/COMP. button
For switching to the
respective input signal type.
For switching to the
respective input signal type.
PICTURE MODE button
For selecting the appropriate
picture.
For selecting the appropriate
picture.
ON button
For turning the power on.
For turning the power on.
Adjustment buttons
( / / / )
( / / / )
For selecting menu items.
For adjusting the Keystone
Correction when in the
Keystone Correction mode.
For adjusting the Keystone
Correction when in the
Keystone Correction mode.
MENU button
For displaying adjustment
and setting screens.
For displaying adjustment
and setting screens.
ENTER button
For setting items selected
or adjusted on the menu.
For setting items selected
or adjusted on the menu.
RESIZE button
For switching the picture
size (STRETCH, SIDE
BAR, etc.).
For switching the picture
size (STRETCH, SIDE
BAR, etc.).
FREEZE button
For freezing images.
For freezing images.
INPUT 1, 2, 3, 4, 5 and 6
buttons
For switching to the
respective input modes.
buttons
For switching to the
respective input modes.
IRIS button (only XV-Z3100U, XV-Z3100,
XV-Z3300)
For switching "HIGH
BRIGHTNESS MODE",
"MEDIUM MODE" and
"HIGH CONTRAST MODE".
XV-Z3300)
For switching "HIGH
BRIGHTNESS MODE",
"MEDIUM MODE" and
"HIGH CONTRAST MODE".
IRIS button (DT-510)
For switching "HIGH
BRIGHTNESS MODE", and
"HIGH CONTRAST MODE".
For switching "HIGH
BRIGHTNESS MODE", and
"HIGH CONTRAST MODE".
AUTO SYNC button
For automatically
adjusting images
when connected to a
computer.
For automatically
adjusting images
when connected to a
computer.
Backlight button
For lighting all buttons on the
remote control.
For lighting all buttons on the
remote control.

