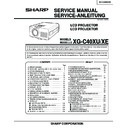
Read Sharp XG-C40XE (serv.man15) Service Manual online
1
XG-C40XU/XE
In the interests of user-safety (Required by safety regulations in some countries) the set should be restored
to its original condition and only parts identical to those specified should be used.
to its original condition and only parts identical to those specified should be used.
Im lnteresse der Benutzersicherheit (erforderliche Sicherheitsregeln in einigen Ländern) muß das Gerät in seinen
Originalzustand gebracht werden. Außerdem dürfen für die spezifizierten Bauteile nur identische Teile verwendet
werden.
Originalzustand gebracht werden. Außerdem dürfen für die spezifizierten Bauteile nur identische Teile verwendet
werden.
CONTENTS
INHALT
Page
»
SPECIFICATIONS ...................................................... 2
»
INPORTANT SERVICE SAFTY NOTES(for USA) ...... 3
»
OPERATION MANUAL ............................................... 7
»
REMOVING OF MAJOR PARTS .............................. 13
»
RESETTING THE TOTAL LAMP TIMER .................. 18
»
THE OPTICAL UNIT OUTLINE ................................ 19
»
CONVERGENCE AND FOCUS ADJUSTMENT ........ 20
»
ELECTRICAL ADJUSTMENT ................................... 25
»
ADJUSTING THE PC BOARD ................................. 31
»
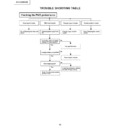
TROUBLE SHOOTING TABLE ................................ 32
»
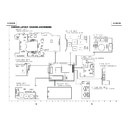
CHASSIS LAYOUT ................................................... 92
»
BLOCK DIAGRAM .................................................... 94
»
OVERALL WIRING DIAGRAM .................................. 96
»
DESCRIPTION OF SCHEMATIC DIAGRAM ............. 98
»
WAVEFORMS ........................................................... 99
»
SCHEMATIC DIAGRAM ......................................... 100
»
PRINTED WIRING BOARD ASSEMBLIES ............ 148
»
PARTS LIST
Ë
ELECTRICAL PARTS ........................................ 158
Ë
CABINET AND MECHANICAL PARTS .............. 178
Ë
ACCESSORIES PARTS .................................... 184
Ë
PACKING PARTS ............................................... 184
»
PACKING OF THE SET .......................................... 185
Seite
»
TECHNISCHE DATEN ............................................. 48
»
HINWEISE FÜR DAS WARTUNGSPERSONAL ...... 49
»
BEDIENUNGSANLEITUNG ..................................... 50
»
ENTFERNEN DER HAUPTTEILE ............................ 56
»
NULLSTELLUNG DES LAMPEN-
BETRIEBSSTUNDENZÄHLERS (GESAMTZEIT) .... 61
BETRIEBSSTUNDENZÄHLERS (GESAMTZEIT) .... 61
»
ÜBERSICHT DER OPTIKEINHEIT .......................... 62
»
EINSTELLUNG VON KONVERGENZ UND
BRENNPUNKT ......................................................... 63
BRENNPUNKT ......................................................... 63
»
ELEKTRISCHE EINSTELLUNG ............................... 68
»
EINSTELLUNG DER PC-PLATINE .......................... 74
»
FEHLERSUCHTABELLE .......................................... 75
»
CHASSIS-ANORDNUNG ......................................... 92
»
BLOCKSCHALTBILD ................................................ 94
»
GESAMTSCHALTPLAN ........................................... 96
»
BESCHREIBUNG DES SCHEMATISCHEN
SCHALTPLANS ........................................................ 98
SCHALTPLANS ........................................................ 98
»
WELLENFORMEN ................................................... 99
»
SCHEMATISCHER SCHALTPLAN ........................ 100
»
LEITERPLATTENEINHEITEN ................................ 148
»
ERSATZTEILLISTE
Ë
ELEKTRISCHE BAUTEILE ................................ 158
Ë
GEHÄUSE UND MECHANISCHE BAUTEILE ... 178
Ë
ZUBEHÖRTEILE ................................................ 184
Ë
VERPACKUNGSTEILE ...................................... 184
»
VERPACKEN DES GERÄTS .................................. 185
SHARP CORPORATION
SERVICE MANUAL
SERVICE-ANLEITUNG
SERVICE-ANLEITUNG
LCD PROJECTOR
LCD PROJEKTOR
LCD PROJEKTOR
MODELS
MODELLE
MODELLE
XG-C40XU/XE
S01B4XG-C40XU
2
XG-C40XU/XE
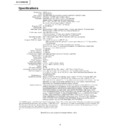
Product type
Model
Video system
Display method
LCD panel
Lens
Projection lamp
Contrast ratio
Video input signal
S-video input signal
Horizontal resolution
Audio output
Computer RGB input signal
Pixel clock
Vertical frequency
Horizontal frequency
Computer control signal
Speaker system
Rated voltage
Input current
Rated frequency
Power consumption
Operating temperature
Storage temperature
Cabinet
I/R carrier frequency
Laser pointer of remote control
Dimensions (approx.)
Weight (approx.)
Supplied accessories
Replacement parts
LCD Projector
XG-C40XU/XE
PAL/SECAM/NTSC 3.58/NTSC 4.43/DTV 480P/DTV 720P/DTV 1080I
LCD panel
XG-C40XU/XE
PAL/SECAM/NTSC 3.58/NTSC 4.43/DTV 480P/DTV 720P/DTV 1080I
LCD panel
×
3, RGB optical shutter method
Panel size: 22.9 mm (0.9") (13.9 [H]
×
18.5 [W] mm)
Display method: Translucent TN liquid crystal panel
Drive method: TFT (Thin Film Transistor) Active Matrix panel
No. of dots: 786,432 dots (1,024 [H]
Drive method: TFT (Thin Film Transistor) Active Matrix panel
No. of dots: 786,432 dots (1,024 [H]
×
768 [V])
1–1.3
×
zoom lens, F1.7–2.0, f = 33–43 mm
DC 200 W lamp
250:1
RCA Connector: VIDEO, composite video, 1.0 Vp-p, sync negative, 75
250:1
RCA Connector: VIDEO, composite video, 1.0 Vp-p, sync negative, 75
Ω
terminated
RCA Connector: AUDIO, 0.5 Vrms more than 22 k
Ω
(stereo)
4-pin Mini DIN connector
Y (luminance signal): 1.0 Vp-p, sync negative, 75
Y (luminance signal): 1.0 Vp-p, sync negative, 75
Ω
terminated
C (chrominance signal): Burst 0.286 Vp-p, 75
Ω
terminated
560 TV lines (video input), 750 TV lines (DTV 720P input, Dot by Dot)
3 W (monaural)
15-
3 W (monaural)
15-
PIN
MINI
D-
SUB
CONNECTOR
(INPUT 1, 2):
RGB separate/composite sync/sync on green type analog input: 0–0.7 Vp-p, positive,
75
75
Ω
terminated
S
TEREO
M
INIJACK
: AUDIO, 0.5 Vrms, more than 22 k
Ω
(stereo)
H
ORIZONTAL
SYNC
.
SIGNAL
: TTL level (positive/negative) or composite sync (Apple only)
V
ERTICAL
SYNC
.
SIGNAL
: Same as above
12–230 MHz
43–200 Hz
15–126 kHz
9-pin Mini DIN female connector (RS-232C Input Port)
8 cm (3
43–200 Hz
15–126 kHz
9-pin Mini DIN female connector (RS-232C Input Port)
8 cm (3
3
⁄
32
") round
AC 100–240 V
3.3 A
50/60 Hz
300 W
41
3.3 A
50/60 Hz
300 W
41
°
F to + 104
°
F (+ 5
°
C to + 40
°
C)
-4
°
F to + 140
°
F (– 20
°
C to + 60
°
C)
Plastic
38 kHz
Wave length: 650 nm / Max. output: 1 mW / Class
38 kHz
Wave length: 650 nm / Max. output: 1 mW / Class
II
Laser Product
9
1
/
64
"
(W)
×
4
49
/
64
"
(H)
×
12
13
/
64
"
(D) (229
×
121
×
310 mm) (main body only)
9
19
/
32
"
(W)
×
5
9
/
32
"
(H)
×
14
7
/
64
"
(D) (243.5
×
134
×
358.4 mm) (including adjustment feet
and projecting parts)
10.6 lbs. (4.8 kg)
Remote control, Two AA size batteries, Power cord (11' 10" 3.6m), Computer RGB cable
(9' 10" 3 m), Computer audio cable (9' 10" 3 m), USB mouse control cable (3' 3" 1 m),
DIN-D-sub RS-232C cable (6
10.6 lbs. (4.8 kg)
Remote control, Two AA size batteries, Power cord (11' 10" 3.6m), Computer RGB cable
(9' 10" 3 m), Computer audio cable (9' 10" 3 m), USB mouse control cable (3' 3" 1 m),
DIN-D-sub RS-232C cable (6
45
/
64
" 15 cm), Remote mouse receiver, Extra air filter, Lens cap
(attached), CD-ROM, LCD projector operation manual, LCD projector quick references,
Sharp Advanced Presentation Software operation manual
Lamp unit (Lamp/cage module) (BQC-XGC40XU/1), Remote control (RRMCG1579CESA),
(RRMCG1584CESA),AA size batteries, Power cord (QACCU5013CEZZ(XG-C40XU),
QACCB5024CENA(XG-C40XE),QACCV4002CEZZ(XG-C40XE)), Computer RGB cable
(QCNWG0002CEZZ), Computer audio cable (QCNW-4870CEZZ), USB mouse control
cable (QCNWG0007CEPZ), DIN-D-sub RS-232C cable (QCNW-5288CEZZ), Remote mouse
receiver (RUNTK0673CEZZ), Air filter (PFILD0076CEZZ), Lens cap (GCOVH1307CESB),
CD-ROM (UDSKA0053CEN1),(UDSKA0057CEN1), LCD projector operation manual
(TINS-7482CEZZ),(TINS-7533CEZZ), LCD projector quick references (TINS-7483CEZZ),
(TINS-7534CEZZ, TINS-7535CEZZ, TINS-7536CEZZ), Sharp Advanced Presentation
Software operation manual (TINS-7538CEZZ),(TINS-7537CEZZ)
This unit has some inactive TFTs within acceptable tolerances which
may result in illuminated or inactive dots on the picture screen. This
will not affect the picture quality or the life expectancy of the unit.
may result in illuminated or inactive dots on the picture screen. This
will not affect the picture quality or the life expectancy of the unit.
This SHARP projector uses LCD (Liquid Crystal Display) panels. These
very sophisticated panels contain 786,432 pixels (
very sophisticated panels contain 786,432 pixels (
×
RGB) TFTs (Thin
Film Transistors). As with any high technology electronic equipment
such as large screen TVs, video systems and video cameras, there
are certain acceptable tolerances that the equipment must conform
to.
such as large screen TVs, video systems and video cameras, there
are certain acceptable tolerances that the equipment must conform
to.
Specifications are subject to change without notice.
Specifications
3
XG-C40XU/XE
INPORTANT SERVICE SAFETY NOTES (for USA)
Ë
Service work should be performed only by qualified service technicians who are
thoroughly familiar with all safety checks and servicing guidelines as follows:
thoroughly familiar with all safety checks and servicing guidelines as follows:
WARNING
1. For continued safety, no modification of any circuit
should be attempted.
2. Disconnect AC power before servicing.
BEFORE RETURNING THE PROJECTOR:
(Fire & Shock Hazard)
(Fire & Shock Hazard)
Before returning the projector to the user, perform
the following safety checks:
1. Inspect lead wires are not pinched between the
the following safety checks:
1. Inspect lead wires are not pinched between the
chassis and other metal parts of the projector.
2. Inspect all protective devices such as non-metallic
control knobs, insulating materials, cabinet backs,
adjustment and compartment covers or shields,
isolation resistor-capacity networks, mechanical
insulators, etc.
adjustment and compartment covers or shields,
isolation resistor-capacity networks, mechanical
insulators, etc.
3. To be sure that no shock hazard exists, check for
current leakage in the following manner:
»
Plug the AC cord directly into a 120-volt AC outlet,
(Do not use an isolation transformer for this test).
(Do not use an isolation transformer for this test).
»
Using two clip leads, connect a 1.5k ohm, 10 watt
resistor paralleled by a 0.15
resistor paralleled by a 0.15
µ
F capacitor in parallel
between all exposed metal cabinet parts and earth
ground.
ground.
»
Use an AC voltmeter with sensitivity of 5000 ohm per
volt., or higher, sensitivity to measure the AC voltage
drop across the resistor (See Diagram).
volt., or higher, sensitivity to measure the AC voltage
drop across the resistor (See Diagram).
»
All checks must be repeated with the AC plug
connection reversed. (If necessary, a non-polarized
adapter plug must be used only for the purpose of
completing these checks.)
Any reading of 0.3 volts RMS (this corresponds to
0.2 milliamp. AC.) or more is excessive and indicates
a potential shock hazard which must be corrected
before returning the unit to the owner.
12345678901234567890123456789012123456789012345678901234567890121234567890123456789012345678901212
12345678901234567890123456789012123456789012345678901234567890121234567890123456789012345678901212
12345678901234567890123456789012123456789012345678901234567890121234567890123456789012345678901212
12345678901234567890123456789012123456789012345678901234567890121234567890123456789012345678901212
12345678901234567890123456789012123456789012345678901234567890121234567890123456789012345678901212
12345678901234567890123456789012123456789012345678901234567890121234567890123456789012345678901212
SAFETY NOTICE
Many electrical and mechanical parts in DLP Projector
have special safety-related characteristics.
These characteristics are often not evident from visual
inspection, nor can protection afforded by them be
necessarily increased by using replacement components
rated for higher voltage, wattage, etc.
Replacement parts which have these special safety
characteristics are identified in this manual; electrical
components having such features are identified by “
å
”
and shaded areas in the Replacement Parts Lists and
Schematic Diagrams. For continued protection,
replacement parts must be identical to those used in the
original circuit. The use of a substitute replacement parts
which do not have the same safety characteristics as
the factory recommended replacement parts shown in
this service manual, may create shock, fire or other
hazards.
AVIS POUR LA SECURITE
De nombreuses pièces, électriques et mécaniques, dans
les projecteur à DLP présentent des caractéristiques
spéciales relatives à la sécurité, qui ne sont souvent
pas évidentes à vue.
Le degré de protection ne peut pas être nécessairement
augmentée en utilisant des pièces de remplacement
étalonnées pour haute tension, puissance, etc.
Les pièces de remplacement qui présentent ces
caractéristiques sont identifiées dans ce manuel;
les pièces électriques qui présentent ces particularités
sont identifiées par la marque “
å
” et hachurées dans la
liste des pièces de remplacement et les diagrammes
schématiques. Pour assurer la protection, ces pièces
doivent être identiques à celles utilisées dans le circuit
d’origine. L’utilisation de pièces qui n’ont pas les mêmes
caractéristiques que les pièces recommandées par
l’usine, indiquées dans ce manuel, peut provoquer des
électrocutions, incendies ou autres accidents.
WARNING: The bimetallic component has the primary
conductive side exposed. Be very careful in
handling this component when the power is on.
handling this component when the power is on.
AVERTISSEMENT: La composante bimétallique dispose du
conducteur primaire dénudé. Faire
attention lors de la manipulation de cette
composante sous tension.
attention lors de la manipulation de cette
composante sous tension.
AC
VOLTMETER
1.5k ohm (10W)
0.15
µ
F
TEST PROBE
TO EXPOSED
METAL PARTS
METAL PARTS
CONNECT TO KNOWN
EARTH GROUND
EARTH GROUND
4
XG-C40XU/XE
NOTE POUR LE PERSONNEL
D’ENTRETIEN
D’ENTRETIEN
PRECAUTION POUR LES RADIATIONS UV
La source de lumière, la lampe mètal halide , dans le
projecteur LCD émet de petites quantités de
radiation UV.
projecteur LCD émet de petites quantités de
radiation UV.
EVITEZ TOUTE EXPOSITION DIRECTE
DES YEUX ET DE LA PEAU.
DES YEUX ET DE LA PEAU.
Pour votre sécurité, nous vous prions de respecter
les points suivants:
les points suivants:
1. Toujours porter des lunettes de soleil lors d’un
entretien du projecteur
avec la lampe allumée
et le haut du coffret retiré.
avec la lampe allumée
et le haut du coffret retiré.
2. Ne pas faire fonctionner la lampe à l’extérieur du
boîtier de lampe.
3. Ne pas faire fonctionner plus de 2 heures avec le
coffret retiré.
Précautions pour les radiations UV
et la lampe moyenne pression
et la lampe moyenne pression
1. Toujours débrancher la fiche AC lors du
remplacement de la lampe.
2. Laisser l’unité refroidir pendant une heure avant de
procéder à l’entretien.
3. Ne remplacer qu’avec une lampe du même type.
Type CLMPF0075CE01 or BQC-XGC40XU/1,
caractéristique 85V/200W.
caractéristique 85V/200W.
4. La lampe émet de petites quantités de radiation UV-
éviter tout contact direct avec les yeux.
5. La lampe moyenne pression implique un risque
d’explosion. Toujours suivre les instructions
d’installation décrites ci-dessous et manipuler la
lampe avec soin.
d’installation décrites ci-dessous et manipuler la
lampe avec soin.
NOTE TO SERVICE
PERSONNEL
PERSONNEL
UV-RADIATION PRECAUTION
The light source, metal halide lamp, in the LCD
projector emits small amounts of UV-Radiation.
AVOID DIRECT EYE AND SKIN EXPOSURE.
To ensure safety please adhere to the following:
1. Be sure to wear sun-glasses when servicing the
projector with the lamp
turned “on” and the top
enclosure removed.
turned “on” and the top
enclosure removed.
2. Do not operate the lamp outside of the lamp housing.
3. Do not operate for more than 2 hours with the
enclosure removed.
UV-Radiation and Medium Pressure
Lamp Precautions
Lamp Precautions
1. Be sure to disconnect the AC plug when replacing
the lamp.
2. Allow one hour for the unit to cool down before
servicing.
3. Replace only with same type lamp. Type
CLMPF0075CE01 or BQC-XGC40XU/1 rated 85V/
200W.
200W.
4. The lamp emits small amounts of UV-Radiation, avoid
direct-eye contact.
5. The medium pressure lamp involves a risk of
explosion. Be sure to follow installation instructions
described below and handle the lamp with care.
described below and handle the lamp with care.
12345678901234567890123456789012123456789012345
12345678901234567890123456789012123456789012345
12345678901234567890123456789012123456789012345
12345678901234567890123456789012123456789012345
12345678901234567890123456789012123456789012345
12345678901234567890123456789012123456789012345
12345678901234567890123456789012123456789012345
12345678901234567890123456789012123456789012345
12345678901234567890123456789012123456789012345
12345678901234567890123456789012123456789012345

