Read Sharp PG-M25XE (serv.man38) Technical Bulletin online
LV064
Sharp Electronics (UK) Ltd., Technical Services Group
Model
PGM20XE, PGM25XE
Problem
Intermittent start-up / shut down (Locks up)
• The lamp does not light up after turning the power on.
• The lamp shuts down while in use.
• The colour wheel does not work.
• The lamp does not light up after turning the power on.
• The lamp shuts down while in use.
• The colour wheel does not work.
Cause
IC8025 stopped due to the data communication error with a voltage drop in 2.5V line.
Servicing
When service is required for the above model with this phenomenon, please take the
following steps.
1. Modify the power unit. (Refer to the power unit modification procedure on the page 2.)
following steps.
1. Modify the power unit. (Refer to the power unit modification procedure on the page 2.)
• Add a 100k ohm resistor (VRS-CY1JF104J ) in parallel to R7421.
• Adjust the voltage of 2.5V line to 2.62±0.02 with VR7401.
• Adjust the voltage of 2.5V line to 2.62±0.02 with VR7401.
2. Update the firmware. (Refer to the firmware update procedure on the page 3 to 36.).
Parts
Ref. No.
Part code
Description
Price code
R7421
VRS-CY1JF104J
Resistor, 100 k ohms
AA
INTERMITTENT STARTUP / SHUT DOWN
(LOCKS UP)
TECHNICAL BULLETIN
Date:
12 May 2003
Model: PGM20/25X
Ref.:
Ref.:
002
Colour: White
Page:
Page:
1 of 34
LV064
Sharp Electronics (UK) Ltd., Technical Services Group
POWER UNIT MODIFICATION PROCEDURE
Tools required:
Extension cable (QCNW-A295WJZZ : SERVICE JIG)
Procedure:
1. Referring to the service manual, remove the top cabinet.
Extension cable (QCNW-A295WJZZ : SERVICE JIG)
Procedure:
1. Referring to the service manual, remove the top cabinet.
• Take care not to break the tab (next to the lens).
• Take care not to break the speaker wire when disconnecting it from the socket.
• Take care not to break the speaker wire when disconnecting it from the socket.
2. Referring to the service manual, remove the PC I/F unit.
• Disconnect the FPC from the socket SC8001 (81 pins).
3. Referring to the service manual, remove the cooling fan (for power).
• Disconnect the connector from the socket P3101(3 pins).
4. Disconnect the EA connector (13 pins) between the PFC unit and the input unit.
5. Remove the PFC unit.
5. Remove the PFC unit.
• Remove the four lock screws.
• Disconnect the connectors CN7004 (thermal fuse), CN7003 (LF-sw), CN702 (PL),
• Disconnect the connectors CN7004 (thermal fuse), CN7003 (LF-sw), CN702 (PL),
CN7103 (power unit) and CN7104 (power unit).
6. Remove the power unit.
• Remove the three lock screws.
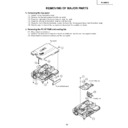
7. Add a 100 k ohm resistor (VRS-CY1JF104J) in parallel to R7421. (See the below
figure.)
Note: Make sure that it has no solder bridge and dry-joint etc.
8. Connect the connectors CN7004, CN7003, CN702, CN7103 and CN7104.
9. Using the extension cable (QCNW-A295WJZZ), connect the EA socket between the
8. Connect the connectors CN7004, CN7003, CN702, CN7103 and CN7104.
9. Using the extension cable (QCNW-A295WJZZ), connect the EA socket between the
PFC unit and the input unit. Note: Insulate all the cabinets not to touch the power unit
during adjustment.
during adjustment.
10.Connect the AC cord to the connector CN701 of the PFC unit.
Note: Make sure that an image is projected.
11. Adjust the voltage of 2.5V line to 2.62±0.02V with VR7401. (See the below figure.)
Note: Make sure that an image is projected.
11. Adjust the voltage of 2.5V line to 2.62±0.02V with VR7401. (See the below figure.)
• Measuring point of 2.5V line: Pin 9 (or 10) of the EA socket.
• GND : Pin 11 of the EA socket
Then, make sure that the voltage of 3.3V line is within 3.4±0.1V at the pin 12 (or 13) of
the EA socket.
• GND : Pin 11 of the EA socket
Then, make sure that the voltage of 3.3V line is within 3.4±0.1V at the pin 12 (or 13) of
the EA socket.
12. Turn off the power and then disconnect the extension cable.
13. Referring to the service manual, re-assemble the power unit and the PFC unit.
13. Referring to the service manual, re-assemble the power unit and the PFC unit.
Figure:
LV064
Sharp Electronics (UK) Ltd., Technical Services Group
In case of PG-M20X
Tools required:
• PC which have the Microsoft Windows 98 Second Edition operating system and the USB
• PC which have the Microsoft Windows 98 Second Edition operating system and the USB
interface
• USB Cable
1. Installing the Tera Term Pro(communication program) into the PC
1-1. Turn on the PC.
1-2. Installing the Tera Term Pro (communication program) into the PC
(1) Decompress “ttermp23.zip” and run “setup.exe” in the folder.
(2) The “Language” list box appears in the dialog box. Select “English” and then
(2) The “Language” list box appears in the dialog box. Select “English” and then
click “Continue”.
(3) The “NOTE: ~” message appears in the dialog box. Click “Continue”.
LV064
Sharp Electronics (UK) Ltd., Technical Services Group
(4) The “Destination Path” dialog box appears. Click “Continue”. It is not
necessary to change the default destination path(c:\PROGRAM
FILES\TTERMPRO).
FILES\TTERMPRO).
(5) The “Complete” dialog box appears. Click “OK”.
Important For M20X
1-3. Copying the update files into the PC for M20X
Decompress “M20X_firmware.zip” and then copy the following files in the folder to the
“c:\PROGRAM FILES\TTERMPRO”
folder in which the Tera Term Pro has been
installed.
If you copy these files to another folder, the Tera Term Pro may stop on the way to
update.
If the message of the overwriting confirmation is indicated, overwrite it.
If you copy these files to another folder, the Tera Term Pro may stop on the way to
update.
If the message of the overwriting confirmation is indicated, overwrite it.
Files(9 files):
comsearch.ttl, fwp_m20x_new.ttl, fwp_m20x_old.ttl, loader_m20x.bwh,
pj_jffs_m20x.bwh, pj_mtd_m20x.bwh, zImage_m20x.bwh, Teraterm.ini, Tera192.ini,
pj_jffs_m20x.bwh, pj_mtd_m20x.bwh, zImage_m20x.bwh, Teraterm.ini, Tera192.ini,


