Read Sharp PG-M20S (serv.man28) User Guide / Operation Manual online
Setup and Connections
Setup and Connections
Up
Down
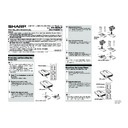
Foot releases
Adjustment feet
Setup
Using the Adjustment
Feet
Feet
The height of the projector can be adjusted
using the adjustment feet when the surface
of the projector is placed on is uneven or when
the screen is slanted.
The projection of the image can be made
higher by adjusting the projector when it is in
a location lower than the screen.
using the adjustment feet when the surface
of the projector is placed on is uneven or when
the screen is slanted.
The projection of the image can be made
higher by adjusting the projector when it is in
a location lower than the screen.
1
Press the foot releases.
2
Lift the projector to adjust its
height and remove your hands
from the foot releases.
height and remove your hands
from the foot releases.
3
Rotate the adjustment feet to
make minor changes.
make minor changes.
Note
•
When returning the projector to its origi-
nal position, hold the projector firmly, press
the foot releases and then lower it.
nal position, hold the projector firmly, press
the foot releases and then lower it.
•
The projector is adjustable up to approxi-
mately 5.5 degrees from the standard po-
sition.
mately 5.5 degrees from the standard po-
sition.
Info
•
Do not press the foot releases when the
feet are extended without firmly holding
the projector.
feet are extended without firmly holding
the projector.
•
Do not hold the lens when lifting or lower-
ing the projector.
ing the projector.
•
When lowering the projector, be careful not
to get your fingers caught in the area be-
tween the adjustment feet and the projector.
to get your fingers caught in the area be-
tween the adjustment feet and the projector.
-16
Setup and Connections
-17
90
°
90
°
Example of Standard Setup
Setting up the Screen
Position the projector perpendicular to the screen with all feet flat and level to achieve an optimal image.
Note
•
The projector lens should be centered in the middle of the screen. If the horizontal line passing through the
lens center is not perpendicular to the screen, the image will be distorted, making viewing difficult.
lens center is not perpendicular to the screen, the image will be distorted, making viewing difficult.
•
For optimal image, position the screen so that it is not in direct sunlight or room light. Light falling directly on
the screen washes out the colors, making viewing difficult. Close the curtains and dim the lights when
setting up the screen in a sunny or bright room.
the screen washes out the colors, making viewing difficult. Close the curtains and dim the lights when
setting up the screen in a sunny or bright room.
•
A polarizing screen cannot be used with this projector.
Standard Setup (Front Projection)
■ Place the projector at the required distance from the screen
according to the desired picture size. (See page
18
.)
Side View
Top View
•
The distance from the screen to the projec-
tor may vary depending on the size of the
screen.
tor may vary depending on the size of the
screen.
P.18
•
The default setting can be used, when plac-
ing the projector in front of the screen. If the
projected image is reversed or inverted, re-
adjust the setting to “Front” in “PRJ Mode”.
ing the projector in front of the screen. If the
projected image is reversed or inverted, re-
adjust the setting to “Front” in “PRJ Mode”.
P.60
•
Place the projector so that the horizontal line
that passes through the center of the lens is
perpendicular to the screen.
that passes through the center of the lens is
perpendicular to the screen.
Audi-
ence
-18
Setup (cont.)
Screen Size and Projection Distance
90
°
H
Screen
Base line:
Horizontal line passing through
the lens center.
Horizontal line passing through
the lens center.
Lens center
L:Projection distance
The formula for picture size and
projection distance
L1 (ft)
= (0.062081X – 0.038676) / 0.3048
L2 (ft)
= (0.051456X – 0.038901) / 0.3048
H (in)
= – 0.0848X
X:
Picture size (diag.) (in)
L:
Projection distance (m)
L1: Maximum projection distance (ft)
L2: Minimum projection distance (ft)
H: Distance from the lens center to
the bottom of the image (in)
The formula for picture size and
projection distance
L1 (ft)
= (0.067635X – 0.038676) / 0.3048
L2 (ft)
= (0.056060X – 0.038901) / 0.3048
H (in) = – 0.1741X
The formula for picture size and
projection distance
L1 (ft)
= (0.082775X – 0.038676) / 0.3048
L2 (ft)
= (0.068608X – 0.038901) / 0.3048
H (in) = – 0.213072X
Note
• There is an error of
±
3% in the formula above.
• Values with a minus (–) sign indicate the distance of the lens center below the bottom of the image.
NORMAL Mode (4:3)
Picture (Screen) size
Projection distance (L)
Diag. (X)
Width
Height
Maximum (L1)
Minimum (L2)
300" (762 cm)
240" (610 cm)
180" (457 cm) –
50' 6" (15.4 m) –25
28/64"
(–64.6 cm)
250" (635 cm)
200" (508 cm)
150" (381 cm) 50' 10" (15.5 m) 42' 1" (12.8 m) –21
13/64"
(–53.8 cm)
200" (508 cm)
160" (406 cm)
120" (305 cm) 40' 7" (12.4 m) 33' 8" (10.3 m) –16
61/64"
(–43.1 cm)
150" (381 cm)
120" (305 cm)
90" (229 cm) 30' 5" (9.3 m)
25' 2" (7.7 m)
–12
46/64"
(–32.3 cm)
100" (254 cm)
80" (203 cm)
60" (152 cm) 20' 3" (6.2 m)
16' 9" (5.1 m)
–8
31/64"
(–21.5 cm)
84" (213 cm)
67" (170 cm)
50" (127 cm) 17' 0" (5.2 m)
14' 1" (4.3 m)
–7
8/64"
(–18.1 cm)
72" (183 cm)
58" (147 cm)
43" (109 cm) 14' 6" (4.4 m)
12' 0" (3.7 m)
–6
7/64"
(–15.5 cm)
60" (152 cm)
48" (122 cm)
36" (91 cm)
12' 1" (3.7 m)
10' 0" (3.0 m)
–5
6/64"
(–12.9 cm)
40" (102 cm)
32" (81 cm)
24" (61 cm)
8' 0" (2.4 m)
6' 8" (2.0 m)
–3
25/64"
(–8.6 cm)
STRETCH Mode (16:9)
Picture (Screen) size
Projection distance (L)
Diag. (X)
Width
Height
Maximum (L1)
Minimum (L2)
250" (635 cm)
218" (554 cm)
123" (312 cm) –
45'10" (14.0 m) –43
34/64"
(–110.6 cm)
225" (572 cm)
196" (498 cm)
110" (279 cm) 49' 10" (15.2 m) 41' 3" (12.6 m) –39
11/64"
(–99.5 cm)
200" (508 cm)
174" (442 cm)
98" (249 cm) 44' 3" (13.5 m) 36' 8" (11.2 m) –34
52/64"
(–88.4 cm)
150" (381 cm)
131" (333 cm)
74" (188 cm) 33' 2" (10.1 m) 27' 6" (8.4 m)
–26
7/64"
(–66.3 cm)
133" (338 cm)
116" (295 cm)
65" (165 cm) 29' 5" (9.0 m)
24' 4" (7.4 m)
–23
10/64"
(–58.8 cm)
106" (269 cm)
92" (234 cm)
52" (132 cm) 23' 5" (7.1 m)
19' 4" (5.9 m)
–18
29/64"
(–46.9 cm)
100" (254 cm)
87" (221 cm)
49" (124 cm) 22' 1" (6.7 m)
18' 3" (5.6 m)
–17
26/64"
(–44.2 cm)
92" (234 cm)
80" (203 cm)
45" (114 cm) 20' 3" (6.2 m)
16' 10" (5.1 m)
–16
1/64"
(–40.7 cm)
84" (213 cm)
73" (185 cm)
41" (104 cm) 18' 6" (5.6 m)
15' 4" (4.7 m)
–14
40/64"
(–37.1 cm)
72" (183 cm)
63" (160 cm)
35" (89 cm)
15' 10" (4.8 m)
13' 1" (4.0 m)
–12
34/64"
(–31.8 cm)
60" (152 cm)
52" (132 cm)
29" (74 cm)
13' 2" (4.0 m)
10' 11" (3.3 m)
–10
29/64"
(–26.5 cm)
40" (102 cm)
35" (89 cm)
20" (51 cm)
8' 9" (2.7 m)
7' 3" (2.2 m)
–6
62/64"
(–17.7 cm)
BORDER Mode (4:3)
Picture (Screen) size
Projection distance (L)
Diag. (X)
Width
Height
Maximum (L1)
Minimum (L2)
200" (508 cm)
160" (406 cm)
120" (305 cm) –
44' 11" (13.7 m) –42
39/64"
(–108.2 cm)
180" (457 cm)
144" (366 cm)
108" (274 cm) 48' 9" (14.9 m) 40' 5" (12.3 m) –38
23/64"
(–97.4 cm)
150" (381 cm)
120" (305 cm)
90" (229 cm) 40' 7" (12.4 m) 33' 8" (10.3 m) –31
61/64"
(–81.2 cm)
100" (254 cm)
80" (203 cm)
60" (152 cm) 27' 0" (8.2 m)
22' 5" (6.8 m)
–21
20/64"
(–54.1 cm)
84" (213 cm)
67" (170 cm)
50" (127 cm) 22' 8" (6.9 m)
18' 9" (5.7 m)
–17
57/64"
(–45.5 cm)
72" (183 cm)
58" (147 cm)
43" (109 cm) 19' 5" (5.9 m)
16' 1" (4.9 m)
–15
22/64"
(–39.0 cm)
60" (152 cm)
48" (122 cm)
36" (91 cm)
16' 2" (4.9 m)
13' 5" (4.1 m)
–12
50/64"
(–32.5 cm)
40" (102 cm)
32" (81 cm)
24" (61 cm)
10' 9" (3.3 m)
8' 11" (2.7 m)
–8
33/64"
(–21.6 cm)
Distance from the lens
center to the bottom
of the image (H)
Distance from the lens
center to the bottom
of the image (H)
Distance from the lens
center to the bottom
of the image (H)


