Read Sharp MX-FX11 (serv.man4) Service Manual online
MX-7040N MX-FX11 (FACSIMILE EXPANSION KIT) 25 – 1
MX-7040N
Service Manual
[25] MX-FX11 (FACSIMILE EXPANSION KIT)
1. Unpacking
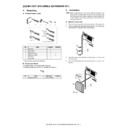
A. Packed items check
*1: Not use these screws at installation.
B. Necessary items
The following item is not packed with this product.
This part is available as service part, prepare it in advance.
This part is available as service part, prepare it in advance.
2. Installation
NOTE: Before installation, be sure to turn both the operation and
main power switches off and disconnect the power plug
from the power outlet. Make double sure that the data lamp
on the operation panel does not light up or blink when per-
forming installation.
from the power outlet. Make double sure that the data lamp
on the operation panel does not light up or blink when per-
forming installation.
A. Attach the fax unit
1)
Remove the two screws from the rear cabinet of the main unit.
2)
Attach the step screw (M4) (Necessary items) to one of the two
positions from which the screws are removed.
positions from which the screws are removed.
3)
Insert the step screw into the mounting hole of the fax unit
(Packed items).
(Packed items).
4)
Use a screw that has been removed in step 1) to secure the
fax unit.
fax unit.
No.
Name
Quantity
Remarks
1
Fax unit
1
2
Line cable
1
3
Ferrite core
2
4
Step screw (M4)
1
*1
5
Step screw (M3)
1
*1
6
M3 screw
1
7
Line cable
1
No.
Name
Parts code
Quantity
1
Step screw (M4)
LX-BZ1169FCZZ
1
2
1
4
3
6
7
U.K
France
Germany
Australia
For other destinations
5
1
1
1
2
2
1
MX-7040N MX-FX11 (FACSIMILE EXPANSION KIT) 25 – 2
B. Pull out the MFP control unit
1)
Remove the screw, and remove the right rear cabinet.
2)
Remove the screw, and pull out the MFP control unit.
C. Connect the interface cable
1)
Connect the interface cable to the MFP control PWB.
NOTE: Check that the connector is not obliquely inserted.
2)
Push the interface cable into the recessed portion of the sheet
metal on the MFP control unit.
metal on the MFP control unit.
3)
Fix a snap band with the M3 screw (Packed items).
D. Attach the MFP control unit
1)
Attach the MFP control unit into the main unit, and fix the
screw.
screw.
2)
Cut out the cut-out portion of the right rear cabinet.
3)
Fit the interface cable into the opening that has been cut.
Attach the right rear cabinet, and fix the screw.
Attach the right rear cabinet, and fix the screw.
1
2
1
1
2
1
2
3
2
2
1
2
1
MX-7040N MX-FX11 (FACSIMILE EXPANSION KIT) 25 – 3
E. Turn ON the power of the main unit
1)
Connect the power plug of the machine to the power outlet,
and turn ON the main power switch and the operation panel
power switch.
and turn ON the main power switch and the operation panel
power switch.
F. Destination setting
1)
Enter the SIM26-6 mode.
2)
Check to confirm that the destination setting of the machine
matches the specifications of the FAX destination. If not, the
FAX may not function properly.
matches the specifications of the FAX destination. If not, the
FAX may not function properly.
G. Clear theFAX related software switches
1)
Enter the SIM66-2 mode.
2)
Press DEST CODE button.
3)
Take a note of the corresponding destination code.
4)
Press BACK button to return to the code entry mode.
5)
Enter the destination code taken in procedure 3), and press
SET button.
SET button.
6)
Press EXECUTE and YES buttons.
H. Line cable connection
1)
Connect the line cable (Packed items) on the line to the modu-
lar jack indicated as “LINE.”
lar jack indicated as “LINE.”
MEMO: When connecting the line cable (to LINE or TEL), wind the
line cable two turns around the ferrite core (Packed items) as
shown in the figure, and connect to the modular jack which is
marked with “LINE.”
line cable two turns around the ferrite core (Packed items) as
shown in the figure, and connect to the modular jack which is
marked with “LINE.”
About
10 cm
10 cm

