Read Sharp MX-6201N / MX-7001N (serv.man36) Service Manual online
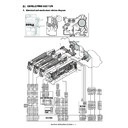
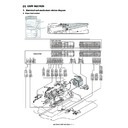
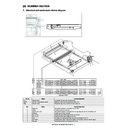
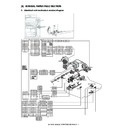
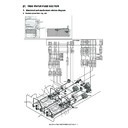
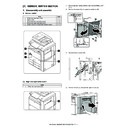
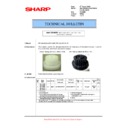
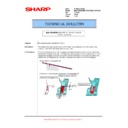
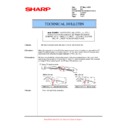
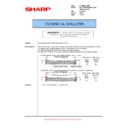
MX-7001N DEVELOPING SECTION L – 1
MX-7001N
Service Manual
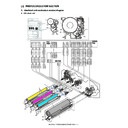
[L] DEVELOPING SECTION
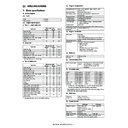
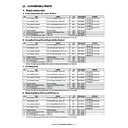
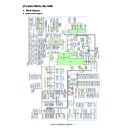
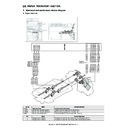
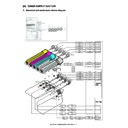
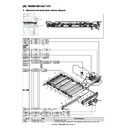
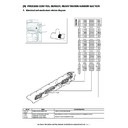
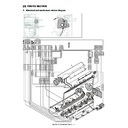
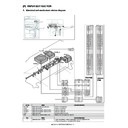
1. Electrical and mechanism relation diagram
CN13
VH-2P
B07B-PASK
PCU PWB
B40B-PNDZS-1
DVKM_GAIN
DVKM_CW/CCW
15
17
6
8
2
25
27
24V4
1
3
P-GND
11
5
5VN
7
DVKM_LD
13
/DVKM_CK
9
/DVKM_D
D-GND
DVKM_GAIN
DVKM_CW/CCW
24V4
P-GND
5VN
DVKM_LD
/DVKM_CK
/DVKM_D
D-GND
DVKM_GAIN
DVKM_CW/CCW
5VN
DVKM_LD
/DVKM_CK
/DVKM_D
D-GND
1
4
3
24V4
1
P-GND
2
5
2
29
4
30
10
6
8
2
25
27
29
4
30
10
6
7
CN9
B7P-PH-K-S
B30B-PNDZS-1
/DVCM_D
DVCM_LD
5
6
4
10
8
10
12
4
1
2
2
/DVCM_CK
INT24V2
P-GND
/DVCM_D
DVCM_LD
/DVCM_CK
INT24V2
P-GND
/DVCM_D
DVCM_LD
/DVCM_CK
INT24V2
P-GND
4
6
6
8
10
12
4
6
8
N.C
3
N.C
7
CN7
51021-0400
51021-0400
51021-0400
DF11-8DP-SP1
B30B-PNDZS-1
TCS_M
TSG_M
21
24V3
14
TSG_Y
14
10
24V3
10
23
TCS_M
23
21
24V3
21
4
D-GND
3
TSG_M
24V3
TCS_M
4
6
6
5
24V3
24V3
2
5
24V3
D-GND
4
7
7
TCS_Y
3
6
TCS_Y
D-GND
TSG_Y
1
2
4
3
1
2
4
3
1
8
5
7
6
8
5
7
6
8
5
7
6
8
5
7
6
8
5
7
6
8
TSG_Y
TSG_Y
6
5
D-GND
TSG_Y
8
TCS_Y
3
24V3
TCS_Y
TSG_M
D-GND
24V3
TCS_M
D-GND
TSG_M
25
5
25
TSG_M
25
12
23
12
TCS_Y
12
14
TSG_C
5
7
8
6
24V3
TCS_M
1
2
8
24V3
3
5
24V3
5
5
24V3
7
TCS_C
4
7
TCS_C
7
7
TCS_C
D-GND
D-GND
5
D-GND
6
TSG_C
TSG_C
6
TSG_C
5
9
TSG_C
9
11
D-GND
11
D-GND
11
9
10
TCS_C
TCS_C
24V3
24V3
6
4
4
GND
GND
GND
GND
CN1
CN6
BS-Y
24V3
P-GND
MC PWB
INT24V2
P-GND
BS-M
/HV_DATA
/HV_CLK
/HV_LD1
BS-C
B08B-PASK
B40B-PNDZS-1
10
5
6
7
8
3
2
1
4
HV_REM#
24V3
P-GND
INT24V2
P-GND
/HV_DATA
/HV_CLK
/HV_LD1
HV_REM#
1
2
3
5
7
6
8
VHR-3
BS-K
P
QR/P8-8P
S
P
QR/P8-8P
S
P
QR/P8-8P
S
PHNR-10-H,BU10P-TR-P-H
PHNR-10-H,BU10P-TR-P-H
PHNR-10-H,BU10P-TR-P-H
S
DF1B-26DE
P
P
DVCM
DVKM
BS_M
BS_C
BS_Y
TCS_M
TCS_C
BS_K
TCS_Y
1
1
1
2
2
2
1
3
3
3
TCS_K
HTCS_K
2
3
PTMH_1
PTMH_2
51021-0400
24V3
5
6
7
8
5
6
7
8
13
15
17
D-GND
17
24V3
TCS_K
TCS_K
24V3
TCS_K
D-GND
TSG_K
23
21
19
22
24
26
11
13
15
17
11
TSG_K
TSG_K
TCS_K
D-GND
1
TSG_K
2
24V3
D-GND
4
3
11
3
2
1
11
3
2
1
D-GND
5VNPD
HTCS_K
DVK_CH
18
14
12
10
18
14
12
10
D-GND
5VNPD
HTCS_K
DVK_CH
12
13
14
10
FPCL2
PHTM_Kb
FPCL1
5VN
9
4
12
13
14
10
9
4
PHTM_Ka
D-GND
5VN
2
21
22
FPCL1
4
PHTM_Kb
FPCL2
5VN
FPCL1
FPCL2
20
16
2
21
22
4
20
16
D-GND
PHTM_Ka
DF3-3S-2C
D-GND
1
5VNPD
HTCS_K
2
3
30
DVK_CH
D-GND
HTCS_K
5VNPD
25
27
29
CN9
B30B-PNDZS-1
CN2
SM9B-GHS-TB
PHTM2_B
PHTM2_A
PHTM_A
DVK_CH_R
DVK_CH
4
1
5
2
PHTM_B
3
9
DVK DRIVER PWB
CN1
SM12B-GHS-TB
4
3
2
1
8
7
6
5
D-GND
24V3
5VNPD
FPCL2
FPCL1
PHTM_Kb
PHTM_Ka
DVK_CH
12
11
10
9
DVK_CH_R
D-GND
DVK_FM_LD
VFM_R
CN2
B12B-PNDZS-1
PHTM_Kb
8
PHTM_Ka
6
DRIVER
PWB
S
D
F1B-22DE
P
P
QR/P8-20P
S
4
2
3
1
4
2
3
1
PHTM_1b
PHTM_1a
DVK_CH
DVK_CH_R
R
SM-4pin
P
R
SM-5pin
P
2
3
1
2
3
1
PHTM_2b
PHTM_2a
NC
2
3
1
2
3
1
D-GND
5VNPD
HTCS_K
4
5
4
5
HTCS_CH
HTCS_CH
R
SM-3pin
P
4
MX-7001N DEVELOPING SECTION L – 2
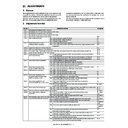
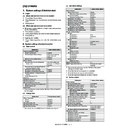
2. Operational descriptions
Electrostatic latent images generated on the OPC drum by the
laser (writing) units (laser image ray) are converted into visible
images by toner.
laser (writing) units (laser image ray) are converted into visible
images by toner.
Toner and carrier in the developing unit are stirred and transported
by the mixing roller.
By mixing and transporting, toner and carrier are negatively
charged due to mechanical friction.
The developing bias voltage (AC component and negative DC
component) is applied to the developing roller.
Negatively charged toner is attracted to the exposed section on the
OPC drum where the negative potential falls due to the developing
bias.
If the OPC drum is not exposed, the negative potential is higher
than the developing bias voltage, and toner is not attracted.
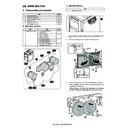
3. Disassembly and assembly
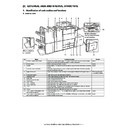
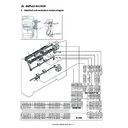
A. Development unit (CL)
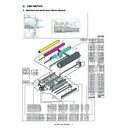
(1) Development unit (CL)
Signal
Name
Function/Operation
BS_C
Developer bias (C)
Developer bias
BS_K
Developer bias (K)
BS_M
Developer bias (M)
BS_Y
Developer bias (Y)
DVCM
Developer drive motor_CL
Drives the development section (CL)
DVKM
Developer drive motor_K
Drives the developement section (K) /Drives the separating operations of the primary transfer belt
HTCS_K
Hopper remaining sensor_K
PTMH_1
Intermediate hopper motor
Transports the toner
PTMH_2
Stirring motor
Stirs the toner
TCS_C
Toner density sensor (C) (ATC)
Detects the toner density in the developing unit
TCS_K
Toner density sensor (K) (ATC)
TCS_M
Toner density sensor (M) (ATC)
TCS_Y
Toner density sensor (Y) (ATC)
No.
Name
Function/Operation
1
Developer roller
Latent electrostatic images on the OPC drum are changed to visible images
2
Stirring roller
Stirring developer
3
Toner filter
Prevents dispersing of toner
4
DVK DRIVER PWB
Controls the toner stirring motor
Unit
Page
A
Development unit (CL)
L - 2
B
Development unit (BK)
L - 7
Unit
Parts
Mainte
nance
Page
1
Development
unit (CL)
unit (CL)
a
Developer (C/M/Y)
▲
L - 4
b
DV seal (CL)
▲
L - 6
c
DV side seal F (CL)
▲
d
DV side seal R (CL)
▲
e
Toner density sensor (ATC)
–
L - 6
f
Toner filter (CL)
▲
L - 6
Unit
1
Development unit (CL)
1-a
1-c
1-b
1-f
1-e
1-d
1
1
MX-7001N DEVELOPING SECTION L – 3
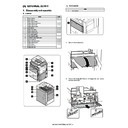
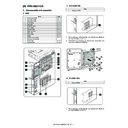
1)
Open the front cabinet (A).
2)
Turn the blue screw (B) counterclockwise. Check that the lock
is released as shown in (C).
* Failure to complete this step may damage the primary trans-
is released as shown in (C).
* Failure to complete this step may damage the primary trans-
fer belt.
3)
Remove the screw (D). Hold the drum fixing knob (E) by the
hand to not rotate, remove the screw (F). Remove the drum
fixing knob (E).
hand to not rotate, remove the screw (F). Remove the drum
fixing knob (E).
4)
Pull out the fixing cover (G).
5)
Loosen the screws (H), and open the cover (I) of the process
section.
section.
6)
Loosen the screw (J).
7)
Pinch the knob (K), and remove the development unit (CL) (L).
A
B
C
E
D
F
G
H
H
I
J
L
K
MX-7001N DEVELOPING SECTION L – 4
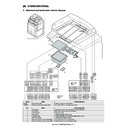
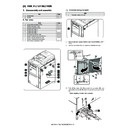
a. Developer (C/M/Y)
1)
Remove the development unit (CL). (Refer to the "(1) Devel-
opment unit (CL)".)
opment unit (CL)".)
2)
Remove the screws (A).
3)
Tilt the developing unit (CL) (B) so that developer is moved to
the MG roller side.
the MG roller side.
4)
Lift the cover (D) from the magnet roller side with the pawl at
the section (C) as the center of rotation, and slide it to the
arrow mark (E) side to remove.
(In order to prevent developer from attaching to the magnet.)
the section (C) as the center of rotation, and slide it to the
arrow mark (E) side to remove.
(In order to prevent developer from attaching to the magnet.)
5)
Take out the old developer (F), and infuse the developer (G).
* When replacing developer, use an extreme care not to drop
developer on the drive section (marked with {).
* [Important information]
(Note for cleaning the development unit)
If the development unit is cleaned with a cleaner or an air
blower with much developer in the development unit, static
electricity may be accumulated in the unit. In order to pre-
vent against this, note the following items.
If the development unit is cleaned with a cleaner or an air
blower with much developer in the development unit, static
electricity may be accumulated in the unit. In order to pre-
vent against this, note the following items.
Unit
Parts
Mainte
nance
1
Development unit
(CL)
(CL)
a
Developer (C/M/Y)
▲
1-a
A
A
B
D
C
E
G
1-a
F

