Read Sharp MX-1800N (serv.man32) Service Manual online
MX-1800N TRANSFER SECTION L – 1
MX-1800N
Service Manual
[L] TRANSFER SECTION
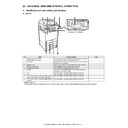
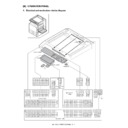
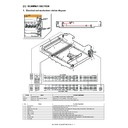
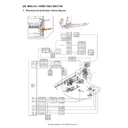
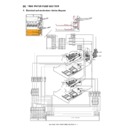
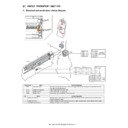
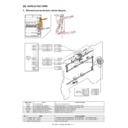
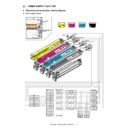
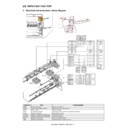
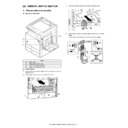
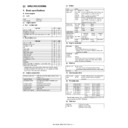
1. Electrical and mechanism relation diagram
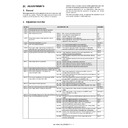
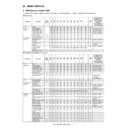
Signal name
Name
Functions and operations
1TC_CMY
Color trasnfer high voltage signal
1TC_K
B/W transfer high voltage signal
1TNFD
Waste toner full detection switch
Waste toner full detection
1TUD_CL
Transfer belt separation CL detection
Color transfer roller position detection signal
1TUD_K
Transfer belt separation BK detection
B/W transfer roller position detection signal
1TURC
Primary transfer separation clutch
Transfer roller separation control clutch
2TC
Secondary transfer high voltage signal
DVMK
Developer drive motor (K)
Transfer unit drive motor (Used together with the B/W developing drive roller)
WTNM
Waste toner drive motor
Stirs waste toner.
CN9
PHNR-3-H + BU03P-TR-P-H
B30B-PHDSS-B
CN1
CN34
2-TC
INT24V2
1
P-GND
2
CLR
/TC_CLK#
4
/TC_DATA#
3
/TC_LD#
5
/HV_REM#
6
B6P-PH-K-S
B40B-PADSS-B
B30B-PHDSS-B
CN1
B6P-PH-K-S
CN26
CN2
1TC_CL
3
HV_REM
7
MC_YMC
6
1TC_K
5
B32B-PHDSS-B
1TC_YMC
4
P-GND
2
INT24V2
1
B7P-PH-K-S
CN1
INT24V2
7
1TC-K
P-GND
6
1TC_YMC
4
1TC-CMY
1TC_K
3
MC_YMC
2
HV_REM
1
1TC_CL
5
B7P-PH-K-S
CN9
PHNR-3-H + BU03P-TR-P-H
B30B-PHDSS-B
HV_REM#
6
5
4
3
2
1
5
4
3
2
1
/HV_DATA#
/HV_CLK#
/HV_LD1#
/HV_LD1#
INT24V2
P-GND
/HV_CLK#
/HV_LD1#
HV_REM#
/HV_LD1#
HV_REM#
20
21
22
23
24
21
22
23
24
2
4
6
8
4
6
8
INT24V2
P-GND
/TC_CLK#
/TC_DATA#
2
1TUD_CL
11
1TUD_CL
1
2
1TUD_CL
1
3
3
5VLED
GND
9
13
12
14
14
5VLED
3
1
5VLED
D-GND
2
3
D-GND
5VLED
3
1TUD_K
1
D-GND
2
1
5VLED
2
1TUD_K
3
D-GND
2
1
3
1
3
5VLED
10
1TUD_K
D-GND
PCU PWB
2nd TC PWB
MC PWB
1st TC PWB
/TC_LD#
/HV_REM#
10
12
12
P-GND
/HV_DATA#
1TUD_CL
1TC_K
2TC
DVMK
1TURC
1TNFD
WTNM
1TC_CMY
R
SM18PIN
P
CN9
P
SL2PIN
R
1
1TNFD
1
2
17
D-GND
2
WTNM_1
1
WTNM_2
2
1
2
2
D-GND
1TNFD
WTNM_1
18
WTNM_2
3
1TNFD
3
4
D-GND
4
5
WTNM_1
5
6
WTNM_2
6
1TUD_K
CN12
PHNR-02-H + BU02P-TR-P-H
B32B-PHDSS-B
24V3
2
2
/1TURC
1
1
16
14
/1TURC
24V3
1
7
9
4
10
11
12
13
2
5
8
3
6
3
MX-1800N TRANSFER SECTION L – 2
2. Operational descriptions
A. Outline
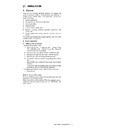
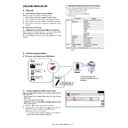
In this section, a high voltage is applied to transfer images to the
intermediate transfer belt and toner images on the intermediate
transfer belt are transferred to paper by the secondary transfer belt.
intermediate transfer belt and toner images on the intermediate
transfer belt are transferred to paper by the secondary transfer belt.
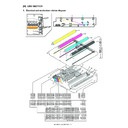
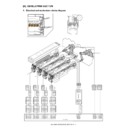
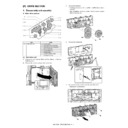
B. Primary (intermediate) transfer roller
separation mechanism and content
The primary transfer roller performs all pressure contact, all sepa-
ration, and only black contact depending on the operation mode.
When the roller separation clutch (1TURC) is turned ON, the trans-
fer cam rotates and the primary transfer link and the primary trans-
fer arm which is linked with the cam are shifted in the arrow
direction, performing separation of the roller.
The arm performs all pressure contact, all separation, and only
black contact.
black contact.
The primary transfer and the secondary transfer are driven together
with the black developing motor.
with the black developing motor.
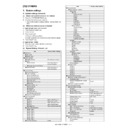
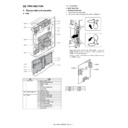
No.
Name
Functions and operations
1
Intermediate transfer blade
Cleans residual toner on the intermediate transfer belt.
2
Intermediate transfer belt
Transfers toner on the OPC drum to form toner images on the belt.
3
Primary transfer roller
Transfers toner images on the OPC drum to the intermediate transfer belt.
4
Transfer drive roller
Drives the transfer belt.
5
Transfer follower roller
Transfer belt follower drive
6
Tension roller
Applies a tension to the transfer belt.
7
Roller cleaning brush
Cleans the back surface of the transfer belt.
8
Y auxiliary roller
Retaining the belt position by separation of the Y transfer roller
9
Registration backup roller
Retaining the belt position in the process control and the registration section.
10
Secondary transfer belt
Transfers toner images on the intermediate transfer belt to paper.
11
Secondary transfer roller
Transfers toner images on the intermediate transfer belt to paper.
12
Secondary belt transfer roller
Drives the transfer belt.
13
Secondary belt tension roller
Applies a proper tension to the transfer belt.
1TUD_CL
1TUD_K
All pressure contact
ON
OFF
All separation
OFF
ON
Only black contact
OFF
OFF
All pressure contact
Only black pressure contact
All separation
MX-1800N TRANSFER SECTION L – 3
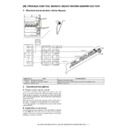
3. Disassembly and assembly
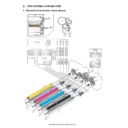
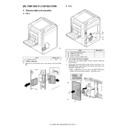
A. Primary transfer
(1) Primary transfer unit
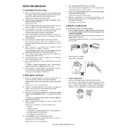
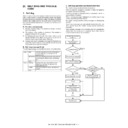
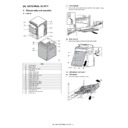
1) Open the front cover.
2)
Open the right door unit.
3)
Loosen the blue screw.
4)
Turn the blue screw (A) counterclockwise. Making sure that
the lock is released (B), open and then pull out the drum posi-
tioning unit.
* Failure to complete this step may damage the intermediate
the lock is released (B), open and then pull out the drum posi-
tioning unit.
* Failure to complete this step may damage the intermediate
transfer belt.
5)
Hold the specified position, and remove the primary transfer
unit.
unit.
(NOTE)
When the transfer belt tension of the primary transfer unit is
released manually, turn on the power again after completion of
the work. (Power OFF-ON) This procedure initializes the trans-
fer roller to return it to the home position.
When the transfer belt tension of the primary transfer unit is
released manually, turn on the power again after completion of
the work. (Power OFF-ON) This procedure initializes the trans-
fer roller to return it to the home position.
Unit
Parts
Maintenance
(1)
Primary
transfer unit
transfer unit
a
Intermediate transfer belt
b
Primary transfer blade
c
Primary transfer coat roller
{
d
Primary transfer conduction
collar
collar
e
Y auxiliary roller
{
f
Belt drive gear
g
Transfer drive roller
{
h
Transfer follower roller
{
i
Tension roller
{
j
Roller cleaning brush
k
Registration backup roller
l
Cleaner seal
m
Cleaner seal R
n
Transfer toner reception seal
o
TC roller bearing
(2)
Others
a
Transfer belt separation CL
detection
detection
b
Transfer belt separation BK
detection
detection
(1)-d
(1)-k
(1)-f
(1)-b
(1)-n
(1)
(1)-i
(1)-h
(1)-a
(2)-a
(2)-b
(1)-e
(1)-c
(1)-g
(1)-j
(1)-l
(1)-m
A
B
MX-1800N TRANSFER SECTION L – 4
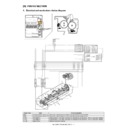
a. Intermediate transfer belt
* Do not replace the belt, and blade separately. When any of the
* Do not replace the belt, and blade separately. When any of the
three parts needs to be replaced, replace the other two parts as
well.
well.
* When replacing the belt, be sure to apply titanium hydroxide and
strontium titanate according to the instructions.
1) Remove the primary trasnfer unit.
2) Remove the transfer guide plate left unit.
3) Remove the parts.
2) Remove the transfer guide plate left unit.
3) Remove the parts.
4) Fold the CL section of the transfer frame and remove the inter-
mediate transfer belt.
* When installing, set the lot number inside the belt to the front
side.
[Precautions for installation]
When replacing the belt, make sure not to scratch or fold it.
Do not touch the surface of the belt with bare hands.
(Applying titanium hydroxide)
* Titanium hydroxide is fine powder, and may disperse when
When replacing the belt, make sure not to scratch or fold it.
Do not touch the surface of the belt with bare hands.
(Applying titanium hydroxide)
* Titanium hydroxide is fine powder, and may disperse when
removing from the bag. To prevent against dispersion, handle the
bag of titanium hydroxide at a lower position.
bag of titanium hydroxide at a lower position.
* Pushing the bag lightly against the belt provides sufficient appli-
cation of titanium hydroxide. Lift the bag from the application sur-
face by 5 mm or less.
face by 5 mm or less.
* Apply titanium hydroxide before installing the cleaner unit.
1)
Install the primary transfer UN with its backside facing upward
and remove the cleaner frame UN.
and remove the cleaner frame UN.
2)
Apply titanium hydroxide to the belt within approx. 15 cm from
the driving roller.
the driving roller.
3)
Rotate the belt by amount 10 cm to move the application part
to the surface.
* Till the applied powder reaches the cleaner installation loca-
to the surface.
* Till the applied powder reaches the cleaner installation loca-
tion.
4)
Mount the cleaner frame UN on the primary transfer UN.
5)
Apply titanium hydroxide to the belt.
* Apply titanium hydroxide to the belt 40 times (10 times in lat-
* Apply titanium hydroxide to the belt 40 times (10 times in lat-
itudinal direction x 4 times in longitudinal direction) for 4
faces (making two circuits of the belt).
faces (making two circuits of the belt).
* Repeat half-around application and half-around rotation
each 4 times.
* Apply titanium hydroxide not to produce bias.
1
2
12345
AB-67
15cm
Driving roller

