Read Sharp AR-FN1 (serv.man7) Service Manual online
SERVICE MANUAL
3-TRAY FINISHER
MODEL
AR-FN1
SHARP CORPORATION
Parts marked with "
" is important for maintaining the safety of the set. Be sure to replace these parts with specified
ones for maintaining the safety and performance of the set.
[ 1 ] BASIC SPECIFICATIONS . . . . . . . . . . . . . . . . . . . . . . . . . . . . . 1-1
[ 2 ] UNPACKING AND INSTALLATION. . . . . . . . . . . . . . . . . . . . . . 2-1
[ 3 ] PICTORIAL NOMENCLATURE . . . . . . . . . . . . . . . . . . . . . . . . . 3-1
[ 4 ] OUTLINE OF OPERATION . . . . . . . . . . . . . . . . . . . . . . . . . . . . 4-1
[ 5 ] DISASSEMBLY AND REINSTALLATION . . . . . . . . . . . . . . . . . 5-1
[ 6 ] ADJUSTMENT . . . . . . . . . . . . . . . . . . . . . . . . . . . . . . . . . . . . . . 6-1
[ 7 ] MAINTENANCE . . . . . . . . . . . . . . . . . . . . . . . . . . . . . . . . . . . . . 7-1
[ 8 ] TROUBLESHOOTING . . . . . . . . . . . . . . . . . . . . . . . . . . . . . . . . 8-1
[ 9 ] DESCRIPTION OF CIRCUITS. . . . . . . . . . . . . . . . . . . . . . . . . . 9-1
[10] CIRCUT DIAGRAM . . . . . . . . . . . . . . . . . . . . . . . . . . . . . . . . . 10-1
CONTENTS
(Danish)
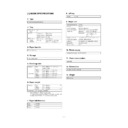
ADVARSEL !
Lithiumbatteri – Eksplosionsfare ved fejlagtig håndtering.
Udskiftning må kun ske med batteri
af samme fabrikat og type.
Levér det brugte batteri tilbage til leverandoren.
(English)
Caution !
Danger of explosion if battery is incorrectly replaced.
Replace only with the same or equivalent type
recommended by the manufacturer.
Dispose of used batteries according to manufacturer’s instructions.
(Finnish)
VAROITUS
Paristo voi räjähtää, jos se on virheellisesti asennettu.
Vaihda paristo ainoastaan laitevalmistajan suosittelemaan
tyyppiin. Hävitä käytetty paristo valmistajan ohjeiden
mukaisesti.
(French)
ATTENTION
Il y a danger d’explosion s’ il y a remplacement incorrect
de la batterie. Remplacer uniquement avec une batterie du
même type ou d’un type équivalent recommandé par
le constructeur.
Mettre au rebut les batteries usagées conformément aux
instructions du fabricant.
(Swedish)
VARNING
Explosionsfara vid felaktigt batteribyte.
Använd samma batterityp eller en ekvivalent
typ som rekommenderas av apparattillverkaren.
Kassera använt batteri enligt fabrikantens
instruktion.
CAUTION FOR BATTERY REPLACEMENT
[6] ADJUSTMENT
The following table shows the main parts requiring adjustment at the
time of replacement
time of replacement
Item
Part name
1
Jogger F/R
2
Paper entry gate solenoid
3
Reversion roller pressure release solenoid
4
Paper discharge gate solenoid 1
5
Paper discharge gate solenoid 2
6
Paper discharge gate solenoid 3
7
Short path switching solenoid
8
Tray 3 upper limit solenoid
Note: Remove or install parts in numerical order shown in the follow-
ing figures.
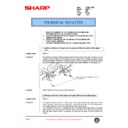
1. Jogger F/R
A. Let the unit staple 5 sheets of A4 or letter paper and check the
bundle of the sheets for deviation in directions A).
B. When the deviation in directions A) is are within 1 mm, there is no
need to adjust the jogger F/R.
C. When the deviation exceeds 1 mm, adjust the jogger F/R accord-
ing to the simulation 3-6: Adjusting Finisher Jogger Position.
Sim. 3-6: Adjusting Finisher Jogger Position
The screen above is displayed after the sub number of the simulation
is entered.
is entered.
1) Adjust the value with the numeric keypad.
2) The joggers in the finisher are operated by pressing the [EXE-
CUTE] key. The [EXECUTE] key is displayed in reverse video
during loading operation. When the [EXECUTE] key in this state
is pressed, loading operation can be canceled.
during loading operation. When the [EXECUTE] key in this state
is pressed, loading operation can be canceled.
Condition
Adjusting procedure
1
When the deviation in the
direction A) exceeds 1 mm.
direction A) exceeds 1 mm.
Decrease the simulation value.
(Decreasing the simulation by
1 narrows the width between
the joggers by 0.63 mm.)
(Decreasing the simulation by
1 narrows the width between
the joggers by 0.63 mm.)
Increase the simulation value.
(Increasing the simulation value
by 1 widens the width between
the joggers by 0.63 mm)
(Increasing the simulation value
by 1 widens the width between
the joggers by 0.63 mm)
Note: The width between joggers can be visually checked by observ-
ing the label inside the staple tray.
A)
Pin
A
Jogger
Label
Letter position
Jogger
A4 position
The spacing between
labels is 0.5 mm.
labels is 0.5 mm.
6 – 1
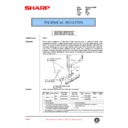
2. Paper entry gate solenoid
[Adjustment and precaution in setting]
1) Insert the paper entry gate solenoid pin A into the hole B on the
paper feed gate arm and secure with the screw 4). In this step,
align the F flame edge with the position aligning stamp as shown
in the enlargement above.
align the F flame edge with the position aligning stamp as shown
in the enlargement above.
2) When setting the paper entry gate solenoid spring 8), ensure that
the direction of the spring hook is as shown in the figure.
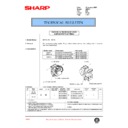
3. Reversion roller pressure release
solenoid
2)
1)
3)
2)
2)
1)
2)
5)
6)
4)
7)
P
8)
Q
A
B
View looking from P
View looking from Q
Positioning mark
1)
2)
2)
3)
6 – 2

