Read Sharp AR-C260 (serv.man10) Service Manual online
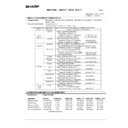
AR-C260/C260M DESCRIPTIONS OF EACH SECTION 7 - 1
[7] DESCRIPTIONS OF EACH SECTION
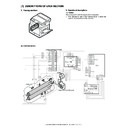
1. Fusing section
A. Operational descriptions
(1) Outline
This section performs the following function and operation.
1) Toner attached to paper in the transport section is fused onto
paper by heat and pressure of the heat roller.
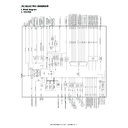
(2) Electrical section
GND2
GND2
THSU
THSD
POD1
+5V
FULHin
+24VL
PCU
FUSM
Driver PWB
Fusing drive connection gear
Drawer connector (13+4pin)
DC power PWB
HL drive circuit
L2
HL1N
2
B2
B3
B4
B6
B1
B3
B4
B5
A7
A6
A2
A1
A4
A4
A5
A3
L2
CN3-3
N2
CN3-1
1
3
2
1
3
HL2N
+24V
+24V
+5V
GND2
THSU
THSD
POD1
FUCHin
GND2
+24V
+24V
+24V
FUSM_A
FUSM_B
FUSM_A\
FUSM_B\
+24V
HLPR
HL1
HL1N
HL2N
L2
HL2
MSW
ON
DC-CNT
FUSM_A\
FUSM_B\
FUSM_A
DSWL
DSWL
FUSM_B
+24V
+24V
FUSM_A\
FUSM_B\
FUSM_A
DSWL
FUSM_B
DSWLin
DSWLout
CN3
CN1(6pin)
CN8(20pin)
CN14(10pin)
CN2(34pin)
CN12(34pin)
CN7
CN2
7
6
5
4
3
1
6
5
4
3
2
1
1
1
1
8
9
10
10
8
19 20
12
14
7
6
6
2
2
8
6
4
3
3
9
11
16
7
5
3
1
9
11
16
7
5
3
2
1
POD1
THSU
THSD
THSD
HLTS1
HL1
HL2
HLTS2
HLTS2
3
5
4
3
2
1
2
1
2
1
1
Fusing unit
AR-C260/C260M DESCRIPTIONS OF EACH SECTION 7 - 2
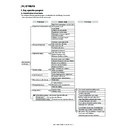
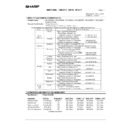
(3) Major parts/signals functions and operations
RW: Abbreviation of Related Wiring, which means the said load is specified in the related figure of the mechanical and the electrical sections.
(4) Operational descriptions
a. Fusing unit drive
To drive the fusing unit, drive power is transmitted from the drive motor
(FUSM) through the connection gear to the upper heat roller gear.
(FUSM) through the connection gear to the upper heat roller gear.
The drive motor (stepping motor) is driven by the motor drive IC in the
driver PWB according to the control signal sent from the PCU.
driver PWB according to the control signal sent from the PCU.
b. Heater lamp drive
The surface temperature detected by the thermistor is sent to the PCU.
When the temperature is lower than the specified level, the PCU sends
the heater lamp lighting signal to the heater lamp drive circuit in the DC
power PWB.
When the temperature is lower than the specified level, the PCU sends
the heater lamp lighting signal to the heater lamp drive circuit in the DC
power PWB.
The triac in the heater lamp drive circuit is turned on to apply AC power
to the heater lamp, which turns on to heat the heat rollers.
to the heater lamp, which turns on to heat the heat rollers.
The thermostats are provided as a safety measure to prevent against
an abnormally high temperature of the heat rollers.
an abnormally high temperature of the heat rollers.
When the thermostat is opened, the power supply (AC neutral) to the
heater lamp is cut off.
heater lamp is cut off.
c. Fusing operation
Color toner of YMCK on paper is heated and pressed by the heat roll-
ers to be fused on paper.
ers to be fused on paper.
At that time, color toner of YMCK is mixed to reproduce nearly actual
colors of document images.
colors of document images.
The upper and the lower heat rollers are provided to heat from above
and below. This is because it is necessary to heat four layers of toner
from above and below and right and left to fuse it on paper.
and below. This is because it is necessary to heat four layers of toner
from above and below and right and left to fuse it on paper.
The upper and lower heat rollers are of silicon rubber. This is because
of the following reasons:
of the following reasons:
1) To provide a greater nip quantity and a higher heating capacity for
paper.
2) The soft, flexible rollers press multi-layer toner without deformation
to fuse on paper.
3) An even pressure is applied to an uneven surface of multi-layer
toner.
6
1
6
2
4
1
5
3
4
1
2
2
6
3
6
6
1
2
4
5
4
5
1
1
3
120V 950W
120V 350W
120V 350W
No.
Name
Code, Signal name
Function
1
Heat roller
—
Heats and presses toner to fuse it on paper. Silicon rubber rollers are used
as the upper and the lower heat rollers. Teflon tube is wound around the
upper heat roller.
as the upper and the lower heat rollers. Teflon tube is wound around the
upper heat roller.
2
Upper/lower separation pawls
—
Mechanically separate paper from the heat roller, which was not separated
naturally.
naturally.
3
Heater lamp
Upper: HL1, Lower: HL2
Heats the heat rollers.
4
Thermistor
Upper: THSU, Lower: THSD
Detects the surface temperature of the heat roller. (Keeps the roller surface
temperature at a constant level.)
temperature at a constant level.)
5
Thermostat
Upper: HLTS1, Lower: HLTS2
Cuts conduction of the heater lamp when an abnormally high temperature is
detected.
detected.
6
Paper exit sensor
POD1
Detects paper discharged from the fusing section.
RW
Control signal
FUSM_A, A’, B, B’
Drives the fusing section.
RW
Control signal
FUCHin
Fusing unit installation detecting signal
RW
Control signal
DSWL
Left cabinet open/close detection signal
RW
Control signal
HLPR
Heater lamp power relay (in the DC power PWB) drive signal
FUSM
PCU
Driver
PWB
PWB
AR-C260/C260M DESCRIPTIONS OF EACH SECTION 7 - 3
d. Fusing temperature control
The temperature sensor is provided at the center of the upper and the
lower heat rollers.
lower heat rollers.
The temperature sensor at the center detects the heat roller tempera-
ture and controls the heater lamp to keep the fusing temperature at the
specified level.
ture and controls the heater lamp to keep the fusing temperature at the
specified level.
The fusing temperature is switched according to the machine condition
and paper type selected.
and paper type selected.
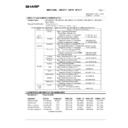
B. Disassembly/Assembly/Maintenance
(1) Fusing section maintenance target parts
✕
: Check (Clean, replace, or adjust as necessary.)
❍
: Clean
▲
: Replace
∆
: Adjust
✩
: Lubricate
❏
: Shift position
Upper heat roller
Lower heat roller
Ready state
170°C
120°C
Power save mode
143°C
OFF
Print mode
Normal paper
175°C
140°C
OHP sheet
170°C
155°C
Heavy paper 1
175°C
136°C
Heavy paper 2
175°C
145°C
Envelope
180°C
145°C
Unit name
No.
Part name
When
calling
50K
100K
150K
200K
250K
300K
350K
400K
Remark
Fusing section
1
Upper heat roller
✕
✕
▲
✕
▲
✕
▲
✕
▲
Replace at 100K or within 2
years.
years.
2
Lower heat roller
✕
✕
▲
✕
▲
✕
▲
✕
▲
Replace at 100K or within 2
years.
years.
3
Heat roller gear
✕
✕
▲
✕
▲
✕
▲
✕
▲
4
Heat roller bearing
✕
✕
▲
✕
▲
✕
▲
✕
▲
5
Separation pawl
✕
✕
▲
✕
▲
✕
▲
✕
▲
6
Thermistor
✕
✕
▲
✕
▲
✕
▲
✕
▲
—
Bearings
✕
✕
✕
✕
✕
✕
✕
✕
✕
7
Gears
✕
✩
✩
✩
✩
✩
✩
✩
✩
8
Paper guides
❍
❍
❍
❍
❍
❍
❍
❍
❍
9
Paper exit roller
✕
✕
✕
✕
✕
✕
✕
✕
✕
—
Fusing unit
✕
▲
✕
▲
✕
▲
✕
▲
Replace the unit at 100K or
within 2 years.
within 2 years.
6
6
1
2
5
4
4
4
4
5
10
10
8
9
3
6
6
1
2
5
4
4
4
4
5
9
7
8
3
AR-C260/C260M DESCRIPTIONS OF EACH SECTION 7 - 4
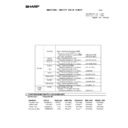
(2) Maintenance parts replacement procedure
a. Fusing unit removal
1) Open the left cabinet.
2) Loosen the roller knob (A) and remove the fusing unit (B).
b. Upper thermistor
1) Remove the fusing until from the machine.
2) Remove the screw and the harness cover (A).
3) Remove the connector, the screw, and the harness, and remove
the thermistor (B).
c. Lower thermistor
1) Remove the fusing unit from the machine.
2) Remove the screws, and remove the fusing front PG (A).
3) Remove the connector, the screw, and the harness, and remove
the thermistor (B).
d. Upper heater lamp
1) Remove the fusing unit from the machine.
2) Remove the screw and remove the fusing front cover (A). Remove
the harness cover (B).
3) Remove the connector, the screw, and the lamp holder (C), and
remove the upper heater lamp.
e. Lower heater lamp
1) Remove the fusing unit from the machine.
2) Remove the screw, and remove the fusing front cover (A).
3) Remove the screw, and remove the fusing front PG (B).
4) Remove the connector, the screw, and the lamp holder (C), and
remove the lower heater lamp.
A
B
A
B
A
B
A
B
C
D
A
B
C
D

