Read Sharp AR-C170 (serv.man50) User Guide / Operation Manual online
2-1
CHAPTER 2
MANAGING THE MACHINE
This chapter explains how to load paper, replace the toner cartridge,
and remove paper misfeeds. It also contains information about supplies.
and remove paper misfeeds. It also contains information about supplies.
Page
LOADING PAPER..........................................................................................2-2
●
Loading paper in paper tray 1 ................................................................2-2
●
Changing the paper size in paper tray 1 ................................................2-2
●
Loading paper in the bypass tray ...........................................................2-4
●
Loading paper in the stand/1 x 500 sheet paper drawer/stand/3 x 500
sheet paper drawer..................................................................................... 2-7
●
Specifications (stand/1 x 500 sheet paper drawer/stand/3 x 500
sheet paper drawer) ...............................................................................2-7
●
Loading paper in the duplex module/2 x 500 sheet paper drawer .........2-8
●
Specifications (duplex module/2 x 500 sheet paper drawer) .................2-8
●
Specifications of paper trays ..................................................................2-9
●
Setting the paper type (except the bypass tray)...................................2-11
●
Setting the paper size when an extra size is loaded ............................2-11
●
Setting the paper type and paper size in the bypass tray ....................2-12
CUSTOM SETTINGS ..................................................................................2-13
●
Operation procedure common to all custom settings...........................2-13
●
About the settings ................................................................................2-14
REPLACING THE TONER CARTRIDGES ..................................................2-15
STORAGE OF SUPPLIES ...........................................................................2-17
MISFEED REMOVAL ..................................................................................2-18
●
Misfeed removal guidance ...................................................................2-18
●
Misfeed in the paper feed area ............................................................2-19
●
Misfeed in the transport area, fusing area, and exit area.....................2-20
●
Misfeed in the stand/1 x 500 sheet paper drawer ................................2-21
●
Misfeed in the stand/3 x 500 sheet paper drawer ................................2-21
●
Misfeed in the duplex bypass/inverter unit and duplex module/2 x 500
sheet paper drawer ..............................................................................2-22
TROUBLESHOOTING .................................................................................2-24
Apollon_general-copy_EX.book 1 ページ 2004年6月7日 月曜日 午後1時59分
2-2
LOADING PAPER
The message "ADD PAPER" or "OPEN TRAY AND ADD PAPER" will appear when paper runs out during operation.
Follow the procedure below to load paper.
Follow the procedure below to load paper.
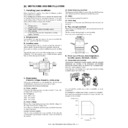
Loading paper in paper tray 1
1
Pull out paper tray 1.
Gently pull the tray out
until it stops.
until it stops.
2
Load paper into the tray.
Load a stack of paper no
higher than the indicator
line (about 500 sheets of
the recommended paper
for colour (80 g/m
higher than the indicator
line (about 500 sheets of
the recommended paper
for colour (80 g/m
2
or 21
lbs.), or approximately
500 sheets of SHARP
standard paper (80 g/m
500 sheets of SHARP
standard paper (80 g/m
2
or 21 lbs.)).
3
Gently push tray 1 into the machine.
Push the tray firmly all the way into the machine.
4
Set the paper type.
If you change the paper type, be sure to set the
paper type refer to "Setting the paper type" (page
2-11).
paper type refer to "Setting the paper type" (page
2-11).
5
Loading paper in paper tray 1 is now
complete.
complete.
Changing the paper size in paper tray 1
The following paper size settings are available for paper tray 1: A3 to A5 (11" x 17" to 8-1/2" x 5-1/2"), and "EXTRA"*
1
.
Use the following procedure to change the size as needed.
*
*
1
This is limited to square or rectangular paper, A3 to A5 (11" x 17" to 8-1/2" x 5-1/2") size.
1
Pull out paper tray 1.
If paper remains in the tray, remove it.
2
Adjust the paper size slide to the paper
size.
size.
Move the paper size
slide right or left to
indicate the paper size
being loaded.
If a special size paper is
loaded in the paper tray,
set the size slide to
slide right or left to
indicate the paper size
being loaded.
If a special size paper is
loaded in the paper tray,
set the size slide to
"EXTRA" to inform the machine that a special size
paper has been loaded. (When INCH-based size
paper is loaded, move the size slide to "EXTRA".)
paper has been loaded. (When INCH-based size
paper is loaded, move the size slide to "EXTRA".)
Note that setting the size slide to "EXTRA" only
informs the machine that a special size of paper
has been loaded; it does not inform the machine of
the specific size. If you wish to inform the machine
of the specific size, follow the steps in "Setting the
paper size when an extra size is loaded" (page 2-
11). (If you do not set a size, part or all of the image
may not print.)
3
Adjust the guide plates A and B by
squeezing their lock levers and sliding
them to the paper size to be loaded.
squeezing their lock levers and sliding
them to the paper size to be loaded.
The guide plates A and
B are slidable. Adjust
them to the paper size to
be loaded while
squeezing their lock
levers.
B are slidable. Adjust
them to the paper size to
be loaded while
squeezing their lock
levers.
NOTES
● Do not use curled or folded paper. Doing so may cause a misfeed.
● For best results use paper supplied by SHARP. (See pages 2-9, 2-17.)
● When you change the paper type and size in paper tray 1, you must change the paper type and size settings as
● Do not use curled or folded paper. Doing so may cause a misfeed.
● For best results use paper supplied by SHARP. (See pages 2-9, 2-17.)
● When you change the paper type and size in paper tray 1, you must change the paper type and size settings as
explained in "Setting the paper type" (page 2-11).
● Do not place heavy objects or press hard on any tray which is pulled out.
NOTE
If you load a different size of the same type of paper,
you only need to change the position of the size slide
(see step 2 below); you do not need to change the
paper type.
you only need to change the position of the size slide
(see step 2 below); you do not need to change the
paper type.
Apollon_general-copy_EX.book 2 ページ 2004年6月7日 月曜日 午後1時59分
LOADING PAPER
2-3
2
4
Load paper into the tray.
5
Gently push tray 1 into the machine.
Push the tray firmly all
the way into the
machine.
the way into the
machine.
6
Set the paper type of the paper that was
loaded in the 1st tray.
loaded in the 1st tray.
If you loaded a different type of paper from the
previous paper, be sure to set the new paper type
as explained in "Setting the paper type" (page 2-
11).
previous paper, be sure to set the new paper type
as explained in "Setting the paper type" (page 2-
11).
7
Changing paper size in paper tray 1 is now
complete.
complete.
NOTE
If the size slide position (step 2 of page 2-2) is not set correctly after changing the paper size, or if the paper type
(page 2-11) is not set correctly, incorrect paper selection or paper misfeeding may occur.
(page 2-11) is not set correctly, incorrect paper selection or paper misfeeding may occur.
Apollon_general-copy_EX.book 3 ページ 2004年6月7日 月曜日 午後1時59分
LOADING PAPER
2-4
Loading paper in the bypass tray
The bypass tray can be used to feed the same paper specified for paper tray 1 or for special papers. For paper types
that can be used in the bypass tray, see the specifications for the bypass tray in the paper tray specifications (page
2-9).
Up to 250 sheets of SHARP standard paper or up to 100 postcards can be set in the bypass tray.
that can be used in the bypass tray, see the specifications for the bypass tray in the paper tray specifications (page
2-9).
Up to 250 sheets of SHARP standard paper or up to 100 postcards can be set in the bypass tray.
1
Open the bypass tray.
When loading paper that
will extend past the end
of the tray, pull out the
tray extension to support
the paper and to allow the
paper sensors to properly
sense the paper size.
will extend past the end
of the tray, pull out the
tray extension to support
the paper and to allow the
paper sensors to properly
sense the paper size.
Be sure to pull the tray extension all the way out. If
the tray extension is not pulled all the way out, the
size of the paper loaded in the bypass tray may not
display correctly.
the tray extension is not pulled all the way out, the
size of the paper loaded in the bypass tray may not
display correctly.
To support papers that
extend past the tray
extension, pull out the
wire extension.
extend past the tray
extension, pull out the
wire extension.
2
Set the bypass tray guides to the width of
the copy paper.
the copy paper.
3
Insert the copy paper all the way into the
bypass tray. (Do not force the paper in.)
bypass tray. (Do not force the paper in.)
Place the copy paper
face up. If the bypass
tray guides are set
wider than the copy
paper, the inside of the
machine may become
soiled, resulting in
face up. If the bypass
tray guides are set
wider than the copy
paper, the inside of the
machine may become
soiled, resulting in
smudges on succeeding copies. Special purpose
papers other than SHARP recommended
transparency film must be fed individually. Multiple
sheets of SHARP recommended transparency
film can be loaded in the bypass tray.
papers other than SHARP recommended
transparency film must be fed individually. Multiple
sheets of SHARP recommended transparency
film can be loaded in the bypass tray.
4
Set the type and size of the paper loaded in
the bypass tray.
the bypass tray.
If you loaded a different type of paper from the
previous paper, be sure to set the new paper type
as explained in "Setting the paper type and paper
size in the bypass tray" (page 2-12). If you loaded
a special size of paper in the bypass tray, set the
paper size as explained in "Setting the paper type
and paper size in the bypass tray" (page 2-12).
(If you do not set a size, part or all of the image
may not print.)
5
This completes the procedure for loading
paper in the bypass tray.
paper in the bypass tray.
NOTES
● After loading the paper in the bypass tray, be sure to set the paper type and size (step 4) if these were changed.
● Do not use inkjet paper. This may cause misfeeds in the fusing unit.
● Do not use inkjet paper. This may cause misfeeds in the fusing unit.
NOTES
When loading paper in
the bypass tray or
closing the tray, close
the paper cover as
shown.
the bypass tray or
closing the tray, close
the paper cover as
shown.
Apollon_general-copy_EX.book 4 ページ 2004年6月7日 月曜日 午後1時59分

