Read Sharp AM-300 (serv.man9) Service Manual online
AM-300DE
1 – 1
AM-300DE
Service Manual
CHAPTER 1.
GENERAL DESCRIPTION
[1] Caution
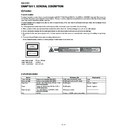
1. Laser caution
This laser facsimile is a class 1 laser product that complies with 21CFR 1040.10 and 1040.11 of the CDRH or IEC60825-1 standard. This means that
this machine dose not produce a hazardous laser radiation. The use of controls, adjustments or performance of procedures other than those specified
herein may result in hazardous radiation exposure.
this machine dose not produce a hazardous laser radiation. The use of controls, adjustments or performance of procedures other than those specified
herein may result in hazardous radiation exposure.
This laser radiation isn't a danger to the skin, but when an exact focusing of the laser beam is achieved on the eyes retina, there is danger of spot
damage to the retina.
damage to the retina.
The following cautions must be observed to avoid exposure of the laser beam to your eyes at the time of servicing.
1) When a problem in the laser optical unit has occurred, the whole optical unit must be exchanged as a unit, not an individual part.
2) Do not look into the machine with the main switch turned on after removing the toner/developer unit and drum cartridge.
3) Do not look into the laser beam exposure slit of the laser optical unit with the connector connected when removing and installing the optical sys-
tem.
4) The cover of Laser Printer Unit contains the safety interlock switch.
Do not defeat the safety interlock by inserting wedges or other items into the switch slot.
2. Life of consumable
Laser Wave Length
: 770 nm -795 nm
Laser Pulse Times
: 72.58 ns
Laser Output Power
: max. 4.0 mW
Section
Part
Estimated Life
Replaced by
Toner cartridge
Replacement cartridge (AM-30DC)
3,000 prints (at Letter/5% chart)
User
Drum cartridge
Replacement cartridge (AM-90DR)
20,000 prints (at Letter/5% chart)
User
Paper feed
Transfer roller (Refer to the P/G No. 3-19)
(NROLR2525XHZZ)
(NROLR2525XHZZ)
50,000 prints
Service Engineer
Fuser
Fusing unit (Refer to the P/G No. 5-901)
(CFRM-2265XH02)
(CFRM-2265XH02)
50,000 prints
Service Engineer
Paper transport
Feed roller (Refer to the P/G No. 3-29)
(NROLR2333XHZZ)
(NROLR2333XHZZ)
Cleaning as needed
--------------------------
Unit
AM-300
5 years or 50,000 prints of early either
--------------------------
CLASS 1
LASER PRODUCT
LASER KLASSE 1
AM-300DE
1 – 2
3. Precautions for using Lead-Free Solder
1. Employing lead-free solder
This model employs lead-free solder.
This is indicated by the "LF" symbol printed on the PWB and in the service manual.
The suffix letter indicates the alloy type of the solder.
Example:
This is indicated by the "LF" symbol printed on the PWB and in the service manual.
The suffix letter indicates the alloy type of the solder.
Example:
Indicates lead-free solder of tin, silver and copper.
2. Using lead-free solder
When repairing a PWB with the "LF" symbol, only lead-free solder should be used. (Using normal tin/lead alloy solder may
result in cold soldered joints and damage to printed patterns.)
As the melting point of lead-free solder is approximately 40°C higher than tin/lead alloy solder, it is recommended that a
dedicated bit is used, and that the iron temperature is adjusted accordingly.
result in cold soldered joints and damage to printed patterns.)
As the melting point of lead-free solder is approximately 40°C higher than tin/lead alloy solder, it is recommended that a
dedicated bit is used, and that the iron temperature is adjusted accordingly.
3. Soldering
As the melting point of lead-free solder (Sn-Ag-Cu) is higher and has poorer melting point (flow), to prevent damage to the
land of the PWB, extreme care should be taken not to leave the bit in contact with the PWB for an extended period of time.
Remove the bit as soon as a good flow is achieved.
The high content of tin in lead free solder will cause premature corrosion of the bit.
To reduce wear on the bit, reduce the temperature or turn off the iron when it is not required.
Leaving different types of solder on the bit will cause contamination of the different alloys, which will alter their
characteristics, making good soldering more difficult.
It will be necessary to clean and replace bits more often when using lead-free solder. To reduce bit wear, care should be
taken to clean the bit thoroughly after each use.
AM-300DE
1 – 3
[2] Specifications
1. Print specifications
2. Copy specifications
3. Scanning specifications
4. General specifications
Printer type:
Laser
Toner cartridge yield*:
(continuous printing, 5%
page coverage, A4
paper)
(continuous printing, 5%
page coverage, A4
paper)
Initial starter cartridge (included
with machine): Approx. 1500 pages
Replacement cartridge AM-30DC:
Approx. 3000 pages
with machine): Approx. 1500 pages
Replacement cartridge AM-30DC:
Approx. 3000 pages
Drum cartridge yield*:
(continuous printing, 5%
page coverage, A4
paper)
(continuous printing, 5%
page coverage, A4
paper)
Initial starter cartridge (included
with machine): 20,000 pages (aver-
age)
Replacement cartridge AM-90DR:
20,000 pages (average)
with machine): 20,000 pages (aver-
age)
Replacement cartridge AM-90DR:
20,000 pages (average)
PC print speed:
12 ppm (pages per minute)
Resolution:
600 x 600 dpi (dots per inch)
* The yields may vary depending on coverage and operating condi-
tions.
tions.
Copy speed:
12 cpm (copies per minute)
Copy quality settings:
Text, Photo
Copy resolution settings:
300 dpi, 600dpi
Enlargement/Reduction:
25% to 400%
Contrast settings:
5 levels
Halftone:
256 levels
Multiple copies:
Max. 99 copies per original
Maximum copy size:
Document glass: A4
Auto document feeder: A4
Auto document feeder: A4
Scanner type:
CIS (Contact Image Sensor)
Resolution:
300/600 x 300 dpi, 300/600 x 600 dpi
Scan speed:
(TWAIN scanning using
the auto document feeder;
reading time only)
(TWAIN scanning using
the auto document feeder;
reading time only)
Black and white:
300/600 x 300 dpi: 6 sec/page
300/600 x 600 dpi: 6 sec/page
Color and grayscale:
300/600 x 300 dpi: 22 sec/page
300/600 x 600 dpi: 22 sec/page
300/600 x 300 dpi: 6 sec/page
300/600 x 600 dpi: 6 sec/page
Color and grayscale:
300/600 x 300 dpi: 22 sec/page
300/600 x 600 dpi: 22 sec/page
Compatibility:
TWAIN, WIA
Grayscale:
256 levels
Color:
24-bit color
Auto document feeder:
A4 size: 20 sheets max. (80 g/cm
2
)
Computer connection:
USB 2.0 or 1.1 port (USB 2.0 or 1.1
cable must be purchased separately)
cable must be purchased separately)
Effective scanning width:
208 mm max.
Effective printing width:
202 mm max.
Display:
16-digit LCD display
Paper tray capacity:
(A4-size plain paper)
(A4-size plain paper)
250 sheets (80 g/cm
2
)
(At room temperature and normal
humidity)
humidity)
Power requirements:
220 - 230 V AC, 50 Hz
(U.K., Eire: 230 V AC, 50 Hz)
(U.K., Eire: 230 V AC, 50 Hz)
Operating temperature:
10 - 30
°C
Humidity:
20 - 85% RH
Noise emission:
German Products and Equipment
Safety Law, Part 3: Noise emission:
The max. Acoustic Noise is 70 dB(A)
or less according to EN ISO7779.
Safety Law, Part 3: Noise emission:
The max. Acoustic Noise is 70 dB(A)
or less according to EN ISO7779.
Power consumption:
Idle: 8.5 W
Maximum: 870 W
Maximum: 870 W
Dimensions:
Width: 475 mm
Depth: 420 mm
Height: 370 mm
Depth: 420 mm
Height: 370 mm
Weight:
Approx. 12.7 kg (including trays and
toner and drum cartridges)
toner and drum cartridges)
As a part of our policy of continuous improvement, SHARP reserves the right to make design and specification changes for product improvement
without prior notice. The performance specifications figures indicated are nominal values of production units. There may be some deviations from
these values in individual units.
without prior notice. The performance specifications figures indicated are nominal values of production units. There may be some deviations from
these values in individual units.
Trademark information
• Microsoft, Windows and Internet Explorer are trademarks of Microsoft Corporation in the
U.S.A. and other countries.
U.S.A. and other countries.
AM-300DE
1 – 4
[3] Operation panel
1
4
2 3
1. Display
This displays messages and prompts to help you operate the
machine.
2. E-SORT key
Press this key when making multiple copies to have the
copies collated (sorted into sets with the pages ordered 1, 2,
3..., 1, 2, 3..., etc.).
3. CONTRAST key
Press this key when making a copy to select a contrast
setting.
setting.
4. QUALITY key
When making a copy, press this key to select the type of
original you are copying (TEXT, PHOTO).
original you are copying (TEXT, PHOTO).
5. Right/left arrow keys
When making a copy, press either of these keys after
selecting an enlargement/reduction setting with the ZOOM
key to increase or decrease the setting by 1%.
6. MENU key
Press this key, followed by the left or right arrow key, to
access special functions and settings.
7. Stop key
Press this key to cancel operations before they are completed.
8. COPY key
Press this key to select copy mode.
9. SCAN key
Press this key to select scan mode.
10. HELP key
Press this key to print the HELP list, a brief guide to the
operation of the machine.
11. Alarm indicator
This blinks when the toner cartridge nears empty or the drum
cartridge is near or at the end of its life. This lights steadily
when the toner cartridge is empty, the machine is out of
paper, the print compartment cover is open, or when a paper
jam has occurred (a message will appear to indicate the
problem).
problem).
12. PRINT STOP key
Press this key to cancel a print job sent to the machine from a
computer.
computer.
13. ZOOM key
Press this key to select an enlargement or reduction setting
when making a copy.
when making a copy.
14. ENTER key
Press this key to enter or select a setting.
15. Number keys
Use these keys to enter the number of copies.
16. Start key
Press this key when you are ready to begin copying or
scanning.
8
5
9 10 11
6
12 13
14
7
15
QUALITY
CONTRAST
E-SORT
ZOOM
PRINT STOP
MENU
ENTER
COPY
SCAN
FAX
!
16

