Read Sharp AL-1644 (serv.man10) Service Manual online
AL-1633/1644 UNPACKING AND INSTALLATION 5-1
[5]UNPACKING AND INSTALLATION
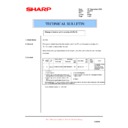
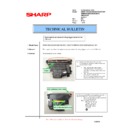
3. Installing procedure
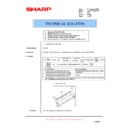
A. Set-up
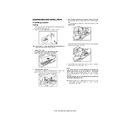
and remove the protective material.
2) Use a coin (or other suitable object) to remove the screw.
Note: Store the screw in the paper tray as described in step 6) because it
must be used if the machine has to be moved.
3) Install the TD cartridge.
For installation of the TD cartridge, see the next page.
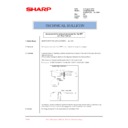
4) Gentry lift and pull out the paper tray until it stops.
5) Remove the pressure plate lock.
Rotate the pressure plate lock in the direction of the arrow to remove
it while pressing down the pressure plate of the paper tray.
6) Store the pressure plate lock which has been removed in step 5) and
the screw which has been removed in step 2) in the front of the paper
tray.
To store the pressure plate lock, rotate the lock to fix it on the
relevant location.
relevant location.
For two tray models, follow steps 4) to 6) for both the upper and lower
trays except for storage of the screw.
trays except for storage of the screw.
7) Ensure that the power switch of the machine is in the OFF position.
Plug the power cord into the nearest outlet.
Caution:
•If you use the machine in a country other than the country where the
machine was purchased, you will need to make sure that your local
power supply is compatible with your model. If you plug the machine
power supply is compatible with your model. If you plug the machine
into an incompatible power supply, irreparable damage to the machine
will result.
•Only insert the power cord into a properly grounded wall socket. Do not
use extension cords or power strips.
Note: Connect the machine to a power outlet which is not used for other
electric appliances. If a lighting fixture is connected to the same
outlet, the light may flicker.
Pressure
plate lock
Screw
[05]UNPACKING.fm 1 ページ 2003年11月28日 金曜日 午前9時16分
AL-1633/1644 UNPACKING AND INSTALLATION 5-2
B. Installing the TD cartridge
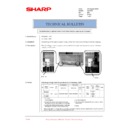
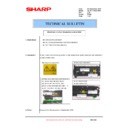
1) Push gentry on both ends of the front cover and open it.
2) Remove the new TD cartridge from the bag. Hold the cartridge on
both sides and shake it horizontally four or five times.
3) Remove the protective cover from the TD cartridge by unlatching
three cover hooks from the holes on the cartridge and then pulling
the cover in the direction indicated by the arrow in the illustration.
the cover in the direction indicated by the arrow in the illustration.
4) Insert the TD cartridge along the guides until it locks in place while
pushing the lock release lever.
If there is any dirt or dust on the TD cartridge, remove it before
installing the cartridge.
5) Close the front cover.
The TD cartridge replacement required indicator will go out.
Note:
•Even after a new TD cartridge is installed, the TD cartridge replacement
•Even after a new TD cartridge is installed, the TD cartridge replacement
required indicator may still light up, indicating that copying cannot be
resumed (toner is not fed sufficiently). In this case, open and close the
front cover. The machine will feed toner again for about two minutes and
front cover. The machine will feed toner again for about two minutes and
then copying can be resumed.
•Before closing the front cover, make sure that the TD cartridge is
correctly installed.
•When closing the front cover, gently hold both ends.
4 or 5 times
[05]UNPACKING.fm 2 ページ 2003年11月28日 金曜日 午前9時16分
AL-1633/1644 UNPACKING AND INSTALLATION 5-3
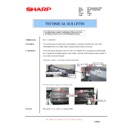
5. Changing a tray's paper size setting
Follow these steps to change a tray's paper size setting.
Note:
•The paper size setting cannot be changed when the machine has
stopped temporarily due to running out of paper or a misfeed, or during
interrupt copying.
interrupt copying.
•During printing (even in copy mode), the paper size setting cannot be
changed.
•A5 size paper can only be selected in upper paper tray.
•Do not load paper that is a different size than the paper size setting.
Copying will not be possible.
1) Hold down the [PAPER SIZE ENTER] key for more than 5 seconds to
set the selected paper size.
The currently selected paper feed location indicator will blink and the
The currently selected paper feed location indicator will blink and the
corresponding paper size (which is currently set) indicator will light
steadily.
All other indicators will go out.
All other indicators will go out.
2) Use the [TRAY SELECT] key to select the paper tray for which you
wish to change the paper size setting.
Each time the [TRAY SELECT] key is pressed, a paper tray will be
indicated with a blinking paper feed location indicator.
3) Use the [ORIGINAL SIZE ENTER] key to select the paper size.
The indicator of the selected paper size lights up.
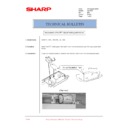
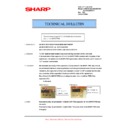
4) Squeeze the lock lever of the front guide and slide the front guide to
match the width of the paper, and move the left guide to the
appropriate slot as marked on the tray.
•The front guide is a slide-type guide. Grasp the locking knob on the
guide and slide the guide to the indicator line of the paper to be loaded.
•The left guide is an insert-type guide. Remove it and then insert it at the
indicator line of the paper to be loaded.
5) Press the [START] key and then the [PAPER SIZE ENTER] key.
To change the paper size setting of another tray, repeat steps 2) to 5)
after pressing the [START] key.
Note: Affix the paper size label for the paper size selected in step 3) to
the label position on the right end of the tray.
Important points when using the printer mode
•Make sure that the tray's paper size setting is the same as the tray's
paper size setting in the printer driver. For example, if the tray's paper
size setting is A4R, set "Setting Paper Size" to "A4-R". For more
information, see "CONFIGURING THE PRINTER DRIVER" in the
"Software Setup Guide".
"Software Setup Guide".
A3
A4
A4
A5
B4
A4
A4
A5
B4
XTRA
ENTER
A3
A4
A4
A5
B4
A4
A4
A5
B4
TRA
Left guide
Front guide
[05]UNPACKING.fm 3 ページ 2003年11月28日 金曜日 午前9時16分

