Read Sharp AL-1622 (serv.man8) Service Manual online
AL-1611/AL-1622
UNPACKING AND INSTALLATION
5 – 1
[ 5 ] UNPACKING AND INSTALLATION
1. CHECKING PACKED COMPONENTS AND
ACCESSORIES
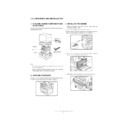
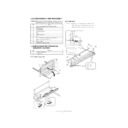
Open the carton and check to ensure that the following componets and
accessories are included.
accessories are included.
Note:
• If anything is not included or is damaged, contact your authorised
service representative.
• Save the carton and packing materials. These can be re-used for
transporting the machine, should it be necessary.
2. UNPAKING PROCEDURE
Be sure to hold the handles on both sides of the copier by two persons
to unpack the copier and carry it to the installation location.
to unpack the copier and carry it to the installation location.
3. INSTALLING PROCEDURE
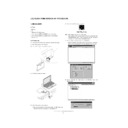
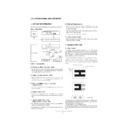
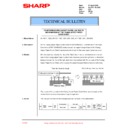
1) Remove all pieces of tape. Then open the original cover and
remove the protective material.
2) Use a coin (or suitable object) to remove the screw.
• Store the screw in the paper tray because it will be used if the copier
has to be moved. (Refer to the description in the following.)
3) Ensure that the bypass tray is open. Raise the side coverrelease
handle and pull out the side cover until it stops.
4) Push gently on both sides of the front cover to open the cover.
Copier
TD cartridge
Operation
manual
manual
Power cord
Drum cartridge
(installed in copier)
AL-1611/AL-1622
UNPACKING AND INSTALLATION
5 – 2
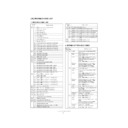
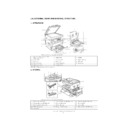
5) Gently pull the TD cartridge out while holding the handle.
6) Hold the strap on the cartridge and remove the TD cartridge
upward.
7) Remove the new TD cartridge from the bag. Hold the cartridge on
both sides and shake it horizontally four or five times.
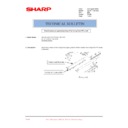
8) Remove the protective cover from the TD cartridge by unlatching
three cover hooks from the holes on the cartridge and then pulling
the cover in the direction indicated by the arrow in the illustration.
the cover in the direction indicated by the arrow in the illustration.
9) Gently insert the TD cartridge along the guides until it locks in place.
• If dirt or dust is adhered to the TD cartridge, remove it before install-
ing the cartridge.
10) Close the front cover by holding both sides with your hands and
then close the side cover. The TD cartridge replacement required
indicator will go out and the START key indicator will light up.
• When closing the covers, be sure to close the front cover securely
and then close the side cover. If the covers are closed in the wrong
order, the covers may be damaged.
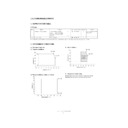
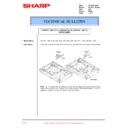
11) Raise the handle of the paper tray and pull the paper tray out until it
stops.
12) Remove the pressure plate lock. Rotate the pressure plate lock in
the direction of the arrow to remove it while pressing down the pres-
sure plate of the paper tray.
TD cartridge lock
release lever
release lever
4 or 5 times
AL-1611/AL-1622
UNPACKING AND INSTALLATION
5 – 3
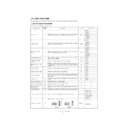
13) Store the pressure plate lock which has been removed in step 5 and
the screw which has been removed in step 2 in the front of the
paper tray.
• To store the pressure plate lock, rotate the lock to fix it on the relevant
location.
• For AL-1622, follow steps 3), 4), 13) for both the upper and lower
trays except for storage of the screw.
14) Push the pressure plate down until it locks in place.
15) Squeeze the lock lever of the front guide and slide the front guide to
match the width of the paper.
16) Move the left guide to the appropriate slot as marked on the tray.
• When using A3 copy paper, store the left guide in the slot at the left
front of the paper tray.
17) Load copy paper into the tray.
• Set the paper along the guides.
• The tray holds up to 250 sheets of about 9kg bond paper.Do not load
paper above the maximum height line.
18) Push the paper tray firmly back into the copier.
19) Ensure that the power switch of the copier is in the OFF position.
Insert the supplied power cord into the power cord socket at the
rear of the copier.
• If you use the copier in a country other than the country where the
copier was purchased, you will need to make sure that your local
power supply is compatible with your model. If you plug the copier
power supply is compatible with your model. If you plug the copier
into an incompatible power supply, irreparable damage to the copier
will result.
20) Plug the other end of the power cord into the nearest outlet.
• Only insert the power cord into a properly grounded wall socket.
Do not use extension cords or power strips.
4. CHANGING THE COPY PAPER SIZE IN
THE TRAY
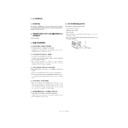
1) Gently lift and pull out the paper tray until it stops.
2) Push the pressure plate down until it locks in place.
3) Squeeze the lock lever of the front guide and slide the front guide to
match the width of the paper.
Pressure
plate lock
plate lock
Screw
Front guide
Left guide
Maximum height line
Left guide
Front guide
AL-1611/AL-1622
UNPACKING AND INSTALLATION
5 – 4
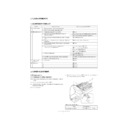
4) Move the left guide to the appropriate slot as marked on the tray.
• When using 11”
×
17” copy paper, store the left guide in the slot at the
left front of the paper tray.
5) Load copy paper into the tray.
6) Place the paper size plate in the front of the paper tray.
• The paper size indication which shows through the slot on the front of
the copier should match the selected paper size.
7) Push the paper tray firmly back into the copier.
8) To set the selected paper size, press the PAPER SIZE ENTER
(
) key.
• The selected paper feed location indicator will blink and the corre-
sponding paper size (which is currently set) indicator will light up
steadily. All other indicators except the START (
steadily. All other indicators except the START (
) key indicator
will go out.
Note: If copying is being performed, paper size setting cannot be made.
9) AL-1622 only Use the TRAY SELECT (
) key to select the paper
tray of which the paper size has been changed.
• Each time the TRAY SELECT (
) key is pressed, a paper tray will
be indicated with a blinking paper feed location indicator.
10) Use the ORIGINAL SIZE ENTER (
) key to select the
paper size which is set in the paper tray.
• Each time the ORIGINAL SIZE ENTER (
) key is pressed,
a paper size will be indicated with a paper size indicator.
11) Press the START (
) key and then the PAPER SIZE ENTER
(
) key.
• AL-1622 only To change the paper size setting of the other tray,
repeat steps 9 to 10 after pressing the START (
) key.

