Read Sharp AL-1611 (serv.man10) Service Manual online
AL-1611/AL-1622
SIMULATIONS
8 – 1
[ 8 ] SIMULATIONS
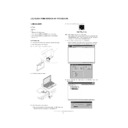
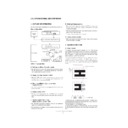
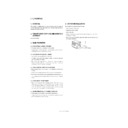
1. ENTERING THE SIMULATION MODE
Perform the following procedure to enter the simulation mode.
Clear key
Clear key
3
Interrupt key
3
“0“ key
3
Interrupt key
3
Main code
3
Start key
3
Sub code
3
Start key
2. CANCELLING THE SIMULATION MODE
When the clear all key is pressed, the simulation mode is cancelled.
When the interruption key is pressed, the process is interrupted and the
screen returns to the sub code entering display.
When the interruption key is pressed, the process is interrupted and the
screen returns to the sub code entering display.
*
After canceling the simulation mode, be sure to turn OFF/ON the
power and check the operation.
power and check the operation.
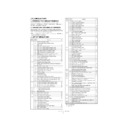
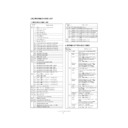
3. LIST OF SIMULATIONS
Main
code
code
Sub
code
Contents
*
1
1
Mirror unit operation check
2
Optical system sensor operation check
2
1
SPF aging
A
2
SPF sensor operation check
A
3
SPF motor forward rotation operation check
A
4
SPF motor reverse rotation operation check
A
8
SPF paper feed solenoid operation check
A
9
RSPF reverse solenoid operation check
B
10
RSPF paper exit gate solenoid operation check
B
11
SPF PS release solenoid operation check
A
3
2
Shifter job separator sensor operation check
B
3
Shifter operation check
B
4
Job separator operation check
B
11
Shifter Home Position Check
B
5
1
Operation panel display check
2
Heater lamp lighting check, cooling fan motor opera-
tion check
tion check
3
Copy lamp lighting check
6
1
Paper feed solenoid operation check
10
Main cassette semi-circular roller drive
7
1
Aging with warmup time display
4
Warmup saving
6
Intermittent aging
8
Warmup time display
8
1
Developing bias voltage output check
2
Main charger voltage output check (Grid bias high mode)
3
Main charger voltage output check (Grid bias low mode)
6
Transfer charger voltage check
9
1
Duplex motor forward rotation operation check
B
2
Duplex motor reverse rotation operation check
B
4
Duplex motor rotation speed adjustment
B
5
Duplex motor switchback time adjustment
B
10
Toner motor operation check
14
Trouble (except for U2) cancel
16
U2 trouble cancel
20
1
Maintenance counter clear
B
21
1
Maintenance cycle setting
B
2
Mini maintenance cycle setting
B
22
1
Maintenance counter display
B
2
Maintenance preset value display
B
3
JAM memory display
4
Total JAM counter display
5
Total counter display
6
Developing counter display
B
7
Developing preset counter value display
B
8
SPF counter display
A
9
Paper feed counter display
22
12
Drum counter display
14
Copier ROM version display
15
Trouble memory display
16
Duplex print counter display
B
17
Copy counter display
18
Printer counter display
B
19
Electronic sort counter display
B
21
Scanner counter display
24
1
JAM memory, JAM counter clear
2
Trouble memory clear
4
SPF counter clear
A
5
Duplex counter clear
B
6
Paper feed counter clear
7
Drum counter clear
8
Copy counter clear
9
Printer counter clear
B
10
Electronic sort counter clear
B
13
Scanner counter clear
25
1
Main motor operation check
10
Polygon motor operation check
26
1
Option switch display
B
3
Auditor setting
5
Counter mode setting
6
Destination setting
7
CRUM set value display
10
Model name setting
22
Language setting
30
CE mark conformity control setting
32
Fan rotation duty change state setup
38
Cancel of stop at dram life over
B
42
Transfer timing adjustment
50
Black-white reversion function setup
51
Sort/Group copy temporary stop function setup
B
30
1
Machine sensor operation check
41
2
B
3
Document sensor light reception level display
B
42
1
Developing counter clear
B
43
1
Fusing temperature setting
46
1
Copy density level adjustment
48
1
Main scanning (front/rear) direction magnification ratio
adjustment (Copy/OC-SPF common)
adjustment (Copy/OC-SPF common)
2
OC mode sub scanning direction magnification ratio
adjustment in copying
adjustment in copying
5
SPF mode sub scanning direction magnification ratio
adjustment in copying
adjustment in copying
A
50
1
Copy image lead edge position adjustment
10
Paper off center adjustment
13
16
A
18
Duplex memory reverse print adjustment
B
19
Duplex rear edge void adjustment
B
51
2
Resist amount adjustment
53
8
SPF scan position auto adjustment
A
9
SPF white level value display
A
63
1
Shading data check
7
White correction start pixel/position auto adjustment
A
64
1
Self printing mode
67
14
Printer Flash ROM Data Download
B
*
A: Only AL-1622
B: Not used
B: Not used
Main
code
code
Sub
code
Contents
*
AL-1611/AL-1622
SIMULATIONS
8 – 2
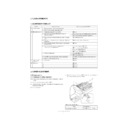
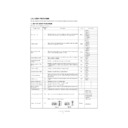
4. CONTENTS OF SIMULATIONS
Main
code
code
Sub
code
Contents
Details of operation
Initial
value
value
Set range
1
1
Mirror unit operation check
Used to execute scanning at the speed corresponding to the set magnification
ratio.
ratio.
100%
50 ~ 200%
2
Optical system sensor oper-
ation check
ation check
Used to check MHPS (Mirror home position sensor) ON/OFF state with the
LED on the operation panel.
LED on the operation panel.
2
1
SPF aging
<Only AL-1622>
Used to perform SPF document transport.
The paper size is not detected. (Excluding postcards, extra large sheet of 1m
or greater.)
With SPF installed: Single transport operation
With RSPF installed: Duplex transport operation
The paper size is not detected. (Excluding postcards, extra large sheet of 1m
or greater.)
With SPF installed: Single transport operation
With RSPF installed: Duplex transport operation
100%
50 ~ 200%
2
SPF sensor operation check
<Only AL-1622>
Used to check sensors in SPF with the LED on the operation panel.
3
SPF motor forward rotation
operation check
<Only AL-1622>
operation check
<Only AL-1622>
Used to rotate the SPF motor forward for 10 sec.
4
SPF motor reverse rotation
operation check
operation check
<Only AL-1622>
Used to rotate the SPF motor reversely for 10 sec.
8
SPF paper feed solenoid
operation check
operation check
<Only AL-1622>
Used to drive the SPF paper feed solenoid (PSOL) at the cycle of 500 msec
ON and 500 msec OFF 20 times.
ON and 500 msec OFF 20 times.
9
RSPF reverse solenoid
operation check
<Not Used>
operation check
<Not Used>
Used to drive the RSPF reverse solenoid (RSOL) at the cycle of 500 msec ON
and 500 msec OFF 20 times.
and 500 msec OFF 20 times.
10
RSPF paper exit gate sole-
noid operation check
noid operation check
<Not Used>
Used to drive the RSPF paper exit gate solenoid (GSOL) at the cycle of 500
msec ON and 500 msec OFF 20 times.
msec ON and 500 msec OFF 20 times.
11
SPF PS release solenoid
operation check
operation check
<Only AL-1622>
Used to drive the SPF PS release solenoid at the cycle of 500 msec ON and
500 msec OFF 20 times.
500 msec OFF 20 times.
Key operation
Display
Changing the magnification ratio:
Fixed magnification ratio key
ZOOM UP KEY, ZOOM DOWN
KEY
KEY
Set magnification ratio:
Fixed magnification ratio LED
ZOOM LED
Display
<Lighting when the sensor is ON>
MHPS: Paper empty LED
MHPS: Paper empty LED
Key operation
Display
Changing the magnification ratio:
Fixed magnification ratio key
ZOOM UP KEY, ZOOM DOWN
KEY
KEY
Set magnification ratio:
Fixed magnification ratio LED
ZOOM LED
Display
<Lighting at sensor ON>
PW1: JAM LED
PW2: Paper empty LED
PW3: Machine position JAM LED
PW4: SPF JAM LED
PL1: Manual paper feed tray select LED
PL2: 2nd tray position JAM LED
P-IN: SPF select LED
SPF COVER OPEN: Main cassette select LED
PW1: JAM LED
PW2: Paper empty LED
PW3: Machine position JAM LED
PW4: SPF JAM LED
PL1: Manual paper feed tray select LED
PL2: 2nd tray position JAM LED
P-IN: SPF select LED
SPF COVER OPEN: Main cassette select LED
AL-1611/AL-1622
SIMULATIONS
8 – 3
3
2
Shifter job separator sensor
operation check
operation check
<Not Used>
Used to check the sensors state in the shifter job separator with the LED on
the operation panel.
the operation panel.
3
Shifter operation check
<Not Used>
Used to drive the shifter motor at the speed of printing of A4 (8-1/2 x 11”).
Pressing the clear all key or interrupt key moves the shifter to the home posi-
tion.
Pressing the clear all key or interrupt key moves the shifter to the home posi-
tion.
4
Job separator operation
check
check
<Not Used>
Used to drive the job separator one way. Pressing the clear all key or interrupt
key stops the job separator at the home position.
key stops the job separator at the home position.
11
Shifter Home Position check
<Not Used>
Used to drive the shifter motor
5
1
Operation panel display
check
check
Used to light all LED’s on the operation panel for 5 sec.
2
Heater lamp lighting check,
cooling fan motor operation
check
cooling fan motor operation
check
Used to turn ON the heater lamp for 500 msec and OFF for 500 msec 5 times.
At the same time, the cooling fan is rotated at a high speed. After checking the
heater lamp operation, the cooling fan motor rotate at a low speed.
At the same time, the cooling fan is rotated at a high speed. After checking the
heater lamp operation, the cooling fan motor rotate at a low speed.
3
Copy lamp lighting check
Used to light the copy lamp for 10 sec.
6
1
Paper feed solenoid opera-
tion check
tion check
When the start key is pressed, the selected paper feed solenoid is driven at
the cycle of 500 msec ON and 500 msec OFF 20 times.
the cycle of 500 msec ON and 500 msec OFF 20 times.
10
Main cassette semi-circular
roller drive
roller drive
Excute the simulation with the developer cartridge removed, used to rotate the
semi-circular roller of the main cassette one turn to face it downward.
semi-circular roller of the main cassette one turn to face it downward.
7
1
Aging with warmup time dis-
play
play
Execute the simulation input with the copier side cover open, then close the
side cover, and the machine will start warming up. Warm up time is counted
up every 2nd and it is displayed. After completion of warmup, count up is ter-
minated. When the clear all key is pressed ready lamp is lighted and the copy
quantity is entered and the start key is pressed, copying is made to make the
set quantity of copies. At that time, the paper size does not matter.
1 ~ 99
4
Warmup saving
Used to bring the machine to the ready state without warmup.
1 ~ 99
Main
code
code
Sub
code
Contents
Details of operation
Initial
value
value
Set range
Display
<Lighting at sensor ON>
Shifter HP sensor: Machine position JAM LED
Job separator HP sensor: SPF JAM LED
Paper exit full sensor: 2nd tray position JAM LED
Shifter HP sensor: Machine position JAM LED
Job separator HP sensor: SPF JAM LED
Paper exit full sensor: 2nd tray position JAM LED
Key operation
The shifter is moved to the home position: Clear all key, interrupt key
Key operation
Stops at the home position: Clear all key, interrupt key
Key operation
Feed: Exposure up key or "3" key
Return: Exposure down key or "4" key
Move to Home Position: Magnification ratio display key or "5" key
Return: Exposure down key or "4" key
Move to Home Position: Magnification ratio display key or "5" key
Key operation
Display
Solenoid selection:
Tray select button
<Lighting at solenoid selection>
Main cassette paper feed solenoid:
Main cassette select LED
Multi manual paper feed solenoid:
Manual paper feed select LED
No. 2 cassette paper feed solenoid:
No. 2 cassette select LED
Resist roller solenoid:
Machine position JAM LED
No. 2 cassette transport solenoid:
No. 2 cassette position JAM LED
Key operation
Copy quantity setting: Copy quantity keys
AL-1611/AL-1622
SIMULATIONS
8 – 4
*
2: Display after clearing each counter 000
(0.75 sec)
3
Blank (0.35 sec)
3
000 (0.75 sec)
3
Blank (1.0 sec)
3
Repetition
7
6
Intermittent aging
After completion of warmup, counting is stopped and the ready lamp is
lighted. When the copy quantity is entered and the start key is pressed, copy-
ing is made to make the set quantity of copies. After 3 sec standby, copying is
made again to make the set quantity of copies. After that this operation is
repeated. The paper size does not matter.
lighted. When the copy quantity is entered and the start key is pressed, copy-
ing is made to make the set quantity of copies. After 3 sec standby, copying is
made again to make the set quantity of copies. After that this operation is
repeated. The paper size does not matter.
1 ~ 99
8
Warmup time display
Execute the simulation input with the copier side cover open, then close the
side cover, and the machine will starts warming up. Warm up time is counted
up every 2nd and it is displayed.
side cover, and the machine will starts warming up. Warm up time is counted
up every 2nd and it is displayed.
1 ~ 99
8
1
Developing bias voltage
output check
output check
Used to out put the developing bias for 30 sec. For the adjustment procedure
of the developing bias, refer to the previous descriptions.
of the developing bias, refer to the previous descriptions.
2
Main charger voltage output
check (Grid bias high mode)
check (Grid bias high mode)
Used to output the main charger grid bias voltage at the high mode for 30 sec.
For the adjustment procedure of the main charger grid bias voltage, refer to
the previous descriptions.
For the adjustment procedure of the main charger grid bias voltage, refer to
the previous descriptions.
3
Main charger voltage output
check (Grid bias low mode)
check (Grid bias low mode)
Used to output the main charger grid bias voltage at the low mode for 30 sec.
For the adjustment procedure of the main charger grid bias voltage, refer to
the previous descriptions.
For the adjustment procedure of the main charger grid bias voltage, refer to
the previous descriptions.
6
Transfer charger voltage
check
check
Used to output the transfer charger voltage for 30 sec. For the adjustment pro-
cedure of the transfer charger voltage, refer to the previous descriptions.
cedure of the transfer charger voltage, refer to the previous descriptions.
9
1
Duplex motor forward rota-
tion operation check
tion operation check
<Not Used>
Used to rotate the duplex motor forward for 30 sec.
2
Duplex motor reverse rota-
tion operation check
<Not Used>
tion operation check
<Not Used>
Used to rotate the duplex motor reversely for 30 sec.
4
Duplex motor rotation speed
adjustment
adjustment
<Not Used>
The currently set duplex motor rotation speed set value is displayed. When
the set value is entered and the start key is pressed, the set value is stored.
the set value is entered and the start key is pressed, the set value is stored.
6
1 ~ 13
5
Duplex motor switchback
time adjustment
time adjustment
<Not Used>
The currently set duplex motor switchback time set value is displayed. When
the set value is entered and the start key is pressed, the set value is stored.
50
18 ~ 76
10
Toner motor operation check Used to operate the toner motor for 30 sec.
Note: If this simulation is executed with the toner hopper installed, toner is
automatically supplied to the developer. Be careful of overtoner.
14
Trouble (except for U2)
cancel
cancel
Used to cancel troubles except for U2.
16
U2 trouble cancel
Used to cancel U2 trouble.
20
1
Maintenance counter clear
Used to clear the maintenance counter.
*
2
21
1
Maintenance cycle setting
Used to display the currently set maintenance cycle at the numbers shown at
right. When the set value is entered and the start key is pressed, the set value
is stored.
right. When the set value is entered and the start key is pressed, the set value
is stored.
2
0 ~ 7
Main
code
code
Sub
code
Contents
Details of operation
Initial
value
value
Set range
Key operation
Copy quantity setting: Copy quantity keys
Key operation
Duplex motor rotation speed set value: Copy quantity keys
Key operation
Duplex motor switchback time set value: Copy quantity keys
Key operation/Display
0: 2500 sheets
1: 5000 sheets
2: 25000 sheets (When toner save is ON)
3: 50000 sheets (When toner save is ON)
3: 50000 sheets (When toner save is ON)
4: 150000 sheets
5: FREE (999999 sheets)
6: 10000 sheets
7: 7500 sheets
7: 7500 sheets

