Read Sharp PN-K321 (serv.man15) Technical Bulletin online
IDP 2013 06 05
Date of Issue:
24
th
June 2013
Classification:
White
IDP TECHNICAL BULLETIN
Page 1 of 4
Sharp Electronics (UK) Limited
Reference
– PNF-A271
Revision - 3
White
– Carry out as required
Yellow
– Carry out as required and whenever the unit comes in for service
Red
– Carry out on all units
MODELS
PNK321
REASON
New firmware and service tool to resolve the following issues:
(Firmware V1.130)
Added support for second generation models (B). Refer to IDP 2014 02 01.
(Firmware V1.100)
(Firmware V1.130)
Added support for second generation models (B). Refer to IDP 2014 02 01.
(Firmware V1.100)
Added support when using a Display Port connection 3840 x 2160 60Hz with
NVIDIA graphic cards. This issue was caused due to a problem with the BIOS on
NVIDIA graphic cards.
NVIDIA graphic cards.
The description of Titled Display (*) has been added to the EDID for MST of
Display Port.
* Tiled Display: This feature is to display the monitors of 4K2K as one screen
without integrating the desktops on the graphic driver side when using MST by
listing the information of Tiled Display to EDID, which is based on Display ID
Standard of VESA.
* Tiled Display: This feature is to display the monitors of 4K2K as one screen
without integrating the desktops on the graphic driver side when using MST by
listing the information of Tiled Display to EDID, which is based on Display ID
Standard of VESA.
Blu-ray discs
cannot be played with “Power DVD 10” on a PC that uses Radeon
graphic cards installed. This problem has been corrected.
Radeon: Name of the series for video chips, video cards, etc. with GPU developed
by AMD installed.
Radeon: Name of the series for video chips, video cards, etc. with GPU developed
by AMD installed.
In response to the request from NVIDIA, EDID has been changed:
* Modification has been made to avoid a problem that appears as if there were two
audio devices, seeing from PC side when using MST with Display Port connection.
* This behaviour happens when one of the displays receives the video data while
using Titled Display has been changed to -
audio devices, seeing from PC side when using MST with Display Port connection.
* This behaviour happens when one of the displays receives the video data while
using Titled Display has been changed to -
“Image is cloned to all other tiles of the
entire tiled display” to “Behaviour cannot be described by other values defined in
this revision of the data block”.
this revision of the data block”.
Serial No. has been listed to Display ID section.
(Firmware V1.040)
Wh
en recovering from “Signal Wait” mode using the Display Port input, either the
right or left side of the screen is not displayed.
Reduce the high frequency noise caused by the backlight (LED driver). The PWM
(Pulse Width Modulation) frequency has been reduced.
The main PWB has been modified during production with a change to the
headphone jack. If you are using the old or new headphone jack the CPLD revision
history and anti-noise program is executed accordingly.
history and anti-noise program is executed accordingly.
IDP 2013 06 05
Date of Issue:
24
th
June 2013
Classification:
White
IDP TECHNICAL BULLETIN
Page 2 of 4
Sharp Electronics (UK) Limited
Reference
– PNF-A271
Revision - 3
White
– Carry out as required
Yellow
– Carry out as required and whenever the unit comes in for service
Red
– Carry out on all units
ACTION
Download the service tool from the technical website and follow the instructions
provided below to update the main and sub firmware.
provided below to update the main and sub firmware.
Firmware update procedure using a USB memory stick
USB MEMORY
Use a USB memory stick corresponding to the following standards:
Use a USB memory stick corresponding to the following standards:
Format - FAT32 / FAT16
USB - 2.0 / 1.1
Recommended to use a USB memory stick with a read / write LED.
Important notes
Set up an appropriate volume label name.
Using a SD card reader is unsupported.
Using a USB HUB is unsupported.
Do not use an encrypted USB memory stick.
Do not store any other files or folders in the USB memory stick.
If the version after rewriting is the same, the update will not start.
If the filename is changed, the update will not start.
Do not turn OFF the power or touch / remove the USB memory stick during the
update.
If the firmware update is performed with a USB memory stick where the firmware data
of a different model is stored, the display cannot start up and cannot be recovered.
When storing the firmware data to a USB memory stick, ensure the model name is
correct.
of a different model is stored, the display cannot start up and cannot be recovered.
When storing the firmware data to a USB memory stick, ensure the model name is
correct.
IDP 2013 06 05
Date of Issue:
24
th
June 2013
Classification:
White
IDP TECHNICAL BULLETIN
Page 3 of 4
Sharp Electronics (UK) Limited
Reference
– PNF-A271
Revision - 3
White
– Carry out as required
Yellow
– Carry out as required and whenever the unit comes in for service
Red
– Carry out on all units
Preparation of the USB memory stick
1. Format the USB memory stick.
2. With the service tool launcher, select the "Make USB Data" button.
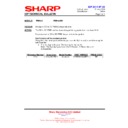
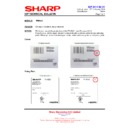
3. The following dialogue to specify the copy destination is displayed.
1. Format the USB memory stick.
2. With the service tool launcher, select the "Make USB Data" button.
3. The following dialogue to specify the copy destination is displayed.
Ensure you specify the root folder of USB memory stick.
(The example below is that USB memory is F: Drive)
4. Press "Extract", the file is copied to your USB memory stick.
5. If a file with same name already exists, the following dialogue is displayed.
5. If a file with same name already exists, the following dialogue is displayed.
Select "Yes to All" to overwrite the data.
6. When the file copy is completed, the dialogue will close.
NOTE
: Check the USB memory stick and ensure that “manifest.txt”, “*****.hex” and
“*****.S19” have been copied.
IDP 2013 06 05
Date of Issue:
24
th
June 2013
Classification:
White
IDP TECHNICAL BULLETIN
Page 4 of 4
Sharp Electronics (UK) Limited
Reference
– PNF-A271
Revision - 3
White
– Carry out as required
Yellow
– Carry out as required and whenever the unit comes in for service
Red
– Carry out on all units
Preparing the display
1. Before you update the firmware, turn ON the power of the display and then ensure
1. Before you update the firmware, turn ON the power of the display and then ensure
the unit does not enter signal waiting mode.
Set the "POWER MANAGEMENT" to "OFF" or input the video signal.
Performing the update
1. Insert the USB memory stick into the USB terminal of the display.
1. Insert the USB memory stick into the USB terminal of the display.
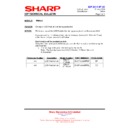
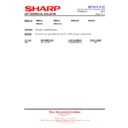
When the USB memory stick is recognised, the following OSD message appears:
2. Check the content of the message, and if it is OK, press the [ENTER] button on the
remote control or wait 30-sec timeout.
To cancel the update, press the [RETURN] button or remove the USB memory
stick.
To cancel the update, press the [RETURN] button or remove the USB memory
stick.
3. Wait until the completion message is displayed.
The display may reboot several times during the update process.
The firmware update is now complete. Verify the firmware version by entering the
service menu as outlined in the products service manual.
service menu as outlined in the products service manual.
If the update fails
1. Turn OFF then ON the main power switch with USB memory stick inserted in the
1. Turn OFF then ON the main power switch with USB memory stick inserted in the
terminal.
2. Leave the unit to perform the update.
3. When the update is complete, the display will automatically turn OFF then ON.
3. When the update is complete, the display will automatically turn OFF then ON.
If the screen has no display during the update, you can check if the data is being
read by looking at the USB memory sticks LED.
read by looking at the USB memory sticks LED.
4. If you cannot update the unit using a USB memory stick, refer to the service
manual procedure to update using RS232C.

