Read Sharp R-238ASL (serv.man9) Service Manual online
R238A(SL)
9 – 1
R238A(SL)
Service Manual
CHAPTER 9.
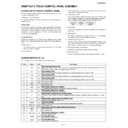
TOUCH CONTROL PANEL ASSEMBLY
[1] OUTLINE OF TOUCH CONTROL PANEL
The touch control section consists of the following units as shown in
the touch control panel circuit.
the touch control panel circuit.
(1) Key Unit (2) Control Unit
The principal functions of these units and their related signals are
explained below.
explained below.
1. Key Unit
The key unit is composed of a matrix, signals generated in the LSI are
sent to the key unit through P22, P23, P24, P25, P26 and P33. When
a key pad is touched, a signal is completed through the key unit and
passed back to the LSI through P50, P51, P52 and P53 to perform the
function that was requested.
sent to the key unit through P22, P23, P24, P25, P26 and P33. When
a key pad is touched, a signal is completed through the key unit and
passed back to the LSI through P50, P51, P52 and P53 to perform the
function that was requested.
2. Control Unit
Control unit consists of LSI, reset circuit, indicator circuit, power
source circuit, relay circuit, buzzer circuit and synchronizing signal cir-
cuit.
source circuit, relay circuit, buzzer circuit and synchronizing signal cir-
cuit.
1) Reset Circuit
This circuit generates a signal which resets the LSI to the initial
state when power is supplied.
state when power is supplied.
2) Indicator Circuit
This circuit consists of 4-digits, 12-segments and 3-common elec-
trodes using a Liquid Crystal Display.
trodes using a Liquid Crystal Display.
3) Power Source Circuit
This circuit generates voltage necessary in the control unit from the
AC line voltage. In addition, the synchronizing signal is available in
order to compose a basic standard time in the clock circuit.
AC line voltage. In addition, the synchronizing signal is available in
order to compose a basic standard time in the clock circuit.
4) Relay Circuit
To drive the magnetron, fan motor, turntable motor and light the
oven lamp.
oven lamp.
5) Buzzer Circuit
The buzzer is responsive to signals from the LSI to emit audible
sounds (key touch sound and completion sound).
sounds (key touch sound and completion sound).
6) Synchronizing Signal Circuit
The power source synchronizing signal is available in order to com-
pose a basic standard time in the clock circuit. It accompanies a
very small error because it works on commercial frequency.
pose a basic standard time in the clock circuit. It accompanies a
very small error because it works on commercial frequency.
7) 2nd. Interlock Relay Control Switch
A switch to “tell” the LSI if the door is open or closed.
8) Back Light Circuit
A circuit to drive the back light (Light emitting diodes LD1 - LD4).
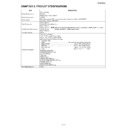
[2] DESCRIPTION OF LSI
The I/O signal of the LSI are detailed in the following table.
Symbol
Voltage
Application
VSS
-5V
LSI(IC1)
Pin No.
Signal
I/O
Description
1
P50
IN
Signal coming from touch key.
When either G7 line on key matrix is touched, a corresponding signal out of P22 - P26 and P33 will be input into
P50. When no key is touched, the signal is held at “H” level.
When either G7 line on key matrix is touched, a corresponding signal out of P22 - P26 and P33 will be input into
P50. When no key is touched, the signal is held at “H” level.
2
P51
IN
Signal similar to P50.
When either G8 line on key matrix is touched, a corresponding signal will be input into P51.
When either G8 line on key matrix is touched, a corresponding signal will be input into P51.
3
P52
IN
Signal similar to P50.
When either G9 line on key matrix is touched, a corresponding signal will be input into P52.
When either G9 line on key matrix is touched, a corresponding signal will be input into P52.
4
P53
IN
Signal similar to P50.
When either G10 line on key matrix is touched, a corresponding signal will be input into P53.
When either G10 line on key matrix is touched, a corresponding signal will be input into P53.
5
IC
IN
Connected to VSS.
6
XT1
IN
Connected to VSS.
7
XT2
Terminal not used.
8
VDD
IN
Power source voltage input terminal.
The power source voltage to drive the LSI. Connected to GND.
The power source voltage to drive the LSI. Connected to GND.
9
VSS
IN
Power source voltage input terminal.
The power source voltage to drive the LSI.
The power source voltage to drive the LSI.
10
X1
IN
Internal clock oscillation frequency input setting.
The internal clock frequency is set by inserting the resistor-capacitor oscillation circuit with respect to X2 termi-
nal.
The internal clock frequency is set by inserting the resistor-capacitor oscillation circuit with respect to X2 termi-
nal.
11
X2
OUT
Internal clock oscillation frequency control output.
Output to control oscillation input of X1.
Output to control oscillation input of X1.
12
RESET
IN
Auto clear terminal.
Signal is input to reset the LSI to the initial state when power is applied.
Signal is input to reset the LSI to the initial state when power is applied.
13-15
P00-P02
OUT Terminal not used.
16
P03
OUT Back light circuit (Light emitting diodes) driving signal.
17
CAPH
-
Terminal not used.
18
CAPL
-
Terminal not used.
19-21
VLC0-VLC2
IN
Power source voltage input terminal.
Standard voltage for LCD.
Standard voltage for LCD.
22
COM0
OUT
Common data signal.
Connected to LCD signal C1.
Connected to LCD signal C1.
23
COM1
OUT
Common data signal.
Connected to LCD signal C2.
Connected to LCD signal C2.
R238A(SL)
9 – 2
24
COM2
OUT
Common data signal.
Connected to LCD signal C3.
Connected to LCD signal C3.
25
COM3
OUT Terminal not used.
26-37
SEG0-SEG11
OUT
Segment data signal.
Connected to LCD.The relation between signals are as follows:
LSI signal (Pin No.) LCD (segment) LSI signal (Pin No.) LCD (segment)
SEG 0 (26) ----------------- S 1 SEG 6 (32) ----------------- S 7
SEG 1 (27) ----------------- S 2 SEG 7 (33) ----------------- S 8
SEG 2 (28) ----------------- S 3 SEG 8 (34) ----------------- S 9
SEG 3 (29) ----------------- S 4 SEG 9 (35) ----------------- S10
SEG 4 (30) ----------------- S 5 SEG 10 (36) ---------------- S11
SEG 5 (31) ----------------- S 6 SEG 11 (37) ---------------- S12
38-40
SEG12-SEG14 OUT Terminal not used.
41
P70
OUT
Oven lamp, fan motor and turntable motor driving signal
To turn on and off shut off relay (RY1). The square wave-
form voltage is delivered to the RY1 driving circuit and
RY2 control circuit.
To turn on and off shut off relay (RY1). The square wave-
form voltage is delivered to the RY1 driving circuit and
RY2 control circuit.
42
P71
OUT Terminal not used.
43
P72
OUT
Magnetron high-voltage circuit driving signal.
To turn on and off the cook relay (RY2). The signals
holds “L” level during microwave cooking and “H” level
while not cooking. In other cooking modes (variable
cooking) the signal turns to “H” level and “L” level in
repetition according to the power level.
To turn on and off the cook relay (RY2). The signals
holds “L” level during microwave cooking and “H” level
while not cooking. In other cooking modes (variable
cooking) the signal turns to “H” level and “L” level in
repetition according to the power level.
44
AVDD
IN
A/D converter power source voltage.
The power source voltage to drive the A/D converter in the LSI. Connected to GND.
The power source voltage to drive the A/D converter in the LSI. Connected to GND.
45-48
AIN5-AIN2
IN
Terminal to change cooking input according to the Model.
By using the A/D converter contained in the LSI, DC voltage in accordance with the Model in operation is
applied to set up its cooking constant.
By using the A/D converter contained in the LSI, DC voltage in accordance with the Model in operation is
applied to set up its cooking constant.
49-50
AIN1-AIN0
IN
This is the terminal to detect the voltage of the signal coming from the touch key.
51
AVSS
IN
A/D converter power source voltage.
The power source voltage to drive the A/D converter in the LSI.
The power source voltage to drive the A/D converter in the LSI.
52
P11
IN
To input signal which communicates the door open/close information to LSI.
Door close “H” level signal (0V). Door open “L” level signal (-5V)
Door close “H” level signal (0V). Door open “L” level signal (-5V)
53
P10
OUT Terminal not used.
54
P33
OUT
Key strobe signal.
Signal applied to touch-key section. A pulse signal is input to P50, P51, P52 and P53 terminal while one of G1
line keys on key matrix is touched.
Signal applied to touch-key section. A pulse signal is input to P50, P51, P52 and P53 terminal while one of G1
line keys on key matrix is touched.
55
P32
OUT Terminal not used.
56
P31
OUT Terminal not used.
57
INTP0
IN
Signal synchronized with commercial power source frequency.
This is the basic timing for time processing of LSI.
This is the basic timing for time processing of LSI.
58
P26
OUT
Key strobe signal.
Signal applied to touch-key section. A pulse signal is input to P50, P51, P52 and P53 terminal while one of G2
line keys on key matrix is touched.
Signal applied to touch-key section. A pulse signal is input to P50, P51, P52 and P53 terminal while one of G2
line keys on key matrix is touched.
59
P25
OUT
Key strobe signal.
Signal applied to touch-key section. A pulse signal is input to P50, P51, P52 and P53 terminal while one of G3
line keys on key matrix is touched.
Signal applied to touch-key section. A pulse signal is input to P50, P51, P52 and P53 terminal while one of G3
line keys on key matrix is touched.
60
P24
OUT
Key strobe signal.
Signal applied to touch-key section. A pulse signal is input to P50, P51, P52 and P53 terminal while one of G4
line keys on key matrix is touched.
Signal applied to touch-key section. A pulse signal is input to P50, P51, P52 and P53 terminal while one of G4
line keys on key matrix is touched.
61
P23
OUT
Key strobe signal.
Signal applied to touch-key section. A pulse signal is input to P50, P51, P52 and P53 terminal while one of G5
line keys on key matrix is touched.
Signal applied to touch-key section. A pulse signal is input to P50, P51, P52 and P53 terminal while one of G5
line keys on key matrix is touched.
62
P22
OUT
Key strobe signal.
Signal applied to touch-key section. A pulse signal is input to P50, P51, P52 and P53 terminal while one of G6
line keys on key matrix is touched.
Signal applied to touch-key section. A pulse signal is input to P50, P51, P52 and P53 terminal while one of G6
line keys on key matrix is touched.
Pin No.
Signal
I/O
Description
20 msec.
During cooking
H : GND
L : -5V
Maximum
output
70% of maximum
output
H : GND
L : -5V
H : GND
L : -5V
ON
ON
OFF
OFF
OFF
24 sec.
8 sec.
20 msec.
H : GND
L : -5V
R238A(SL)
9 – 3
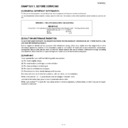
[3] SERVICING FOR TOUCH CONTROL PANEL
1. Precautions for Handling Electronic Components
This unit uses CMOS LSI in the integral part of the circuits. When han-
dling these parts, the following precautions should be strictly followed.
CMOS LSI have extremely high impedance at its input and output ter-
minals. For this reason, it is easily influenced by the surrounding high
voltage power source, static electricity charge in clothes, etc., and
sometimes it is not fully protected by the built-in protection circuit.
In order to protect CMOS LSI.
1) When storing and transporting, thoroughly wrap them in aluminium
foil. Also wrap PW boards containing them in aluminium foil.
2) When soldering, ground the technician as shown in the figure and
use grounded soldering iron and work table.
2. Servicing of Touch Control Panel
We describe the procedures to permit servicing of the touch control
panel of the microwave oven and the precautions you must take when
doing so. To perform the servicing, power to the touch control panel is
available either from the power line of the oven itself or from an exter-
nal power source.
panel of the microwave oven and the precautions you must take when
doing so. To perform the servicing, power to the touch control panel is
available either from the power line of the oven itself or from an exter-
nal power source.
1. Servicing the touch control panel with power supply of the oven:
CAUTION: THE HIGH VOLTAGE TRANSFORMER OF THE MICRO-
WAVE OVEN IS STILL LIVE DURING SERVICING AND
PRESENTS A HAZARD.
PRESENTS A HAZARD.
Therefore, before checking the performance of the touch control
panel,
panel,
1) Disconnect the power supply cord and then remove outer case.
2) Open the door and block it open.
3) Discharge high voltage capacitor.
4) Disconnect the leads to the primary of the power transformer.
5) Ensure that these leads remain isolated from other components
and oven chassis by using insulation tape.
6) After that procedure, re-connect the power supply cord.
After checking the performance of the touch control panel,
1) Disconnect the power supply cord.
2) Open the door and block it open.
3) Re-connect the leads to the primary of the power transformer.
4) Re-install the outer case (cabinet).
5) Re-connect the power supply cord after the outer case is
installed.
6) Run the oven and check all functions.
a) On some models, the power supply cord between the touch
control panel and the oven itself is so short that the two can't
be separated. For those models, check and repair all the
controls (sensor-related ones included) of the touch control
panel while keeping it connected to the oven.
be separated. For those models, check and repair all the
controls (sensor-related ones included) of the touch control
panel while keeping it connected to the oven.
b) On some models, the power supply cord between the touch
control panel and the oven proper is so long enough that
they may be separated from each other. For those models,
therefore, it is possible to check and repair the controls of the
touch control panel while keeping it apart from the oven
proper; in this case you must short both ends of the door
sensing switch (on PWB) of the touch control panel with a
jumper, which brings about an operational state that is equiv-
alent to the oven door being closed. As for the sensor-
related controls of the touch control panel, checking them is
possible if the dummy resistor(s) with resistance equal to
that of the controls are used.
2. Servicing the touch control panel with power supply from an exter-
nal power source:
Disconnect the touch control panel completely from the oven
proper, and short both ends of the door sensing switch (on PWB) of
the touch control panel, which brings about an operational state
that is equivalent to the oven door being closed. Connect an exter-
nal power source to the power input terminal of the touch control
panel, then it is possible to check and repair the controls of the
touch control panel; it is also possible to check the sensor-related
controls of the touch control panel by using the dummy resistor(s).
3. Servicing Tools
Tools required to service the touch control panel assembly.
1) Soldering iron: 60W
(It is recommended to use a soldering iron with a grounding termi-
nal.)
nal.)
2) Oscilloscope: Single beam, frequency range: DC - 10MHz type or
more advanced model.
3) Others: Hand tools
4. Other Precautions
1) Before turning on the power source of the control unit, remove the
aluminium foil applied for preventing static electricity.
2) Connect the connector of the key unit to the control unit being sure
that the lead wires are not twisted.
3) After aluminium foil is removed, be careful that abnormal voltage
due to static electricity etc. is not applied to the input or output ter-
minals.
minals.
4) Attach connectors, electrolytic capacitors, etc. to PWB, making
sure that all connections are tight.
5) Be sure to use specified components where high precision is
required.
63
BZO90
OUT
Signal to sound buzzer (2.0 kHz).
A: key touch sound.
B: Completion sound.
A: key touch sound.
B: Completion sound.
64
P20
OUT Terminal not used.
Pin No.
Signal
I/O
Description
A
B
0.1 sec.
2.0 sec.
H : GND
L : -5V
H : GND
L : -5V
approx. 1M ohm
R238A(SL)
9 – 4
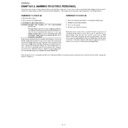
[4] PRECAUTIONS FOR USING LEAD-FREE SOLDER
1. Employing lead-free solder
The “Main PWB” of this model employs lead-free solder. This is indicated by the “LF” symbol printed on the PWB and in the service manual. The suffix
letter indicates the alloy type of the solder.
letter indicates the alloy type of the solder.
Example:
2. Using lead-free wire solder
When repairing a PWB with the “LF” symbol, only lead-free solder should be used. (Using normal tin/lead alloy solder may result in cold soldered
joints and damage to printed patterns.)
joints and damage to printed patterns.)
As the melting point of lead-free solder is approximately 40
°C higher than tin/lead alloy solder, it is recommend that a dedicated bit is used, and that
the iron temperature is adjusted accordingly.
3. Soldering
As the melting point of lead-free solder (Sn-Ag-Cu) is higher and has poorer wettability, (flow), to prevent damage to the land of the PWB, extreme
care should be taken not to leave the bit in contact with the PWB for an extended period of time. Remove the bit as soon as a good flow is achieved.
The high content of tin in lead free solder will cause premature corrosion of the bit. To reduce wear on the bit, reduce the temperature or turn off the
iron when it is not required.
Leaving different types of solder on the bit will cause contamination of the different alloys, which will alter their characteristics, making good soldering
more difficult. It will be necessary to clean and replace bits more often when using lead-free solder. To reduce bit wear, care should be taken to clean
the bit thoroughly after each use.
more difficult. It will be necessary to clean and replace bits more often when using lead-free solder. To reduce bit wear, care should be taken to clean
the bit thoroughly after each use.
Indicates lead-free solder of tin, silver and copper

