|
|
UP-X300 (serv.man43)
ER-03DWB ER-05DWB Cash Drawer service manual including parts guide
Service Manual
|
7
|
198.26 KB
|
|
|
UP-X300 (serv.man44)
UP-X200 with UP-X300 application Configuration Procedure
Service Manual
|
14
|
1.83 MB
|
|
|
UP-X300 (serv.man45)
UP-X300 Service Manual
Service Manual
|
73
|
3.62 MB
|
|
|
UP-X300 (serv.man48)
Back Office Programming Manual
User Guide / Operation Manual
|
127
|
1.58 MB
|
|
|
UP-X300 (serv.man49)
Front End Operation Manual
User Guide / Operation Manual
|
127
|
2.8 MB
|
|
|
UP-X300 (serv.man46)
ER-03DWB ER-05DWB Cash Drawer service manual including parts guide
Parts Guide
|
7
|
198.26 KB
|
|
|
UP-X300 (serv.man47)
UP-X300 Parts Guide Manual
Parts Guide
|
18
|
379.57 KB
|

|
UP-X300 (serv.man41)
Layouts Version 1.1
Specification
|
|
76.18 KB
|
|
|
UP-X300 (serv.man42)
Documentation on how to connect Avery FX series scale to the UP-X300 series including cable specification
Specification
|
3
|
218.76 KB
|
|
|
UP-X300 (serv.man110)
X500 300 Touch Panel change
Technical Bulletin
|
4
|
808.43 KB
|
|
|
UP-X300 (serv.man111)
UP-X300 Auto Application Upgrade (Terminalfile.txt)It is possible to perform auto application version upgrades on Backup Client machines on a network.
Technical Bulletin
|
1
|
17.44 KB
|
|
|
UP-X300 (serv.man112)
UP-X300 Pre Installation Guide Tech Bulletin
Technical Bulletin
|
2
|
27.78 KB
|
|
|
UP-X300 (serv.man113)
UP-X300 Release of Power Switch Cover, to prevent accidental power off
Technical Bulletin
|
1
|
74.23 KB
|
|
|
UP-X300 (serv.man114)
UP-X300 Speed Performance Issues (V1.6.0.9 V1.6.0.10 Only)changes to mfull.ini file
Technical Bulletin
|
1
|
18.83 KB
|
|
|
UP-X300 (serv.man115)
UP-X300 Lock Out or Freezing after manual Date Change (BST)
Technical Bulletin
|
1
|
18.97 KB
|
|
|
UP-X300 (serv.man116)
UP-X300 Configuration Guide for interface to Sharpsoft B O (Updated to include latest required files)
Technical Bulletin
|
3
|
381.8 KB
|
|
|
UP-X300 (serv.man117)
UP-X200 Installation Guide
Technical Bulletin
|
1
|
18.5 KB
|
|
|
UP-X300 (serv.man118)
X300 500 to Wireless Hand Held terminal AP and Wireless set-up guide
Technical Bulletin
|
7
|
477.43 KB
|
|
|
UP-X300 (serv.man119)
UP-X300 500 RTC Battery Failure Symptons
Technical Bulletin
|
1
|
17.46 KB
|
|
|
UP-X300 (serv.man120)
UP-X300 X200 Version 1.4.7.0 1.0.6.0 with new O S Update Notes
Technical Bulletin
|
1
|
19.43 KB
|

|
UP-X300 (serv.man121)
X300 HDD Mapping Document. Required when using SharpSoft Back Office.
Technical Bulletin
|
|
306.24 KB
|
|
|
UP-X300 (serv.man122)
Date Time is reset to factory default
Technical Bulletin
|
2
|
119.3 KB
|
|
|
UP-X300 (serv.man51)
Release notes for printer layouts 1.0 1.1M
Driver / Update
|
2
|
37.01 KB
|

|
UP-X300 (serv.man52)
Standard Print Layouts for the UP-X300 Ver 1.1M(Please refer to print layout import procedure for instructions) Date added for Daily Summary report
Driver / Update
|
|
88.81 KB
|

|
UP-X300 (serv.man53)
Standard Print Layouts for the UP-X300 Ver 1.0M(Please refer to print layout import procedure for instructions) Date added for Daily Summary report
Driver / Update
|
|
88.87 KB
|

|
UP-X300 (serv.man54)
Standard Print Layouts for the UP-X300 Ver 1.1L(Please refer to print layout import procedure for instructions) Qty field added for KP Condiments
Driver / Update
|
|
88.8 KB
|

|
UP-X300 (serv.man55)
Application Version 1.5.0.9 with OS 1.08 (Compatible with ALL V1.5.x.x but with latest 1.08 OS, allows you to upgrade your 1.5 sites without converting data)
Driver / Update
|
|
14.74 MB
|
|
|
UP-X300 (serv.man56)
Printer Layout Release Notes
Driver / Update
|
2
|
35.75 KB
|

|
UP-X300 (serv.man57)
Standard Print Layouts for the UP-X300 Ver 1.0L(Please refer to print layout import procedure for instructions) Qty field added for KP Condiments
Driver / Update
|
|
88.86 KB
|

|
UP-X300 (serv.man58)
1.6.0.18 Version Application (Please refer to Version History for full details of upgrades, this version will install with O S 1.08)
Driver / Update
|
|
15.47 MB
|
|
|
UP-X300 (serv.man59)
UP-X300 Version History 1.6.0.18 (This document contains all the specification changes and Bug fixes upto version 1.6.0.18)
Driver / Update
|
15
|
106.4 KB
|
|
|
UP-X300 (serv.man60)
UP-X300 Version History 1.6.0.16 (This document contains all the specification changes and Bug fixes upto version 1.6.0.16)
Driver / Update
|
14
|
48.99 KB
|

|
UP-X300 (serv.man61)
1.6.0.16 Version Application. (Please refer to Version History for a complete list of fixes and enhancements posted here on 11 06 2008
Driver / Update
|
|
15.48 MB
|
|
|
UP-X300 (serv.man62)
Printer Layouts Release notes
Driver / Update
|
2
|
26.52 KB
|

|
UP-X300 (serv.man63)
Standard Print Layouts for the UP-X300 Ver 1.0k(Please refer to print layout import procedure for instructions) Graphic logo now prints on sales reports
Driver / Update
|
|
76.61 KB
|

|
UP-X300 (serv.man64)
Version 1.1k Print Layouts for the UP-X300 (These are as Standard V1.0j with following changes - No GT's or NET1 NET2 on transaction sales report) 76.59Kb
Driver / Update
|
|
76.58 KB
|

|
UP-X300 (serv.man65)
Version 2 1.6.x.x This demo version is as Version 1 but has been configured for use with the X200 (Use RESTORE ALL to install for V1.6.x.x)Please refer to User Notes posted in Handy Guides section 22 02 08
Driver / Update
|
|
439.3 KB
|

|
UP-X300 (serv.man66)
Version 1 1.6.x.x This is a basic demo program, the dealer could carry out additional programming for specific demonstrations)
Driver / Update
|
|
455.48 KB
|

|
UP-X300 (serv.man67)
Presentation 1.6.x.x This is the Sharp UK demonstration data, that is used for Training Courses. (NOT to be used as customer program)Please use RESTORE ALL to demonstrate the X300 features (There is also a Powerpoint Presentation Doc for this data, on this WEB site)
Driver / Update
|
|
1.4 MB
|

|
UP-X300 (serv.man68)
1.6.0.13 Version Application. (Please refer to Version History for a complete list of fixes and enhancements posted on below 20 11 07)
Driver / Update
|
|
15.5 MB
|
|
|
UP-X300 (serv.man69)
X300 Version Upgrade Procedure 1.5.x.x to 1.6.x.x (if you require further deatils on the CSV Upgrade Utility you can refer to X300 200 Data Conversion Utility Guide posted 09 11 06)
Driver / Update
|
1
|
19.24 KB
|

|
UP-X300 (serv.man70)
CSV Update to 1.6.x.x (This utility is required to update BACKUP ALL data from 1.5.x.x to 1.6.x.x version) Please refer to related documentation for use.
Driver / Update
|
|
214.63 KB
|
|
|
UP-X300 (serv.man71)
UP-X300 Version History 1.6.0.13 (This document contains all the specification changes and Bug fixes upto version 1.6.0.13)
Driver / Update
|
12
|
45.13 KB
|
|
|
UP-X300 (serv.man72)
X300 Printer Layouts Revision History
Driver / Update
|
2
|
25.11 KB
|

|
UP-X300 (serv.man73)
Version 1.1j Print Layouts for the UP-X300 (These are as Standard V1.0j with following changes - No GT's or NET1 NET2 on transaction sales report)
Driver / Update
|
|
76.59 KB
|

|
UP-X300 (serv.man74)
Standard Print Layouts for the UP-X300 Ver 1.0j(Please refer to print layout import procedure for instructions)
Driver / Update
|
|
76.63 KB
|

|
UP-X300 (serv.man75)
UP-X300 V1.5.0.8 with Downgrade OS 1.07 At initial install please select Update OS YES at next time of Update OS please select NO ...Please use this version for all new installations until further notice
Driver / Update
|
|
14.71 MB
|

|
UP-X300 (serv.man76)
UP-X300 Version 1.5.0.8 with OS ver 1.08
Driver / Update
|
|
14.72 MB
|

|
UP-X300 (serv.man77)
X300 Screenshot Utility. Runs on X300 only. See documentation in Handy Guides.
Driver / Update
|
|
24.97 KB
|

|
UP-X300 (serv.man78)
Presentation 1.5.x.x (This is the data used on support Training Courses, not to be used as basis of customer program, due to extreme use of screens etc)
Driver / Update
|
|
1.4 MB
|

|
UP-X300 (serv.man79)
X300 Application Version 1.5.0.6 (Please use 1.5.x.x compatable data or select use default data)
Driver / Update
|
|
14.72 MB
|
|
|
UP-X300 (serv.man80)
Revision History X300 V1.5.0.6 and X200 V1.1.0.4
Driver / Update
|
4
|
25.49 KB
|

|
UP-X300 (serv.man81)
UP-X200 Application Version 1.1.0.4 (to be used with UP-X300 Version 1.5.0.6)
Driver / Update
|
|
14.15 MB
|

|
UP-X300 (serv.man82)
UP-X300 Sample INI files for Macro Reports (editable report.ini file for filter setting)
Driver / Update
|
|
31.17 KB
|

|
UP-X300 (serv.man83)
REMOTE SUPPORT NetOP HOST installation files for UP-X300, please read documentation for installation procedure. A licence is required to use this software and must be obatined before installation.
Driver / Update
|
|
443.64 KB
|

|
UP-X300 (serv.man84)
X300 Version 1.5.0.4 (Compatable with X200 V1.1.0.2) Please refer to X300 200 (Version 1.5.0.x)Installation Notes below. Also please see presentation notes in Handy Guide section of WEB
Driver / Update
|
|
14.72 MB
|

|
UP-X300 (serv.man85)
Version 2 1.5.x.x with X200 (This data is similar to Demo Data V1 but includes X200 configuration) To load please use the Program Restore feature.
Driver / Update
|
|
274.2 KB
|
|
|
UP-X300 (serv.man86)
X300 X200 Revision History upto Version 1.5.0.4 and X200 version 1.1.0.2(details enhancements and resolved issues)
Driver / Update
|
4
|
24.35 KB
|

|
UP-X300 (serv.man87)
UP-X300 Data Conversion Utility This utility is required to convert X300 V1.4.x.x data to Ver 1.5.x.x Please refer to Installation Notes (see WEB Below)
Driver / Update
|
|
344.07 KB
|
|
|
UP-X300 (serv.man88)
X300 200 Data Conversion Utility Guide (Please read these notes before upgrading from 1.4.x.x to version 1.5.0.x)
Driver / Update
|
2
|
21.06 KB
|

|
UP-X300 (serv.man89)
Note the MS7120 cable pt number shoud be 54000B
Driver / Update
|
|
1.31 KB
|

|
UP-X300 (serv.man90)
X300 Application Version 1.4.11.1 compatible with 1.4.7.0 existing data, if using older version data or data stored on USB please use the Restore Procedure (not Copy Paste PRESET)
Driver / Update
|
|
14 MB
|

|
UP-X300 (serv.man91)
Version 1.1h Print Layouts for the UP-X300 (These are as Standard V1.0h with following changes - No GT's or NET1 NET2 on transaction sales report) Please see release notes for revision history
Driver / Update
|
|
76.34 KB
|

|
UP-X300 (serv.man92)
Standard Print Layouts for the UP-X300 Ver 1.0h (Please refer to print layout import procedure for instructions) Please see release notes for revision history
Driver / Update
|
|
76.4 KB
|
|
|
UP-X300 (serv.man93)
X300 Printer Layouts Revision History document. Latest Split Check added to Rcpt and Bill. Total now shows on Bill
Driver / Update
|
2
|
16.21 KB
|

|
UP-X300 (serv.man94)
X300 Sample Room files for use with filebased PMS system. Extract the files and place them into a folder called Room
Driver / Update
|
|
2.87 KB
|

|
UP-X300 (serv.man95)
X300 Demo version 2 with X200 configuration (Please use the Program Restore in B O to load this data.
Driver / Update
|
|
274.16 KB
|

|
UP-X300 (serv.man96)
UP-X300 Basic 1 Demo data. Unzip and restore from folder. This data is to be restored using B O program restore The data is a basic customers program and could be used as a template. It is to be used with Application V1.4.7.0 or later and O S Ver 1.07 or later. A screen shot of the program is included for help with identification
Driver / Update
|
|
419.04 KB
|

|
UP-X300 (serv.man97)
Standard Print Layouts for the UP-X300 Ver 1.0d (Please refer to print layout import procedure for instructions)
Driver / Update
|
|
76.16 KB
|

|
UP-X300 (serv.man98)
Version 1.1d Print Layouts for the UP-X300 (These are as Standard V1.0d with following changes - No GT's or NET1 NET2 on transaction sales report)
Driver / Update
|
|
76.17 KB
|

|
UP-X300 (serv.man99)
X300 Version 1.4.7.0 Application Update. DO NOT COPY PASTE preset file when using existing data (Please refer to Tech Bulletin UP-X300 X200 Version 1.4.7.0 1.0.6.0 Update)Copy and then extract to an X300 folder. Please ensure the X300 folder is in the root of your USB insert into POS AND POWER ON
Driver / Update
|
|
14.09 MB
|

|
UP-X300 (serv.man100)
Windows XP patch to allow connection Windows CE
Driver / Update
|
|
892.8 KB
|

|
UP-X300 (serv.man101)
UP-X200 Application Version 1.0.5.1 (March 2006)
Driver / Update
|
|
4.62 MB
|

|
UP-X300 (serv.man102)
X300 Application Version 1.4.6.2 (Please refer to V1.4.6.2 Revision Notes)
Driver / Update
|
|
8.46 MB
|
|
|
UP-X300 (serv.man103)
X300 Application Version History (Updated Feb 2006)
Driver / Update
|
1
|
34.93 KB
|

|
UP-X300 (serv.man104)
UP-X300 Application Version Upgrade 1.4.0.0
Driver / Update
|
|
8.43 MB
|

|
UP-X300 (serv.man105)
UPX300 Application Version Upgrade 1.2.0.0
Driver / Update
|
|
7.45 MB
|

|
UP-X300 (serv.man106)
Epson TM Flash Logo Setup Utility Version 2.0.1 (for downloading a logo to Epson printers)
Driver / Update
|
|
435.86 KB
|

|
UP-X300 (serv.man107)
Epson TMNet WinConfig V1.0 (for assigning IP addresses to epson network printers).
Driver / Update
|
|
1003.39 KB
|

|
UP-X300 (serv.man108)
UP-X300 Sharp UK (Backup All) Training Demo Data Version 1.0 This data is to be used together with the Training Presentation (also available on he WEB)it contains all the features but is not practical for an installation. Please refer to the Handy guide Restoring a Backup (All) file for installation
Driver / Update
|
|
1.4 MB
|

|
UP-X300 (serv.man109)
UP-X300(HD2 PRESET FOLDER) Training Demo Data Version 1.0 This data is to be used together with the Training Presentation (also available on he WEB)it contains all the features but is not practical for an installation.
Driver / Update
|
|
3.83 MB
|
|
|
UP-X300
PMS Proceedure
Handy Guide
|
9
|
864.56 KB
|
|
|
UP-X300 (serv.man2)
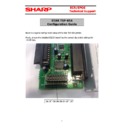
Star TSP-654 printer guide
Handy Guide
|
3
|
892.61 KB
|
|
|
UP-X300 (serv.man3)
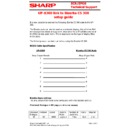
Documentation on how to connect a Bizerba scale to UPX300 series including cable specification
Handy Guide
|
3
|
198.28 KB
|
|
|
UP-X300 (serv.man4)
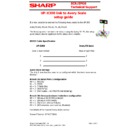
Documentation on how to connect Avery FX series scale to the UP-X300 series including cable specification
Handy Guide
|
3
|
218.76 KB
|
|
|
UP-X300 (serv.man5)
TM-U230 Buzzer support for X300.
Handy Guide
|
1
|
30.33 KB
|

|
UP-X300 (serv.man6)
RecoverPWFail.bat
Handy Guide
|
|
176 B
|
|
|
UP-X300 (serv.man7)
RecoverPWFail.bat documentation.
Handy Guide
|
1
|
31.29 KB
|
|
|
UP-X300 (serv.man8)
X300 FTP configuration to use with Sharpsoft across LAN or Broadband WAN.
Handy Guide
|
11
|
907.59 KB
|
|
|
UP-X300 (serv.man9)
Recovershutdown.bat documentation...
Handy Guide
|
1
|
30.52 KB
|

|
UP-X300 (serv.man10)
RecoverShutdown.bat This batch file will automatically restore the shutdown.dat file in the event of a power failure. Please follow the installation instructions.
Handy Guide
|
|
193 B
|
|
|
UP-X300 (serv.man11)
Demo Data Version 2 1.6.x.x User Notes
Handy Guide
|
1
|
18.14 KB
|
|
|
UP-X300 (serv.man12)
X300 Online configuration with Sharpsoft.
Handy Guide
|
4
|
384.36 KB
|
|
|
UP-X300 (serv.man13)
X300 Macro Report Job Number Table (List of Sales Report job numbers when creating macro key report)
Handy Guide
|
9
|
129.45 KB
|
|
|
UP-X300 (serv.man14)
Procedure for downgrading OS 1.08 to 1.07
Handy Guide
|
1
|
34.38 KB
|
|
|
UP-X300 (serv.man15)
Procedure for downgrading 1.6.x.x data to 1.5.x.x ready for restore.
Handy Guide
|
1
|
69.2 KB
|
|
|
UP-X300 (serv.man16)
UP-X300 200 Installations, Best Practices Guide (Please familiarise with these details when preparing installation and troubleshooting)
Handy Guide
|
1
|
18.77 KB
|
|
|
UP-X300 (serv.man17)
X300 Screenshot Utility documentation.
Handy Guide
|
1
|
93.69 KB
|
|
|
UP-X300 (serv.man18)
UP-X300 Remote Support Facility (NetOp)Installation Guide. Licences now purchased from BNS Distribution, contact details within document.
Handy Guide
|
7
|
537.48 KB
|
|
|
UP-X300 (serv.man19)
X300 X200 Feature Enhancement-2 (Contains setup and operational details on the new enhancements released for 1.6.x.x 1.2.0.9
Handy Guide
|
23
|
2.56 MB
|
|
|
UP-X300 (serv.man21)
X300 with X200 set up guide (Brief explanation to set up an already configured X300 with an X200 using X300 Demo Version 2 program (also on Web)
Handy Guide
|
1
|
18.62 KB
|
|
|
UP-X300 (serv.man22)
UP-X300 Documented Guide on editing INI file when setting filters on Macro Report Key
Handy Guide
|
3
|
46.25 KB
|
|
|
UP-X300 (serv.man23)
Guide on how to image a 256Mb CF Card for use in X300. INCLUDES RESTORE FEATURE FOR HD3
Handy Guide
|
5
|
98.07 KB
|
|
|
UP-X300 (serv.man24)
Guide on how to image a 256Mb CF Card for use in X300
Handy Guide
|
1
|
40.46 KB
|
|
|
UP-X300 (serv.man25)
X300 X200 Feature Enhancement Presentation (Contains details on the five new enhancements released in version 1.5.0.4)
Handy Guide
|
39
|
6.37 MB
|
|
|
UP-X300 (serv.man26)
UP-X300 Bar Code Scanner Setup
Handy Guide
|
1
|
34.27 KB
|
|
|
UP-X300 (serv.man27)
X300 Program Mode PLU Print Out user notes
Handy Guide
|
1
|
18.01 KB
|

|
UP-X300 (serv.man28)
X300 Program Mode PLU print out Utility This program will convert PLU Program data taken from X300 into CSV format ready for simple print out at PC
Handy Guide
|
|
230.22 KB
|
|
|
UP-X300 (serv.man29)
UP-X300 Mag Card Guide (explains procedure to create Mag Cards for the UP-X300
Handy Guide
|
1
|
27.65 KB
|
|
|
UP-X300 (serv.man30)
UP-X300 X500 to X200 HHT with AP. Wireless Network set up Guide
Handy Guide
|
7
|
477.46 KB
|
|
|
UP-X300 (serv.man31)
User notes for the X300 Demo Version 2 with X200 program data (refer to WEB site)
Handy Guide
|
1
|
17.94 KB
|
|
|
UP-X300 (serv.man32)
UP-X300 Backup Restore Function. briefly explains the procedure to Backup or Restore data through the Data Control function
Handy Guide
|
1
|
90.29 KB
|
|
|
UP-X300 (serv.man33)
X300 Feature Awareness Updates (Consolidated Stock Report when using Modifiers)
Handy Guide
|
1
|
29.56 KB
|
|
|
UP-X300 (serv.man34)
X300 Feature Awareness Update- Individual Person Ordering Payment on a Table
Handy Guide
|
1
|
29.43 KB
|
|
|
UP-X300 (serv.man35)
X300 Promotions Guide. The Guide details how to set up and use the many different types of Promotions that are available on the X300
Handy Guide
|
20
|
324.29 KB
|
|
|
UP-X300 (serv.man36)
UP-X300 Training Study guide
Handy Guide
|
30
|
894.08 KB
|
|
|
UP-X300 (serv.man37)
UP-X300 Printer layouts from demo version installation instructions.
Handy Guide
|
2
|
172.33 KB
|
|
|
UP-X300 (serv.man38)
UP-X300 Restoring using HD2 Preset folder
Handy Guide
|
1
|
45.72 KB
|
|
|
UP-X300 (serv.man39)
UP-X300 Restoring a Backup (All) file.
Handy Guide
|
2
|
67 KB
|
|
|
UP-X300 (serv.man40)
UP-X300 Main Features Presentation
Handy Guide
|
64
|
5.84 MB
|
|
|
UP-X300 (serv.man50)
Updated 7 7
FAQ
|
38
|
247.32 KB
|
|
|
UP-X300 (serv.man123)
UP-X300 Brochure
Brochure
|
2
|
1.2 MB
|

