Read Sharp UP-3500 (serv.man33) User Guide / Operation Manual online
P
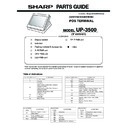
OS TERMINAL
INSTRUCTION MANUAL
UP-3500
MODEL
Second Edition
Warning
This is a Class A product. In a domestic environment this product may cause radio interference in which
case the user may be required to take adequate measures.
This is a Class A product. In a domestic environment this product may cause radio interference in which
case the user may be required to take adequate measures.
Warnung
Dies ist eine Einrichtung der Klasse A. Diese Einrichtung kann im Wohnbereich Funkstörungen
verursachen; in diesem Fall kann vom Betreiber verlangt werden, angemessene Maßnahmen
durchzuführen und dafür aufzukommen.
Dies ist eine Einrichtung der Klasse A. Diese Einrichtung kann im Wohnbereich Funkstörungen
verursachen; in diesem Fall kann vom Betreiber verlangt werden, angemessene Maßnahmen
durchzuführen und dafür aufzukommen.
Avertissement
Ceci est un produit de Classe A. Dans un environnement domestique ce produit risque de provoquer une
interférence radio, auquel cas l’utilisateur sera obligé d’observer les mesures adéquates.
Ceci est un produit de Classe A. Dans un environnement domestique ce produit risque de provoquer une
interférence radio, auquel cas l’utilisateur sera obligé d’observer les mesures adéquates.
Advertencia
Este es un producto de la clase A. En un ambiente doméstico es posible que este producto cause
radiointerferencia. En este caso se solicita al usuario que tome medidas adecuadas.
Este es un producto de la clase A. En un ambiente doméstico es posible que este producto cause
radiointerferencia. En este caso se solicita al usuario que tome medidas adecuadas.
CAUTION: Please observe the following when an optional drawer is used.
The drawer unit should be securely fitted to the supporting platform to avoid instability when the drawers
are open.
The drawer unit should be securely fitted to the supporting platform to avoid instability when the drawers
are open.
CAUTION:
The socket-outlet shall be installed near the equipment and shall be easily accessible.
VORSICHT:
Die Netzsteckdose muß nahe dem Gerät angebracht und leicht zugänglich sein.
ATTENTION:
La prise de courant murale devra être installée à proximité de l’équipement et devra être facilement
accessible.
AVISO:
El tomacorriente debe estar instalado cerca del equipo y debe quedar bien accesible.
VARNING:
Det matande vägguttaget skall placeras nära apparaten och vara lätt åtkomligt.
LET OP:
Het stopcontact dient in de buurt van de kassa en gemakkelijk toegangbaar te zijn.
CAUTION:
For a complete electrical disconnection pull out the mains plug.
VORSICHT:
Zur vollständigen elektrischen Trennung vom Netz den Netzstecker ziehen.
ATTENTION:
Pour obtenir une mise hors-circuit totale, débrancher la prise de courant secteur.
AVISO:
Para una desconexión eléctrica completa, desenchufar el enchufe de tomacorriente.
VARNING:
För att helt koppla från strömmen, dra ut stickproppen.
LET OP:
Trek de stekker uit het stopcontact indien u de stroom geheel wilt uitschakelen.
Authorized representative responsible for the European Union Community Market
Autorisierter Repräsentant in der Europäischen Union
Représentant autorisé pour le marché de la communauté européenne
Representante autorizado responsable para el Mercado Común de la Unión Europea
Auktoriserad representant ansvarig för EU marknaden
Geautoriseerde vertegenwoordiger in de Europese Unie
1
INTRODUCTION
Thank you very much for your purchase of the SHARP POS Terminal Model UP-3500.
Please read this manual carefully before operating your POS terminal.
Please keep this manual for future reference.
Please read this manual carefully before operating your POS terminal.
Please keep this manual for future reference.
IMPORTANT
• Install this terminal in a location that is not subject to direct radiation, unusual temperature
changes, and high humidity or exposure to water or other liquids.
Installation in such locations could cause damage to the cabinet and the electronic components.
Installation in such locations could cause damage to the cabinet and the electronic components.
• Do not drop this terminal nor subject it to any strong shock.
This may cause damage to the terminal.
• Do not apply excessive pressure to the display. Do not use a sharp-pointed object on the
display.
This may cause damage to the LCD display.
This may cause damage to the LCD display.
• When cleaning this terminal, use a dry, soft cloth. Never use solvents, such as benzine or
thinner.
The use of such chemicals will lead to discoloration or deterioration of the cabinet.
The use of such chemicals will lead to discoloration or deterioration of the cabinet.
• The terminal plugs into any standard wall outlet official (nominal) voltage.
Other electrical devices on the same electrical circuit could cause the terminal to malfunction.
• If the terminal malfunctions, call your local authorized dealer for service. Do not try to repair the
terminal yourself.
• Be sure to use the supplied AC adapter and AC power cord.
• For a complete electrical disconnection, remove the AC power cord from the wall outlet.
• Do not stay in contact with the parts of the product or the AC adapter that become hot for long
• For a complete electrical disconnection, remove the AC power cord from the wall outlet.
• Do not stay in contact with the parts of the product or the AC adapter that become hot for long
periods of time. Doing so may result in low-temperature burns.
PRECAUTION
This POS terminal has a built-in memory protection circuit which is operated by a rechargeable battery
pack.
Please note that all batteries will, in time, dissipate their charge even if not used. Therefore to insure an
adequate initial charge in the protection circuit and to prevent any possible loss of memory upon
installation, it is recommended that each unit be allowed to be recharged for a period of 24 to 48 hours prior
to use by the customer.
After installation, the battery pack is charged when the machine is plugged in. This recharging precaution
can prevent unnecessary initial service calls.
2
CONTENTS
INTRODUCTION ··········································································································································· 1
IMPORTANT ················································································································································· 1
PRECAUTION ·············································································································································· 1
CONTENTS ·················································································································································· 2
1. Part Names and Functions ··················································································································· 7
External View ······································································································································· 7
Front view ···································································································································· 7
Rear view ····································································································································· 7
Rear view ····································································································································· 7
Displays ··············································································································································· 9
Operator display (touch panel) ···································································································· 9
Customer display ······················································································································· 12
Screen save mode ····················································································································· 12
Customer display ······················································································································· 12
Screen save mode ····················································································································· 12
Clerk keys ·········································································································································· 13
2. Before Operating the POS Terminal ·································································································· 14
Display Adjusttment ··························································································································· 14
Connecting the Printer and Installing the Paper Rolls ······································································· 14
Connecting the Printer and Installing the Paper Rolls ······································································· 14
3. Selecting an Operating Mode ············································································································ 15
Operating Mode ································································································································· 15
Mode Selection ·································································································································· 16
Mode Selection ·································································································································· 16
Selecting a mode ······················································································································· 16
4. Prior to Making Entries ······················································································································· 17
Preparations for Entries ····················································································································· 17
Error Warning ···································································································································· 17
Entering a Secret Code ····················································································································· 18
Error Warning ···································································································································· 17
Entering a Secret Code ····················································································································· 18
5. Entries ·················································································································································· 19
Function Key Description ··················································································································· 19
Screen transitions ······················································································································ 19
Function key list (using default key labels) ················································································ 20
Function key list (using default key labels) ················································································ 20
How to Use the Touch Panel ············································································································· 24
Cursor control by touching option(s) or items(s) in the window ················································· 24
Clerk Assignment (Sign-on/Sign-off) ································································································· 25
Clerk assignment ······················································································································· 25
Item Selection from the Menu ············································································································ 27
Starting Cash Memory Entry ·············································································································· 28
Item Entries ········································································································································ 29
Starting Cash Memory Entry ·············································································································· 28
Item Entries ········································································································································ 29
Registration screen ···················································································································· 29
Single item entries ····················································································································· 29
Repeat entries ···························································································································· 32
Multiplication entries ·················································································································· 33
Split-pricing entries ···················································································································· 35
Successive multiplication entries ······························································································· 37
Scale entries ······························································································································ 39
Single item cash sale (SICS)/single item finalize (SIF) entries ················································· 40
Non-turnover sales ···················································································································· 41
Special Entries for PLU/EAN ············································································································· 42
Promotion function ····················································································································· 42
PLU/EAN link entries ················································································································· 44
EAN learning function ················································································································ 45
EAN/ITF-to-PLU conversion ······································································································ 46
PLU/EAN information inquiry (view) function ············································································· 47
EAN price change function ········································································································ 48
Combo meal PLU/EAN entries ·································································································· 49
With/without entries ··················································································································· 50

