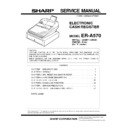
Read Sharp ER-A570 (serv.man6) Service Manual online
INSTALLATION MANUAL
CODE: 00ZERA570VIME
ELECTRONIC
CASH REGISTER
MODEL
ER-A570
SRV Key : LKGIM7113RCZZ
PRINTER : M-820
(For "V" version)
PRINTER : M-820
(For "V" version)
CAUTION
EXTREME CAUTION MUST BE TAKEN WHEN SERVICING THIS MACHINE. EVEN
THOUGH THE MODE SWITCH IS IN THE
EXTREME CAUTION MUST BE TAKEN WHEN SERVICING THIS MACHINE. EVEN
THOUGH THE MODE SWITCH IS IN THE
&
POSITION, VOLTAGE IS STILL SUPPLIED TO
THE ENTIRE MACHINE.
WHEN WORKING ON THIS MACHINE MAKE SURE THAT THE POWER CORD IS
REMOVED FROM THE WALL OUTLET.
WHEN WORKING ON THIS MACHINE MAKE SURE THAT THE POWER CORD IS
REMOVED FROM THE WALL OUTLET.
CHAPTER 1.
GENERAL . . . . . . . . . . . . . . . . . . . . . . . . . . . . . . . . . . . . . . . . . . . . . . 1
CHAPTER 2.
LIST OF OPTIONS . . . . . . . . . . . . . . . . . . . . . . . . . . . . . . . . . . . . . . . 1
CHAPTER 3.
REMOVING THE MAIN DRAWER . . . . . . . . . . . . . . . . . . . . . . . . . . . 2
CHAPTER 4.
REMOVING THE TOP CABINET . . . . . . . . . . . . . . . . . . . . . . . . . . . . 3
CHAPTER 5.
EXPANSION RAM CHIP and RAM BOARD
(ER-01RA, ER-02RA, ER-01MB and ER-02MB) . . . . . . . . . . . . . . . . 4
(ER-01RA, ER-02RA, ER-01MB and ER-02MB) . . . . . . . . . . . . . . . . 4
CHAPTER 6.
CONTROL ROM (ER-A61R1) . . . . . . . . . . . . . . . . . . . . . . . . . . . . . . 7
CHAPTER 7.
IN-LINE I/F (ER-A6IN) and RS232 I/F (ER-A5RS). . . . . . . . . . . . . . . 8
CHAPTER 8.
REMOTE DRAWER (ER-03DW) . . . . . . . . . . . . . . . . . . . . . . . . . . . 12
CHAPTER 9.
SLIP PRINTER (ER-31SP) . . . . . . . . . . . . . . . . . . . . . . . . . . . . . . . . 14
CHAPTER 10.
ONE HOLE CLERK KEY (ER-A5CL) . . . . . . . . . . . . . . . . . . . . . . . . 19
CHAPTER 11.
WMF CLERK KEY I/F (ER-A6WF) . . . . . . . . . . . . . . . . . . . . . . . . . . 20
CHAPTER 12.
JOURNAL NEAR END SENSOR (DKIT-8643RCZZ) . . . . . . . . . . . 22
CHAPTER 13.
DRAWER FIXING KIT (DKIT-8633RCZZ) . . . . . . . . . . . . . . . . . . . . 23
CHAPTER 14.
PRESETS LOADER . . . . . . . . . . . . . . . . . . . . . . . . . . . . . . . . . . . . . 24
CONTENTS
SHARP CORPORATION
This document has been published to be used
for after sales service only.
The contents are subject to change without notice.
for after sales service only.
The contents are subject to change without notice.
Parts marked with "
!
" is important for maintaining the safety of the set. Be sure to replace these parts with specified ones for
maintaining the safety and performance of the set.
≅
Example of wire treatment when all system is installed:
RS232 Cable
SRN Cable
Remote Drawer Cable
RS232 Cable
SRN Cable
CHAPTER 1. GENERAL
This manual describes the installation and operational test proce-
dures for the Model ER-A570 system ECR options.
Be sure to read the "BEFORE INSTALLING OPTIONS" prior to in-
stalling any option.
Descriptions of the specifications of the ECR and options subject to
change.
dures for the Model ER-A570 system ECR options.
Be sure to read the "BEFORE INSTALLING OPTIONS" prior to in-
stalling any option.
Descriptions of the specifications of the ECR and options subject to
change.
Note: This manual describes only options whose installing proce-
dures need to be explained.
∗
BERORE INSTALLING OPTIONS
1. If you install any options in an ER-A570 register already in use,
you must reset the totals. Please notify its user before performing
the installation.
If the register is not reset, sales data stored in the register may be
destroyed due to possible incorrect installation.
the installation.
If the register is not reset, sales data stored in the register may be
destroyed due to possible incorrect installation.
2. Print out the SRV-mode and PGM2-mode programs before install-
ing any option. It may be necessary to modify each program after
installation. These printouts are needed for this modification.
installation. These printouts are needed for this modification.
3. If you install the option PWBs (ER-A6IN, ER-A5RS), option control
ROM (ER-A57R1) and expansion RAM chip in the ER-A650 regis-
ter already in use, perform data saving for memory protection by
using the SIO interface in advance.
ter already in use, perform data saving for memory protection by
using the SIO interface in advance.
4. As a safety measure, be sure to turn the mode switch to the OFF
position and unplug the register before installing any option.
5. The ER-A570 is equipped with various SRV-mode functions to aid
you in installing the options. Never enter any job numbers other
than those shown in each of the following sections, so that data
stored is not destroyed.
than those shown in each of the following sections, so that data
stored is not destroyed.
6. After installing any options, start the ER-A570 register by perform-
ing the service reset or the master reset.
Service reset
1) Turn the mode switch to the SRV’ position to
turn on the power.
2) Turn the mode switch to the SRV position.
Sample printout
PRG. RESET ***
PRG. RESET ***
Master reset
1) Turn the mode switch to the SRV’ position to
turn on the power.
2) Turn the mode switch to the SRV position,
holding down the journal feed key.
Sample printout
MASTER. RESET ***
MASTER. RESET ***
CHAPTER 2. LIST OF OPTIONS
1. Options
NO.
NAME
MODEL
DESCRIPTION
1
REMOTE PRINTER
E R – 0 3 R P
Via SRN I/F (ER-A6IN)
E R – 0 4 R P
2
REMOTE DRAWER
E R – 0 3 D W
4B/8C, MAX. 3 units
3
COIN CASE
E R – 4 8 C C 3
4B/8C
4
COIN CASE COVER
E R – 0 2 C V 1 ~ 5
For ER-48CC3
5
EXPANSION RAM CHIP
E R – 0 1 R A
32K bytes RAM chip
E R – 0 2 R A
128K bytes RAM chip
6
EXPANSION MEMORY BOARD
E R – 0 1 M B
128K bytes memory board with 3 IC sockets (For ER-02RA)
E R – 0 2 M B
1M bytes memory board
7
IN-LINE SYSTEM
E R – A 6 I N
SRN inline I/F
8
ON-LINE SYSTEM
E R – A 5 R S
2ports RS232 I/F
9
CONTROL ROM
E R – A 6 1 R 1
Control for ER-A6IN snd ER-A5RS
10
PRESETS LOADER
E R – 0 2 F D
FD unit
11
CONNECTION CABLE
E R – A 5 C B
Loader cable
12
SLIP PRINTER
E R – 3 1 S P
13
1 HOLE CLERK KEY
E R – A 5 C L
14
WMF CLERK KEY I/F
E R – A 6 W F
2. Service options
NO.
NAME
PARTS CODE
PRICE RANK
DESCRIPTION
1
SERVICE KEY
L K G I M 7 1 1 3 R C Z Z
AK
For the mode switch
2
DRIP-PROOF SWITCH COVER
G C O V B 7 0 4 7 R C Z Z
BA
3
MODE KEY GRIP COVER
L K G I M 7 1 2 6 R C Z Z
AL
OPkey only
4
JOURNAL NEAR END SENSOR
D K I T – 8 6 4 3 R C Z Z
BG
5
DRAWER FIXING KIT
D K I T – 8 6 3 3 R C Z Z
BE
6
ADDITIONAL CLERK KEY
(For ER-A5CL)
(For ER-A5CL)
L K G I M 7 3 4 6 R C Z Z
AX
Key No. = 7
L K G I M 7 3 4 7 R C Z Z
AX
Key No. = 8
L K G I M 7 3 4 8 R C Z Z
AX
Key No. = 9
L K G I M 7 3 4 9 R C Z Z
AX
Key No. = 10
L K G I M 7 3 5 0 R C Z Z
AX
Key No. = 11
L K G I M 7 3 5 1 R C Z Z
AX
Key No. = 12
L K G I M 7 3 5 2 R C Z Z
AX
Key No. = 13
L K G I M 7 3 5 3 R C Z Z
AX
Key No. = 14
L K G I M 7 3 5 4 R C Z Z
AX
Key No. = 15
3. Service tools
NO.
NAME
PARTS CODE
PRICE RANK
1
EXPANSION PWB
C K O G – 6 7 0 8 R C Z Z
BU
2
SIO LOOP BACK CONECTOR
U K O G – 6 7 0 4 R C Z Z
AV
4. Supplines
NO.
NAME
PARTS CODE
PRICE RANK
DESCRIPTION
1
ROLL PAPER
D P A P R 1 0 0 6 C S Z Z
AR
5rolls/pack
2
INK RIBBON
P R B N – 6 6 4 0 R C Z Z
AX
3
INK FOR STAMP
U I N K – 1 0 0 1 C C Z Z
AK
5cc
4
KEY SHEET
P S H E K 6 8 2 3 B H Z Z
AK
Programming character sheet
P S H E K 6 8 2 2 B H Z Z
AR
Standard character sheet
P S H E K 6 7 7 7 R C Z Z
AC
Blank character sheet
– 1 –
CHAPTER 3. REMOVING THE MAIN
DRAWER
1. Removing the main drawer.
Fig. 1
1) Open the printer cover
1
.
2) Remove the ribbon cover
2
.
3) Remove the drawer fixing screw
3
(Self tap screw).
Fig. 2
4) Slide the main unit in the direction of the arrow A and lift it in the
direction of the arrow B.
Fig. 3
5) Stand the main drawer sideways as illustrated above, and discon-
nect the drawer connector.
2. Replacing the main drawer
Install the main drawer in the reverse order of removing. Before in-
stalling, make sure that the connector is securely fastened.
stalling, make sure that the connector is securely fastened.
3. Changing drawer position.
The position of the drawer on the main body can be changed by
changing the holes into which the drawer is fixed. After changing the
drawer position, fix the drawer securely with the drawer fixing screw
(Self tap screw).
changing the holes into which the drawer is fixed. After changing the
drawer position, fix the drawer securely with the drawer fixing screw
(Self tap screw).
<< When shipping>>
Fig. 4
2
3
1
B
A
496
2

