Read Sharp ER-A410 / ER-A420 (serv.man9) User Guide / Operation Manual online
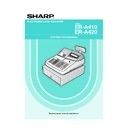
ELECTRONIC CASH REGISTER
INSTRUCTION MANUAL
ER-A410
ER-A420
MODEL
E
R-A410/A420
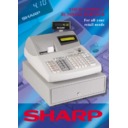
The above illustration shows the model ER-A410.
HYO-1,4(SEEG)(E)
02.4.20, 6:46 PM
1
CAUTION:
The cash register and the remote drawer should be securely fitted to the supporting
platforms to avoid instability when the drawers are open.
CAUTION:
The socket-outlet shall be installed near the equipment and shall be easily accessible.
VORSICHT:
Die Netzsteckdose muß nahe dem Gerät angebracht und leicht zugänglich sein.
ATTENTION:
La prise de courant murale devra être installée a proximité de l’équipement et devra être
facilement accessible.
AVISO:
El tomacorriente debe estar instalado cerca del equipo y debe quedar bien accesible.
VARNING:
Det matande vägguttaget skall placeras nära apparaten och vara lätt atkomligt.
CAUTION:
For a complete electrical disconnection pull out the mains plug.
VORSICHT:
Zur vollständigen elektrischen Trennung vom Netz den Netzstecker ziehen.
ATTENTION:
Pour obtenir une mise hors-circuit totale, débrancher la prise de courant secteur.
AVISO:
Para una desconexión eléctrica completa, desenchufar el enchufe de tomacorriente.
VARNING:
För att helt koppla fran strömmen, dra ut stickproppen.
ER-A410/A420(Hyo2,3) 02.4.20 6:46 PM Page C2
INTRODUCTION
Thank you very much for your purchase of the SHARP Electronic Cash Register, Model ER-A410/A420.
Please read this manual carefully before operating your machine in order to gain full understanding of functions
and features.
Please keep this manual for future reference. It will help you, if you encounter any operational problems.
Please read this manual carefully before operating your machine in order to gain full understanding of functions
and features.
Please keep this manual for future reference. It will help you, if you encounter any operational problems.
IMPORTANT
• Install your register in a location that is not subject to direct sunlight, unusual temperature changes,
high humidity or exposure to water sources and keep away from heat and magnetic sources.
Installation in such locations could cause damage to the cabinet and the electronic components.
Installation in such locations could cause damage to the cabinet and the electronic components.
• The register should not be operated by an individual with wet hands.
The water could seep into the interior of the register and cause component failure.
• When cleaning your register, use a dry, soft cloth. Never use solvents, such as benzine and/or thinner.
The use of such chemicals will lead to discoloration or deterioration of the cabinet.
• The register plugs into any standard wall outlet (Official (nominal) voltage).
Other electrical devices on the same electrical circuit could cause the register to malfunction.
• If the register malfunctions, call your local dealer for service - do not try to repair the register yourself.
• For a complete electrical disconnection, pull out the mains plug.
• For a complete electrical disconnection, pull out the mains plug.
PRECAUTION
This Electronic Cash Register has a built-in memory protection circuit which is operated by rechargeable
batteries.
As you know, all batteries will, in time, dissipate their charge even if not used. Therefore to insure an adequate
initial charge in the protection circuit, and to prevent any possible loss of memory upon installation, it is
recommended that each unit be allowed to recharge for a period of 24 to 48 hours prior to use by the customer.
In order to charge the batteries, the machine must be plugged in. This recharging precaution can prevent
unnecessary initial service calls.
1
ER-A410/A420-English 02.4.20 6:47 PM Page 1
CONTENTS
INTRODUCTION ····················································································································································1
IMPORTANT ··························································································································································1
PRECAUTION························································································································································1
CONTENTS····························································································································································2
EXTERNAL VIEW OF THE ER-A410 ····················································································································7
Front view ···············································································································································7
Rear view················································································································································7
Rear view················································································································································7
EXTERNAL VIEW OF THE ER-A420 ····················································································································8
Front view ···············································································································································8
Rear view················································································································································8
Rear view················································································································································8
PRINTER································································································································································9
KEYBOARD ·························································································································································10
KEYBOARD ·························································································································································10
1 ER-A410 standard keyboard layout·········································································································10
2 ER-A420 standard keyboard layout·········································································································12
3 Standard key number layout····················································································································13
4 Inserting of the key sheet (ER-A420) ······································································································14
KEYS AND SWITCHES ·······································································································································15
1 Mode switch and mode keys ···················································································································15
2 Drawer lock key ·······································································································································15
2 Drawer lock key ·······································································································································15
DISPLAYS ···························································································································································16
1 Operator display ·····································································································································16
2 Customer display (Pop-up type) ··············································································································16
2 Customer display (Pop-up type) ··············································································································16
PRIOR TO PROGRAMMING ·······························································································································17
1 Programming keyboard layout·················································································································17
2 How to program alphanumeric characters·······························································································18
2 How to program alphanumeric characters·······························································································18
Using character keys on the keyboard ·································································································18
Entering character codes······················································································································18
Entering character codes······················································································································18
PROGRAMMING ·················································································································································20
Basic instructions··································································································································20
Preparations for programming··············································································································20
Preparations for programming··············································································································20
Direct Programming ···········································································································································20
1 Setting the date and time·························································································································20
Date ······················································································································································20
Time······················································································································································21
Time······················································································································································21
2 Programming for departments ·················································································································21
Unit price ··············································································································································21
Functional selection······························································································································22
Functional selection······························································································································22
3 Price lookup (PLU) programming ············································································································23
Unit price ··············································································································································23
Functional selection······························································································································24
PLU assignment to department ············································································································25
Functional selection······························································································································24
PLU assignment to department ············································································································25
4 Programming for discount keys (
-
) ······································································································26
Deduction amount ································································································································26
5 Programming for percent and exchange keys (
%
and
e
)···································································26
Percent rate and currency exchange rate ····························································································26
6 Programming for discount and percent keys (
-
and
%
) ·····································································27
FOR THE MANAGER
2
ER-A410/A420-English 02.4.20 6:47 PM Page 2

