Read Sharp DV-RW250H (serv.man2) Service Manual online
SERVICE MANUAL
DVD-RW RECORDER &
VHS VIDEO CASSETTE RECORDER
VHS VIDEO CASSETTE RECORDER
MODEL
DV-RW250H
In the interests of user-safety (Required safety regulations
in some countries) the set should be restored to its original
condition and only parts identical to those specified be used.
CONTENTS
SHARP CORPORATION
IMPORTANT WARING .................................................................................................................................................
SERVICING NOTICES ON CHECKING ......................................................................................................................
HOW TO ORDER PARTS ............................................................................................................................................
DISC REMOVAL METHOD AT NO POWER SUPPLY ...............................................................................................
TAPE REMOVAL METHOD AT NO POWER SUPPLY ..............................................................................................
PARENTAL CONTROL-RATING LEVEL ....................................................................................................................
TRAY LOCK .................................................................................................................................................................
GENERAL SPECIFICATIONS .....................................................................................................................................
DISASSEMBLY INSTRUCTIONS ................................................................................................................................
KEY TO ABBREVIATIONS ..........................................................................................................................................
SERVICE MODE LIST .................................................................................................................................................
PREVENTIVE CHECKS AND SERVICE INTERVALS ...............................................................................................
WHEN REPLACING EEPROM (MEMORY) IC ...........................................................................................................
WHEN REPLACING NEW DVD LOADER ..................................................................................................................
SERVICING FIXTURES AND TOOLS .........................................................................................................................
PREPARATION FOR SERVICING ..............................................................................................................................
MECHANICAL ADJUSTMENTS ..................................................................................................................................
ELECTRICAL ADJUSTMENTS ....................................................................................................................................
TROUBLESHOOTING GUIDE .....................................................................................................................................
BLOCK DIAGRAMS .....................................................................................................................................................
PRINTED CIRCUIT BOARDS ......................................................................................................................................
SCHEMATIC DIAGRAMS ............................................................................................................................................
WAVEFORMS ..............................................................................................................................................................
EXPLODED VIEW ........................................................................................................................................................
REPLACEMENT PARTS LIST .....................................................................................................................................
Page
A1-1
A1-1
A1-1
A1-2
A1-2
A1-2
A1-3
A2-1
B1-1
C1-1
C2-1
C3-1
C4-1
C4-2
D1-1
D1-1
D2-1
D3-1
E-1
F-1
G-1
H-1
I-1
J1-1
K1-1
A1-1
A1-1
A1-1
A1-2
A1-2
A1-2
A1-3
A2-1
B1-1
C1-1
C2-1
C3-1
C4-1
C4-2
D1-1
D1-1
D2-1
D3-1
E-1
F-1
G-1
H-1
I-1
J1-1
K1-1
DATE OF ISSUE 7/2004
The reggion number
for this recorder is 2
.
2
CAUTION:
DVD PLAYER IS A CLASS 1 LASER PRODUCT. HOWEVER THIS PLAYER USES A VISIBLE LASER
BEAM WHICH COULD CAUSE HAZARDOUS RADIATION EXPOSURE IF DIRECTED. BE SURE TO
OPERATE THE PLAYER CORRECTLY AS INSTRUCTED.
DVD PLAYER IS A CLASS 1 LASER PRODUCT. HOWEVER THIS PLAYER USES A VISIBLE LASER
BEAM WHICH COULD CAUSE HAZARDOUS RADIATION EXPOSURE IF DIRECTED. BE SURE TO
OPERATE THE PLAYER CORRECTLY AS INSTRUCTED.
THE FOLLOWING CAUTION LABEL IS LOCATED ON THE REAR PANEL OF THE PLAYER.
WHEN THIS PLAYER IS PLUGGED TO THE WALL OUTLET, DO NOT PLACE YOUR EYES CLOSE
TO THE OPENING OF THE DISC TRAY AND OTHER OPENINGS TO LOOK INTO THE INSIDE OF
THIS PLAYER.
TO THE OPENING OF THE DISC TRAY AND OTHER OPENINGS TO LOOK INTO THE INSIDE OF
THIS PLAYER.
USE OF CONTROLS OR ADJUSTMENTS OR PERFORMANCE OF PROCEDURES OTHER THAN
THOSE SPECIFIED HEREIN MAY RESULT IN HAZARDOUS RADIATION EXPOSURE.
THOSE SPECIFIED HEREIN MAY RESULT IN HAZARDOUS RADIATION EXPOSURE.
DO NOT OPEN COVERS AND DO NOT REPAIR YOURSELF. REFER SERVICING TO QUALIFIED
PERSONNEL.
PERSONNEL.
IMPORTANT WARNING
Please include the following informations when you order parts. (Particularly the VERSION LETTER.)
1. MODEL NUMBER and VERSION LETTER
1. MODEL NUMBER and VERSION LETTER
The MODEL NUMBER can be found on the back of each product and the VERSION LETTER can be
found at the end of the SERIAL NUMBER.
2. PART NO. and DESCRIPTION
2. PART NO. and DESCRIPTION
You can find it in your SERVICE MANUAL.
HOW TO ORDER PARTS
SERVICING NOTICES ON CHECKING
As for the places which need special attentions,
they are indicated with the labels or seals on the
cabinet, chassis and parts. Make sure to keep the
indications and notices in the operation manual.
they are indicated with the labels or seals on the
cabinet, chassis and parts. Make sure to keep the
indications and notices in the operation manual.
PERFORM A SAFETY CHECK AFTER
SERVICING
SERVICING
4.
Confirm that the screws, parts and wiring which
were removed in order to service are put in the
original positions, or whether there are the
portions which are deteriorated around the
serviced places serviced or not. Check the
insulation between the antenna terminal or
external metal and the AC cord plug blades.
And be sure the safety of that.
were removed in order to service are put in the
original positions, or whether there are the
portions which are deteriorated around the
serviced places serviced or not. Check the
insulation between the antenna terminal or
external metal and the AC cord plug blades.
And be sure the safety of that.
2. USE THE DESIGNATED PARTS
The parts in this equipment have the specific
characters of incombustibility and withstand
voltage for safety. Therefore, the part which is
replaced should be used the part which has
the same character.
Especially as to the important parts for safety
which is indicated in the circuit diagram or the
table of parts as a mark, the designated
parts must be used.
1. KEEP THE NOTICES
3. PUT PARTS AND WIRES IN THE
ORIGINAL POSITION AFTER
ASSEMBLING OR WIRING
ASSEMBLING OR WIRING
There are parts which use the insulation
material such as a tube or tape for safety, or
which are assembled in the condition that
these do not contact with the printed board.
The inside wiring is designed not to get closer
to the pyrogenic parts and high voltage parts.
Therefore, put these parts in the original
positions.
material such as a tube or tape for safety, or
which are assembled in the condition that
these do not contact with the printed board.
The inside wiring is designed not to get closer
to the pyrogenic parts and high voltage parts.
Therefore, put these parts in the original
positions.
A1-1
(Printed on the Rear Panel)
CLASS 1
LASER PRODUCT
LASER PRODUCT
A1-2
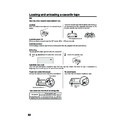
TAPE REMOVAL METHOD AT NO POWER SUPPLY
Remove the Top Cabinet, Front Cabinet and DVD Block. (Refer to item 1 of the
DISASSEMBLY INSTRUCTIONS.)
Remove one screw of the Loading Motor from the insert hole for screw driver and remove the Loading
Motor.
Rotate the Pinch Roller Cam in the direction of the arrow by hand to slacken the Video Tape.
(Refer to Fig. 2)
Rotate the Clutch Ass'y either of the derections to wind the Video Tape in the Cassette Case.
Repeat the above step 3~4. Then take out the Video Cassette from the Deck Chassis. Be careful not to
scratch on the tape.
1.
2.
3.
4.
5.
5.
1.
2.
Insert a fine rod (wire etc.) into the hole of the Front Cabinet as shown by the arrow. (Refer to Fig. 1)
The Tray is opened.
Draw the Tray.
The Tray is opened.
Draw the Tray.
DISC REMOVAL METHOD AT NO POWER SUPPLY
Fig. 1
Front Cabinet
DVD Flap
Fig. 1
Insert hole for screw driver
Fig. 2
Main Cam
Clutch Ass'y
Main Chassis (Front Side)
Loading Motor
Capstan DD Unit
Pinch Roller Cam
Screw
PARENTAL CONTROL - RATING LEVEL
4 DIGIT PASSWORD CANCELLATION
If the stored 4 digit password in the Rating Level menu needs to be cancelled, please follow the steps below.
Turn Unit ON.
Press and hold the '7' key on the remote control unit.
Simultaneously press and hold the 'STOP' key on the front panel.
Hold both keys for more than 2 seconds.
The On Screen Display message 'PASSWORD UNLOCK' will appear.
The 4 digit password has now been cleared
Press and hold the '7' key on the remote control unit.
Simultaneously press and hold the 'STOP' key on the front panel.
Hold both keys for more than 2 seconds.
The On Screen Display message 'PASSWORD UNLOCK' will appear.
The 4 digit password has now been cleared
1.
2.
3.
4.
5.
6.
2.
3.
4.
5.
6.
NB: No indications on the screen when the Parental Lock is setting.
A1-3
TRAY LOCK
Tray cannot be opened by setting the Tray Lock, please follow the steps below.
Turn Unit ON.
Press and hold the '0' key on the remote control unit.
Simultaneously press and hold the 'STOP' key on the front panel.
Hold both keys for more than 2 seconds.
Press the OPEN/CLOSE key on the front panel to check the Tray Lock setting.
Press and hold the '0' key on the remote control unit.
Simultaneously press and hold the 'STOP' key on the front panel.
Hold both keys for more than 2 seconds.
Press the OPEN/CLOSE key on the front panel to check the Tray Lock setting.
1.
2.
3.
4.
5.
2.
3.
4.
5.
NB: No indications on the screen when the Tray Lock is setting.
To unlock the Tray Lock, please follow the steps below.
NB: The above procedure will reset ALL of the player's settings to the default factory state.
Turn Unit ON.
Simultaneously press and hold the 'PLAY' button and 'CH UP' button on the front panel.
Hold both keys for more than 2 second.
The On Screen Display message 'FACTORY INITALIZE' will appear.
The Tray Lock has now been cleared.
Turn Unit OFF.
Simultaneously press and hold the 'PLAY' button and 'CH UP' button on the front panel.
Hold both keys for more than 2 second.
The On Screen Display message 'FACTORY INITALIZE' will appear.
The Tray Lock has now been cleared.
Turn Unit OFF.
1.
2.
3.
4.
5.
6.
2.
3.
4.
5.
6.

