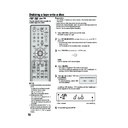
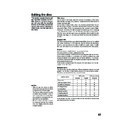
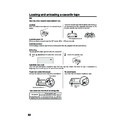
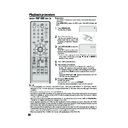
Read Sharp DV-RW250H (serv.man10) User Guide / Operation Manual online
48
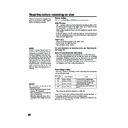
Read this before recording on disc
Types of disc
You can use DVD-RW and DVD-R discs to record video.
DVD-RW discs
• Ver 1.1 and later discs can be formatted for recording in either of the
two modes: the VR mode or the Video mode. Ver.1.0 discs can only
be formatted for recording in the VR mode.
be formatted for recording in the VR mode.
• High quality images and sound can be repeatedly recorded about
1,000 times.
• A disc formatted in the VR mode can have as many as 99 original
titles and playlist titles each. Discs formatted in the Video mode can
have up to 99 original titles.
have up to 99 original titles.
DVD-R discs
• Discs can only be recorded in the Video mode.
• Discs can be recorded only once.
• Up to 99 titles can be created.
• Discs can be recorded only once.
• Up to 99 titles can be created.
For more information on recording format, see “Recording for-
mat” (page 10).
mat” (page 10).
Notes on recording in the Video mode
• The Video mode cannot be selected for Ver. 1.0 DVD-RW discs.
• The remaining available area on the disc decreases as recording
• The remaining available area on the disc decreases as recording
progresses. Additional contents can be recorded in the remaining
time area, but it cannot be overwritten into the recorded area.
time area, but it cannot be overwritten into the recorded area.
• To format a new DVD-RW in the Video mode, set the automatic for-
mat feature to the Video mode. (See page 23.)
Recording modes
There are 4 modes for recording on disc. Recording time and quality
vary according to mode.
vary according to mode.
• Recording time above is based on a 4.7GB disc.
Since DVD recording is performed using VBR (Variable Bit Rate), re-
cording time varies according to the recorded content.
To know the correct recording time, stop recording and check the me-
dia information. (See page 32.)
cording time varies according to the recorded content.
To know the correct recording time, stop recording and check the me-
dia information. (See page 32.)
This section explains things you must
know to record onto a disc. Read it
before attempting to record.
know to record onto a disc. Read it
before attempting to record.
NOTES:
Recording time can change for the
following reasons.
• When image quality is poor as dur-
following reasons.
• When image quality is poor as dur-
ing poor TV reception.
• When recording on a disc that has
been edited before.
• When the video is followed with re-
cordings of still images or just au-
dio.
dio.
NOTE:
Should a power failure occur or
should the AC cord plug be discon-
nected while recording, editing, ini-
tializing, finalising or any other func-
tion, the program being recorded will
be lost or the disc may not be play-
able. Manufacturer can not guaran-
tee against loss of program or disc
should this occur. To start recording
again, re-format the disc or use a new
disc and follow the instruction on re-
cording.
Recording
mode
XP
SP
SP
LP
SLP
Recording time
Approx. 60 min
Approx. 120 min
Approx. 120 min
Approx. 240 min
Approx. 360 min
Quality
Can record high quality images.
Can record normal quality images.
Can record normal quality images.
Quality deteriorates slightly, but
recording time is longer.
recording time is longer.
Recording time is prioritised over
quality.
quality.
2D50901A P44-57
7/20/04, 12:24 PM
48
49
NOTES:
• When using one touch timer re-
cording to record on a DVD disc, it
takes some time from when you
press REC/OTR until recording
actually starts.
Press REC/OTR a little before
your preferred starting point.
takes some time from when you
press REC/OTR until recording
actually starts.
Press REC/OTR a little before
your preferred starting point.
• Even if STOP is pressed during
recording, recording does not stop
instantly. Recording may continue
for as long as 5 seconds maximum
in the VR mode or 30 seconds
maximum in the Video mode.
instantly. Recording may continue
for as long as 5 seconds maximum
in the VR mode or 30 seconds
maximum in the Video mode.
• Because of characteristics pecu-
liar to digital video compression
technology, scenes with fast mo-
tion may appear as a matrix of
larger blocks.
technology, scenes with fast mo-
tion may appear as a matrix of
larger blocks.
• During recording, if the picture
noise continues for 1 minute, the
recording will stop automatically.
recording will stop automatically.
Read this before recording on disc
Disc remaining time
VR mode
• Recording is possible as long as there is available space on the
disc. (Finalised discs can be recorded by cancelling the finalisation,
see “UNDO FINALISE” on page 23.)
see “UNDO FINALISE” on page 23.)
• Erasing unnecessary title frees up available space on the disc. (Titles
can be erased from finalised discs by first undoing the finalisation.
See “UNDO FINALISE” on page 23.)
See “UNDO FINALISE” on page 23.)
Video mode
• Up until the disc is finalised, recording is possible as long as there is
available space on the disc. (Once the disc has been finalised, addi-
tional recording and erasing are not possible.)
tional recording and erasing are not possible.)
• The remaining time cannot be increased, nor can recorded title be
overwritten.
• Titles cannot be erased nor can recorded titles be overwritten.
Images that cannot be recorded
Some DVD-Video and broadcasts contain copy-restriction signals to
protect copyrights. There are 3 types of copy-restriction signals: “Copy
Free”, “Copy Never” and “Copy Once”.
protect copyrights. There are 3 types of copy-restriction signals: “Copy
Free”, “Copy Never” and “Copy Once”.
“Copy Free” (unrestricted recording)
Land-based TV broadcasts and images you record yourself with a video
camera allow unrestricted recording. There are no restrictions on re-
cording.
camera allow unrestricted recording. There are no restrictions on re-
cording.
“Copy Never” (recording prohibited)
• Images that contain the recording prohibited signal cannot be re-
corded.
• If the recording prohibited signal appears halfway through an image
you are recording, recording is paused at that instant. When the
recording prohibited signal ends, recording resumes.
recording prohibited signal ends, recording resumes.
• This unit incorporates a built-in copy guard. It cannot record soft-
ware or broadcasted programs that contain copy restriction signals
designed to protect copyright, etc.
designed to protect copyright, etc.
“Copy Once” (one-time recordable)
Programs (images) that contain the one-time recordable signal can be
recorded only in the VR mode using a DVD-RW disc that supports
CPRM Ver. 1.1.
recorded only in the VR mode using a DVD-RW disc that supports
CPRM Ver. 1.1.
2D50901A P44-57
7/20/04, 12:24 PM
49
50
Recording a TV program
Preparation:
• Turn ON the TV and select its AV channel (this may be labelled EXT
• Turn ON the TV and select its AV channel (this may be labelled EXT
/ AUX etc.)
• Load a recordable DVD or video tape into the unit.
• Press DVD/VCR to select the appropriate mode.
• Press DVD/VCR to select the appropriate mode.
1
Press REC MODE/SPEED to select the re-
cording mode.
The recording mode will appear on the TV
monitor and change every time REC
MODE/SPEED is pressed.
Video recording modes: SP/LP
DVD recording modes: XP/SP/LP/SLP
cording mode.
The recording mode will appear on the TV
monitor and change every time REC
MODE/SPEED is pressed.
Video recording modes: SP/LP
DVD recording modes: XP/SP/LP/SLP
SP is the normal recording mode for video
tapes. LP offers 2 times the recording time
as SP. For more information on DVD re-
cording modes, see page 48.
tapes. LP offers 2 times the recording time
as SP. For more information on DVD re-
cording modes, see page 48.
2
Press the numeric keys or CH
/
to select the channel to be
recorded.
1~9 : e.g. 5 = press “5”
10~80 : e.g. 29 = press “2” and “9” within
1~9 : e.g. 5 = press “5”
10~80 : e.g. 29 = press “2” and “9” within
2 seconds.
3
Press REC/OTR.
“ ” appears on the screen for about 4
seconds and recording will start.
seconds and recording will start.
NOTES:
• When recording onto a DVD, it
takes some time from when you
press REC/OTR until recording
actually starts.
Press REC/OTR a little before
your preferred starting point.
With a video tape, recording starts
almost at the same time you press
press REC/OTR until recording
actually starts.
Press REC/OTR a little before
your preferred starting point.
With a video tape, recording starts
almost at the same time you press
REC/OTR.
• If the erase prevention tab of video
tapes is removed, the tape will
eject when REC/OTR is pressed
for recording.
eject when REC/OTR is pressed
for recording.
You can record programs you watch
on TV onto video tapes or DVDs.
on TV onto video tapes or DVDs.
00 : 00 : 00 SP
SP
DVD mode
VCR mode
CH 29
CH 29
VCR mode
DVD mode
INDEX
2D50901A P44-57
7/20/04, 12:24 PM
50
51
Recording a TV program
To stop recording
Press STOP to stop recording.
NOTE:
When recording onto a DVD, even if STOP is
pressed during recording, recording does not
stop instantly. Recording may continue for as
long as approx. 10 seconds in the VR mode
or 30 seconds maximum in the Video mode.
When recording onto a DVD, even if STOP is
pressed during recording, recording does not
stop instantly. Recording may continue for as
long as approx. 10 seconds in the VR mode
or 30 seconds maximum in the Video mode.
To stop recording temporarily
Press PAUSE/STILL to avoid recording
unwanted material.
“4” will appear on screen for about 4 sec-
onds.
Press again to resume recording.
unwanted material.
“4” will appear on screen for about 4 sec-
onds.
Press again to resume recording.
NOTES:
• In the recording onto a video tape, the pause function will be re-
• In the recording onto a video tape, the pause function will be re-
leased after 5 minutes to prevent damage the video tape. The unit
will change to the STOP mode.
will change to the STOP mode.
• When recording onto a video tape, you can change a recording chan-
nel in the recording pause mode. (You cannot change a recording
channel in the DVD recording pause mode.)
channel in the DVD recording pause mode.)
Auto Rewind feature
This VCR will automatically rewind
the tape when the tape has ended
(except during OTR and TIMER
REC). It will also eject the tape.
the tape when the tape has ended
(except during OTR and TIMER
REC). It will also eject the tape.
NOTES:
• If the disc space become full, the
recording is stopped and “RE-
CORDING INTERRUPTED” will
appear on the screen.
CORDING INTERRUPTED” will
appear on the screen.
• In the event of a power failure dur-
ing DVD recording including OTR
and TIMER REC, the program can
not be recorded on the disc.
When the power resumes, after the
VCR/DVD is turned on, the set
checks the disc to repair the error
which is caused by a power failure.
This checking process may require
a few minutes to about 1 hour ac-
cording to disc condition. In this
process “SYSTEM ERROR
PLEASE WAIT DISC CHECKING”
will appear on the screen.
2D50901A P44-57
7/20/04, 12:24 PM
51

