Read Sharp DV-L88 (serv.man6) Service Manual online
DV-L88S/S(H)
DV-L88W/W(A)
DV-L88W/W(A)
10
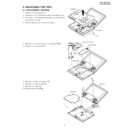
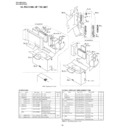
6. ADJUSTMENT METHOD
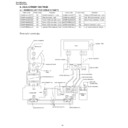
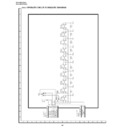
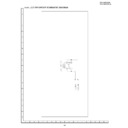
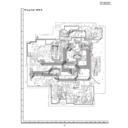
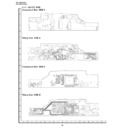
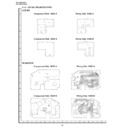
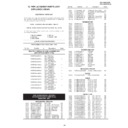
6-1. HARNESS LIST FOR SERVICE PARTS
Drawing for service jigs
Inverter PWB
QCNW-8152GEZZ
QCNW-8151GEZZ
QCNW-8558GEZZ
QCNW-8557GEZZ
CN1901
LCD CTL PWB
OPERATE
PWB
POWER
PWB
MAIN PWB
F
F
C
F
F
C
Panel
CN1900
CN1903
CN1902
CN5001
CN9901
CN802
CN801
CN301
CN6601
CN4402
CN4401
CN1800
CN1801
CN1802
CN1904
9
12
10
9
12
10
Mechanism
QCNW-8562GEZZ
QCNW-8564GEZZ
QCNW-8563GEZZ
QCNW-8565GEZZ
QCNW-8566GEZZ
DET LCD
CLOSE PWB
CLOSE PWB
QCNW-8624GEZZ x4
99GFCKWB90751A
B
to
B
B
to
B
B
to
B
99GFCKWB90751A
99GFCKWB90751A
99GFCKWB90751A
99GFCKWB90751A
99GFCKWB90751A
QCNW-8623GEZZ x2
CN83
CN81
CN82
CN86
CN84
CN85
RF&MOTOR
PWB
Parts Code
Price Code
Remarks
Parts Code
Price Code
Remarks
QCNW-8557GEZZ
AE
Spindle extension, 13-pin
QCNW-8566GEZZ
AD
Operate PWB extension, 2-pin
QCNW-8558GEZZ
AE
Sled extension, 2-pin
QCNW-8623GEZZ
AZ
Main-RF&Motor extension, 25-pin
QCNW-8562GEZZ
AK
Power-LCD extension, 9-pin
QCNW-8624GEZZ
AX
Main-Power extension, 15-pin
QCNW-8563GEZZ
AK
Power-LCD extension, 10-pin 99GFCKWB90751A
BX
—————
QCNW-8564GEZZ
AK
Power-LCD extension, 12-pin
QCNW-8151GEZZ
AQ
Inverter extension, 6-pin
QCNW-8565GEZZ
AE
Operate PWB extension, 6-pin
QCNW-8152GEZZ
AQ
LCD panel extension, 32-pin
DV-L88S/S(H)
DV-L88W/W(A)
DV-L88W/W(A)
11
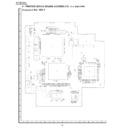
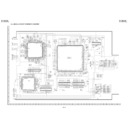
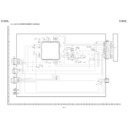
ADJUSTMENT PROCEDURE AND METHOD OF LCD PWB SIDE
Connect the LCD PWB to the jig for shipping adjustment.
Adjustment Item
Adjustment Menu
Adjustment Point
Signal/Setting
Adjustment Contents
1
Free run
R1933
Observe the 5PIN of
No input
Adjust so that the frequency becomes
adjustment
(VR)
TP1900 (HSY) with a
15.63
±
0.1kHz (64.0
µ
S).
frequency counter.
2
Screen center
R1914(VR)
Visual observation of
Monoscope full screen. Adjust the screen so that it is located in the
adjustment
the panel.
(625/25 or 525/30)
center.
HSY
15.63kHz
(64.0
µ
S)
CHECK ITEMS OF LCD PWB SIDE
Adjustment Item
Adjustment Point
Input Signal/Setting
Adjustment Contents
1
Free run check
Check the panel visually by connecting
External input
Check that the horizontal movement of OSD
to the checker.
(625/25)
is 2 mm or less when inputting a signal in
the external input mode with no signal input.
the external input mode with no signal input.
INPUT
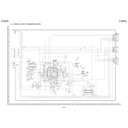
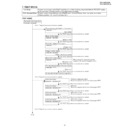
POWER PWB SIDE ADJUSTING PROCEDURE AND METHOD.
Connect the POWER PWB to the jig for shipping adjustment.
Supply the power in the condition that the “ENTER” and “STILL” keys are pressed at the same time and move to the special
mode (SP MODE).
After that, get the initialize set by pressing the “PLAY” key. After setting, turn off the power once.
Supply the power again in the condition that the “ENTER” and “STILL” keys are pressed at the same time and after moving
to the special mode (SP MODE), get the adjustment mode by pressing “INPUT/DVD” key.
Each operation in the adjustment mode changes as follows:
(1) Switch the adjustment block with the "VOLUME+" key input.
(2) Perform paging of each adjustment block with the "RETURN" key.
(3) Switch each adjustment item with the "VOLUME–" key input.
(4) Change each adjustment value with the left or right cursor key.
TV1
TV2
TV3
TV1
OPT
BAT
GAM0
TV1 adjustment
TV2 adjustment
TV3 adjustment
SBRIGHT
GPOS
CONT
WB-R
WB-B
SCOLOR
STINT
COM
OSDH
BBRIGHT
GAIN
[Caution] Do the image plane center adjustment of
2
after you surely do free run adjustment of
1
.
Image plane center deviates when adjustment is done in the reverse order.
DV-L88S/S(H)
DV-L88W/W(A)
DV-L88W/W(A)
12
Adjustment Item
Adjustment Menu
Adjustment Point
Signal/Setting
Adjustment Contents
1
Gamma setting
Check that the gamma function of the body is
check
on "level 2".
2
Contrast check
CONT
Check that CONT set value is "AB".
3
RGB amplitude
GAIN
Connect the synchroscope Black-and-white Adjust the Vpp(SYNC-SYNC) of VG to
adjustment
to 2PIN (VG) of TP1900.
10STEP
4.0
±
0.1V.
4
Gamma 0 set
GAM0
The set value of GAM0 is changed from "50" to
value change
"56".
5
Sub-bright
SBRIGHT
Connect the synchroscope Black-and-white Adjust the 10% white part(SYNC-white 10%) to
adjustment
to 2PIN (VG) of TP1900.
10STEP
1.0
±
0.05V.
6
Common
GPOS
Connect the synchroscope Black-and-white Adjust the common amplitude to 8.0
±
0.1V.
amplitude
to 1PIN (COM) of TP1900. 10STEP
adjustment
7
Contrast
CONT
Connect the synchroscope Black-and-white Adjust the 100% white part(SYNC-white100%)
adjustment
to 2PIN (VG) of TP1900.
10STEP
to 3.8
±
0.1V.
8
White balance
WB-R(Red)
Connect the synchroscope Black-and-white Adjust the white balance (red) so that black level
adjustment
to 2PIN (VG) and 3PIN
10STEP
the equal of green and red output become equal.
(Red)
(VR) of TP1900.
*Adjust the 30% white.
9
White balance
WB-B(Blue)
Connect the synchroscope Black-and-white Adjust the white balance (blue) so that black level
adjustment
to 2PIN (VG) and 4PIN
10STEP
the equal of green and blue output become
(Blue)
(VB) of TP1900.
equal.
*Adjust the 30% white.
*Adjust the 30% white.
0
Burst clear
STINT
Connect the synchroscope MOD10STEP
Adjusted so that the side muscle of the colour
adjustment
to 4PIN (VB) of TP1900.
signal may become the smallest with seeing
liquid crystal image plane.
liquid crystal image plane.
[Another method] [Another method]
100% colour bar Adjusted so that every horizontal term space
100% colour bar Adjusted so that every horizontal term space
may become the level which the swing level of
yellow of the colour bar signal is the same as.
yellow of the colour bar signal is the same as.
8.0V
±
0.1
4.0V
±
0.1
3.8V
±
0.1
1.0V
±
0.05
Input
G
DV-L88S/S(H)
DV-L88W/W(A)
DV-L88W/W(A)
13
Adjustment Item
Adjustment Menu
Adjustment Point
Signal/Setting
Adjustment Contents
q
Sub colour
SCOLOR
Connect the synchroscope 100% colour bar Adjust the yellow amplitude of the colour bar
adjustment
to 4PIN (VB) of TP1900.
signal (white level to yellow peak level) to
2.5
2.5
±
0.1Vpp.
w
Confrontation
COM
Specified adjustment jig
No input state
When using the specified adjustment jig
bias adjustment
(illuminometer) or visual
Brightness: Center Connect the output of jig to the oscilloscope
observation
Perform it in a
and adjust the waveform to the minimum
combination of
point.
PWB and the
At this time, perform the adjustment several
liquid crystal
times to fix the optimal point because the
panel which will measuring value hardly changes around the
be supplied as
be supplied as
optimal point.
products finally.
In case of visual adjustment Stand or tilt the
panel as shown in the figure and check by
shaking your head and seeing whether stripes
appear.
If the adjustment is improper, you will see
stripes in the longitudinal direction.
Perform the adjustment so that they
do not appear.
panel as shown in the figure and check by
shaking your head and seeing whether stripes
appear.
If the adjustment is improper, you will see
stripes in the longitudinal direction.
Perform the adjustment so that they
do not appear.
[Another method] [Another method]
Flicker signal
Flicker signal
Externally input the signal shown left and
generator
adjust so that the cross bars become minimum
“Example:
by visually checking the screen.
BP1018 made
by JFC”
by JFC”
e
OSD position
OSDH
OSD character
The position of the adjustment value on the
adjustment
visual observation
right end of the OSD character is adjusted to
15mm
±
2mm from the right end of the image
plane.
r
Lighting control
BBRIGHT
Check that the BBRIGHT is “76”.
standard check
(Type drawing)
Optimal point
Adjust within the above
range to fix the optimal point
range to fix the optimal point
Direction of stripe
15mm
2.5V
±
0.1
White
Yellow

