Read Sharp XL-70 (serv.man3) User Guide / Operation Manual online
– 7 –
XL-60H/70H
10 cm (4")
10 cm (4")
20 cm (8")
10 cm (4")
3
2
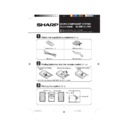
Putting batteries into the remote control
1
Remove the battery
cover.
cover.
●
2 “AA” size batteries (UM/SUM-3, R6, HP-7 or similar)
1
Check the supplied accessories
FM aerial
×
1
Remote control
×
1
AC power lead
×
1
AM loop aerial
×
1
2
Insert the batteries.
3
Replace the battery
cover.
cover.
(For U.K.)
(For Europe)
4
Connections
1
2
2
1
3
1
Connect the AM and FM aerials.
2
FM aerial
AM loop
aerial
aerial
AC 230 V, 50 Hz
3
Connect the AC power lead.
White line
Right speaker
Left speaker
AC 230 V, 50 Hz
(For U.K.)
(For Europe)
6
Listening to a tape
3
2
2
1
4
5
1
2
5
3
4
1
2
6
4
3
OPEN/CLOSE
Label side up
7
5
1
Press the ON/STAND-BY button to turn
the power on.
the power on.
2
Press the FUNCTION button until “FM”
or “AM” appears.
or “AM” appears.
3
Press the BAND button to select FM ST,
FM or AM.
FM or AM.
4
Press the TUNING (
or
) button to
tune into a station.
5
Adjust the VOLUME control.
1
Press the ON/STAND-BY button to turn
the power on.
the power on.
2
Press the FUNCTION button until “CD”
or “NO DISC” appears.
or “NO DISC” appears.
3
Press the
OPEN/CLOSE button to
open the CD compartment.
4
Place a CD on the spindle.
5
Close the CD compartment by pushing
the OPEN/CLOSE button.
the OPEN/CLOSE button.
6
Press the
/CD
button.
7
Adjust the VOLUME control.
5
Listening to a CD
Listening to the radio
7
1
Press the ON/STAND-BY button to turn
the power on.
the power on.
2
Press the FUNCTION button until
“TAPE” appears.
“TAPE” appears.
3
Load a cassette.
4
Press the
button.
5
Adjust the VOLUME control.
8
Recording from a CD
1
Press the ON/STAND-BY button to
turn the power on.
2
Press the FUNCTION button until
“CD” or “NO DISC” appears.
3
Load a CD and a recordable
cassette.
4
Press the REC PAUSE button.
5
Press the
button.
1
3
3
2,3
AC INPUT
3
●
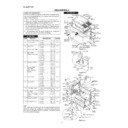
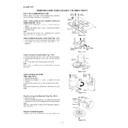
Do not touch the laser pickup lens. If fingerprints
or dust accumulate on the pickup, clean it gently
with a dry cotton swab.
or dust accumulate on the pickup, clean it gently
with a dry cotton swab.
●
CD pickup cleaning
1
Press the ON/STAND-BY button to enter the
stand-by mode.
stand-by mode.
2
Unplug the AC power lead from the AC IN-
PUT socket on this unit.
PUT socket on this unit.
3
Whilst pressing down the MEMORY/SET
button and the
button and the
button, plug the AC power
lead into the AC INPUT socket on this unit.
Caution:
●
The operation explained above will erase all data
●
Resetting the micro computer
1
2
5
3
4
Display

