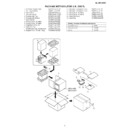
Read Sharp XL-65H (serv.man9) Service Manual online
– 9 –
XL-55H/65H
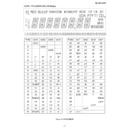
MECHANISM SECTION
• Driving Force Check
Torque Meter
Specified Value
Play: TW-2412
Over 80 g
• Torque Check
Torque Meter
Play: TW-2111
30 to 60 g. cm
Fast forward: TW-2231
55 to 140 g.cm
Rewind: TW-2231
55 to 140 g.cm
Specified
Value
Adjusting
Point
Instrument
Connection
Test Tape
ADJUSTMENT
Specified Value
• Tape Speed
TUNER SECTION
MTT-111
Variable
3,000
±
Headphone
resistor in
90 Hz
terminal
motor.(M901)
Check Point
Instrument
Connection
Display
Frequency
87.5 MHz
87.5 MHz
3.4 V
±
1.0 V
TP301
108 MHz
108 MHz
7.8 V
±
1.0 V
TP301
• Check FM VT
Signal generator: 1 kHz, 40 kHz dev., FM modulated
Signal generator: 1 kHz, 40 kHz dev., FM modulated
Frequency
Frequency
Display
Setting/
Adjusting
Parts
Instrument
Connection
IF
450 kHz
1,602 kHz
T351
*1
AM Band
—
531 kHz
(fL): T306
*2
Coverage
1.1
±
0.1 V
AM
990 kHz
990 kHz
T302
*1
Tracking
fL: Low-renge frequency
fH: High-renge frequency
fH: High-renge frequency
Signal generator: 400 Hz, 30%, AM modulated
• AM IF/RF
Adjusting
Parts
Instrument
Connection
Display
Frequency
98.00 MHz
98.00 MHz
VR351*1
Input: CNP301
(30 dB
µ
V)
Output: Speaker
Terminal
Terminal
• FM Mute Level
Signal generator: 1 kHz, 40 kHz dev., FM modulated
Signal generator: 1 kHz, 40 kHz dev., FM modulated
*1. Adjust so that an output signal appears.
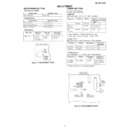
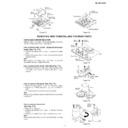
TAPE MECHANISM
M901
Tape
Motor
Tape
Motor
Variable
resistor
in motor
resistor
in motor
IC303
IC302
FE301
CF352
R336
T306
VR351
T302
T351
MAIN PWB
FM Mute
Level
Level
AM IF
TP301
CNP301
ANTENNA
SOCKET
SOCKET
FM
AM
SO301
AM
Tracking
Tracking
AM Band
Coverage fL
Coverage fL
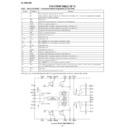
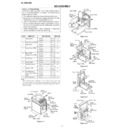
Figure 9-1 ADJUSTMENT POINT
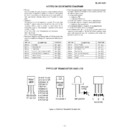
Figure 9-2 ADJUSTMENT POINTS
*1. Input: Antenna
Output: Speaker terminal
*2. Input: Input is not connected
Output: TP301
XL-55H/65H
– 10 –
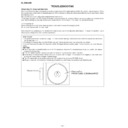
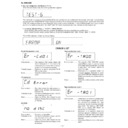
2. CD Test Mode (TEST 1)
In the CD test mode the operation of each step is enabled even when the LID-SW is off. However, if focus cannot be set in step 3
or any error processing is started, it is impossible to proceed to the next step. When the error processing is started, operations other
than termination of test mode by pressing the ON/STAND-BY button or return to the step 1 by pressing the STOP button are inhibited.
1. Step 1 Mode
When the CD test mode is turned on, the following indication lights, the processing (until turning-off of CD STB terminal of CD
initialization operation flow) is executed, and the next button input is waited.
When the CD test mode is turned on, the following indication lights, the processing (until turning-off of CD STB terminal of CD
initialization operation flow) is executed, and the next button input is waited.
After lighting for one second
If the following operation buttons are pressed in this state, the operation is performed as follows.
"ON/STAND-BY" ...... The test mode is turned off, the power is turned off, and the ordinary stand-by mode is set.
"FF/FWD" ................. After the pickup returns once to the innermost periphery, it slides toward the outer periphery while this
"FF/FWD" ................. After the pickup returns once to the innermost periphery, it slides toward the outer periphery while this
button is held down.
"REW/REV" .............. After the pickup returns once to the innermost periphery, it slides toward the inner periphery while this
button is pressed. However, if PU-IN is on, input is invalid.
"PLAY" ..................... Shift to step 2
"STOP" ..................... Invalid
"REC PAUSE" .......... Shift to step 5
"STOP" ..................... Invalid
"REC PAUSE" .......... Shift to step 5
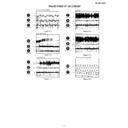
TEST MODE
The test mode applied to this microcomputer has three modes, namely ordinary test mode to be used for adjustment or
measurement, aging test mode to be used for aging test, and self-diagnosis test mode for self-inspection in case of final product
inspection.
measurement, aging test mode to be used for aging test, and self-diagnosis test mode for self-inspection in case of final product
inspection.
1. Turning on the test mode
To turn on the specific test mode, press the ON/STAND-BY button, holding down the following two buttons in the ordinary stand-
by mode (power off state). In this case only the main unit button is valid. Even when the ON/STAND-BY of remote control button
is set to on, the test mode is not turned on.
[Ordinary test mode]
1. CD Test Mode (TEST 1)…………………… BASS/TREBLE + FF/FWD
2. Tuner Test Mode (TEST 2)………………… BASS/TREBLE + REW/REV
3. Electronic volume Test Mode (TEST 3)…… BASS/TREBLE + REC
4. Timer Test Mode (TEST 4)………………… MEMORY/SET + REC
5. LCD Test Mode (TEST 5)……………………MEMORY/SET + REW/REV
MEMORY/SET + PLAY
[Self-diagnosis Test Mode]
1. Button input diagnosis test mode (TEST6).…
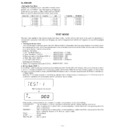
• Setting the Test Mode
Keeping the REW/REV button and BASS/TREBLE button
pressed, turn on POWER. Then, the frequency is initially set
in the memory as shown in Table. Call it with the PRESET
button to use it for adjustment and check of tuner circuit.
Keeping the REW/REV button and BASS/TREBLE button
pressed, turn on POWER. Then, the frequency is initially set
in the memory as shown in Table. Call it with the PRESET
button to use it for adjustment and check of tuner circuit.
Preset No.
FM STEREO
Preset No.
AM
1
87.50 MHz
2
108.00 MHz
3
98.00 MHz
4
90.00 MHz
5
106.00 MHz
11~25
––––
6
531 kHz
7
1,602 kHz
8
990 kHz
9
603 kHz
10
1,404 kHz
Preset No.
FM MONO
26
106.00 MHz
27
90.00 MHz
28
98.00 MHz
29
108.00 MHz
30
87.50 MHz
Display

