Read Sharp XL-1100 (serv.man3) User Guide / Operation Manual online
– 1 –
Web-site: www.sharp.co.uk/support Help Line: 08705 274277 (office hours)
This Quick Guide will help you to correctly
install and operate your system.
install and operate your system.
XL-1000H
XL-1100H
COMPACT AUDIO SYSTEM
If you require any advice or assistance re-
garding your Sharp product, please visit
our web-site www.sharp.co.uk/support.
Customers without internet access may
telephone 08705 274277 during office
hours (or (01) 676 0648 if telephoning from
Ireland).
garding your Sharp product, please visit
our web-site www.sharp.co.uk/support.
Customers without internet access may
telephone 08705 274277 during office
hours (or (01) 676 0648 if telephoning from
Ireland).
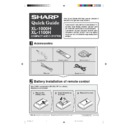
Accessories
1
2
3
Battery installation of remote control
Use 2 “AAA” size batteries (UM-4, R03, HP-16 or similar).
Batteries are not included.
Batteries are not included.
Remove the
Insert the batteries
Replace the cover.
battery cover.
as shown.
1
1
2
2
TINSE0069SJZZ
A0101.HK
Speaker wire
×
2
Remote control
×
1
AC power lead
×
1
AM loop aerial
×
1
FM aerial
×
1
*XL1000H_QG
2001.6.6, 10:58 AM
1
– 2 –
Web-site: www.sharp.co.uk/support Help Line: 08705 274277 (office hours)
System connections
3
3
Right speaker
Left speaker
Connection cable
for digital recording
(not supplied)
for digital recording
(not supplied)
MD recorder
To the optical line
input socket
input socket
Wall socket
(AC 230 V, 50 Hz)
(AC 230 V, 50 Hz)
To the line
output socket
output socket
RCA lead
(not supplied)
(not supplied)
AM loop aerial
VCR, DVD, etc.
TV
FM aerial
Headphones
Right speaker
Left speaker
Black
White line
*XL1000H_QG
2001.6.6, 10:58 AM
2
– 3 –
Web-site: www.sharp.co.uk/support Help Line: 08705 274277 (office hours)
Listening to a CD
Total number of tracks
Turn on your system
4
4
Total playing time
Press the ON/STAND-BY button to turn the power on.
1
Press the FUNCTION button until “CD STOP” or “NO DISC” appears on
the display.
the display.
2
Press the
7
7
7
7
7
button to open the CD compartment.
3
Place a CD on the spindle, label side up.
4
Press the
7
7
7
7
7
button to close the CD compartment.
5
Press the
06
06
06
06
06
button to start playback from track 1.
12 cm (5")
8 cm (3")
*XL1000H_QG
2001.6.6, 10:58 AM
3
– 4 –
Web-site: www.sharp.co.uk/support Help Line: 08705 274277 (office hours)
■
If trouble occurs
If such a problem occurs, do the following:
¡
Press the ON/STAND-BY button to enter the power stand-by mode.
™
Unplug the AC power lead from the AC INPUT socket on the unit.
œ
Whilst pressing down the MEMORY/SET button and the
J
button, plug the AC power lead into the AC
INPUT socket on the unit.
■
Maintenance
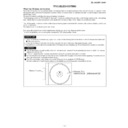
Do not touch the laser pickup lens. If fingerprints or dust accumulate on
the pickup, clean it gently with a dry cotton swab.
the pickup, clean it gently with a dry cotton swab.
1
Press the FUNCTION button until “FM” or “AM” appears on the display.
2
Press the TUNING (
X
X
X
X
X
or
W
W
W
W
W
) button to tune in to the desired station.
When the TUNING button is pressed for more than 0.5 seconds, scanning will start auto-
matically and the tuner will stop at the first receivable broadcast station.
matically and the tuner will stop at the first receivable broadcast station.
3
To receive an FM stereo transmission:
Press the FUNCTION button to display the
“ST” indicator.
Press the FUNCTION button to display the
“ST” indicator.
●
“
j
” will appear when an FM broadcast is in stereo.
Listening to the radio
AC INPUT
FM stereo mode indicator
FM stereo receiving indicator
*XL1000H_QG
2001.6.6, 10:58 AM
4

