Read Sharp CD-BA1500 User Guide / Operation Manual online
CD-BA1500H
– 6 –
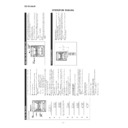
OPERATION MANUAL
S
E
TTI
NG
THE
CLO
CK
ON/
ST
AND-BY
CLOCK
MEMOR
Y/SET
TUNING/
TIME
( )
AM 12:00
AM 0:00
0:00
2
3
4
7
6
5
8
9
In this e
xample
,
the cloc
k
is set f
or
1
Press the ON/ST
AND-BY
b
utton
to enter the stand-b
y
mode
.
2
Press the CLOCK b
utton.
3
Within 5 seconds
,
press the MEMOR
Y/SET
b
utton.
4
Press the TUNING/TIME (
or
) b
utton
to select the time
displa
y mode
.
"0
:0
0
"
→
T
h
e
24
-h
o
u
r d
isp
la
y w
ill
ap
pe
ar
.
(
0
:0
0
-
2
3
:5
9
)
"AM 0:00"
→
The 12-hour displa
y
will appear
.
(
A
M
0
:0
0
-
P
M
1
1
:5
9
)
"AM 12:00"
→
The 12-hour displa
y
will appear
.
(
A
M
1
2
:0
0
-
P
M
1
1
:5
9
)
●
Note that this can only be set when the unit is first installed
or it has been reset (see page 28).
5
Press the MEMOR
Y/SET
b
utton.
6
Press the TUNING/TIME (
or
) b
utton
to adjust the hour
.
●
Press the TUNING/TIME (
or
) b
utton
once to adv
ance
the time b
y
1 hour
.
Hold it do
wn
to adv
ance
contin
uously
.
●
When the 12-hour displa
y
is selected, "AM" will change auto-
matically to "PM".
7
Press the MEMOR
Y/SET
b
utton.
8
P
res
s
the TU
N
IN
G
/T
IM
E
(
or
) b
u
tt
o
n
to
a
d
ju
s
t
th
e
min
utes
.
●
Press the TUNING/TIME (
or
) b
utton
once to adv
ance
the time b
y
1 min
ute
.
Hold it do
wn
to change the time in 5
min
ute inter
v
als
.
●
The hour setting will not adv
ance
e
v
en
if min
utes
adv
ance
from "59" to "00".
9
Press the MEMOR
Y/SET
b
utton.
●
The cloc
k
star
ts
oper
ating
from "0" second.
(Seconds are not displa
y
ed.)
And then the cloc
k
displa
y
will disappear after a f
e
w
seconds
.
T
o
see the time displa
y:
Press the CLOCK b
utton.
●
The time displa
y
will appear f
or
about 5 seconds
.
Note:
●
Th
e c
loc
k d
isp
la
y w
ill
fl
ash
on
an
d o
ff
at
t
he
pus
h o
f
th
e
CLOCK b
utton
when the A
C
po
w
er
po
w
er
failure
occurs or after the A
C
po
w
er
lead is discon-
nected.
If this happens
,
follo
w
the procedure belo
w
to change the cloc
k
time
.
T
o
c
hang
e the c
loc
k
time:
①
Press the CLOCK b
utton.
②
Within 5 seconds
,
press the MEMOR
Y/SET
b
utton.
③
P
erf
or
m
steps 6 - 9 abo
v
e
.
T
o
c
hang
e the time displa
y
mode:
①
P
erf
or
m
steps 1 - 2 in the section "RESETTING THE MICR
O-
COMPUTER", on page 28.
②
P
erf
or
m
steps 1 - 9 abo
v
e
.
(Main unit oper
ation)
RE
S
E
TTI
NG
THE
MI
CR
O
C
O
M
P
UTE
R
Reset the micr
ocomputer
under the f
ollo
wing
conditions:
●
T
o
er
ase
y
contents (cloc
k
and timer
settings
,
and tuner and CD presets).
●
If the displa
y
is not correct.
●
If the oper
ation
is not correct.
1
Press the ON/ST
AND-BY
b
utton
to enter the stand-b
y
mode
.
2
Whilst pressing do
wn
the
b
utton
and the X-BASS/DEMO
b
utton,
hold do
wn
the ON/ST
AND-BY
b
utton
for
at least 1
second.
●
"CLEAR AL" will appear
.
Caution:
●
The oper
ation
e
xplained
abo
v
e
will er
ase
memor
y
including cloc
k
and timer settings
,
and tuner and CD
presets
.
X-B
ASS/
DEMO
ON/
ST
AND-BY
PREP
ARA
TION FOR USE
15
15
Notes concerning use:
●
Replace the batter
ies
if the oper
ating
distance is reduced or if
the oper
ation
becomes err
atic.
●
P
e
riodically
clean the tr
ansmitter
LED on the remote control
and the sensor on the main unit with a soft cloth.
●
Exposing the sensor on the main unit to strong light ma
y
in-
terf
ere
with oper
ation.
Change the lighting or the direction of
the unit.
●
K
eep
the remote control a
w
a
y
from moisture
,
e
xcessiv
e
heat,
shoc
k, and
vibr
ations
.
0.2 m - 6 m
(8" - 20’)
Display

