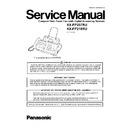
Read Panasonic KX-FP207RU / KX-FP218RU Service Manual online
ORDER NO. KMF0608021CE
Compact Plain Paper Fax (with Digital Answering System)
KX-FP207RU
KX-FP218RU
KX-FP218RU
(for Russia)
2
KX-FP207RU/218RU
TABLE OF CONTENTS
PAGE
PAGE
1 Safety Precautions -----------------------------------------------3
1.1. For Service Technicians ----------------------------------3
1.2. AC Caution---------------------------------------------------3
1.3. Personal Safety Precautions ----------------------------4
1.4. Service Precautions ---------------------------------------5
1.2. AC Caution---------------------------------------------------3
1.3. Personal Safety Precautions ----------------------------4
1.4. Service Precautions ---------------------------------------5
2 Warning --------------------------------------------------------------6
2.1. About Lead Free Solder (PbF: Pb free) --------------6
2.2. Insulation Resistance Test -------------------------------7
2.3. Battery Caution ---------------------------------------------7
2.2. Insulation Resistance Test -------------------------------7
2.3. Battery Caution ---------------------------------------------7
3 Specifications ------------------------------------------------------8
4 General/Introduction ---------------------------------------------9
4 General/Introduction ---------------------------------------------9
4.1. Error Message ----------------------------------------------9
4.2. Optional Accessories------------------------------------ 11
4.2. Optional Accessories------------------------------------ 11
5 Features ------------------------------------------------------------ 11
6 Technical Descriptions---------------------------------------- 12
6 Technical Descriptions---------------------------------------- 12
6.1. Connection Diagram------------------------------------- 12
6.2. General Block Diagram--------------------------------- 13
6.3. Control Section ------------------------------------------- 15
6.4. Facsimile Section ---------------------------------------- 24
6.5. Sensors and Switches ---------------------------------- 31
6.6. Modem Section ------------------------------------------- 35
6.7. NCU Section----------------------------------------------- 42
6.8. ITS (Integrated telephone System) and
Monitor Section ------------------------------------------- 45
6.9. Operation Board Section ------------------------------- 46
6.10. LCD Section ----------------------------------------------- 47
6.11. Power Supply Board Section-------------------------- 48
7 Location of Controls and Components------------------ 51
7.1. Overview --------------------------------------------------- 51
7.2. Control Panel---------------------------------------------- 51
7.2. Control Panel---------------------------------------------- 51
8 Installation Instructions--------------------------------------- 52
8.1. Installation Space ---------------------------------------- 52
8.2. Connections ----------------------------------------------- 53
8.3. Installing the Ink Film------------------------------------ 54
8.4. Installing the Paper Tray ------------------------------- 55
8.5. Paper Support--------------------------------------------- 56
8.6. Installing the Recording Paper------------------------ 56
9 Operation Instructions ---------------------------------------- 57
9.1. Setting Your Logo ---------------------------------------- 57
10 Test Mode---------------------------------------------------------- 58
10.1. DTMF Signal Tone Transmit Selection ------------- 59
10.2. Button Code Table --------------------------------------- 60
10.3. Print Test Pattern----------------------------------------- 61
10.2. Button Code Table --------------------------------------- 60
10.3. Print Test Pattern----------------------------------------- 61
11 Service Mode ----------------------------------------------------- 62
11.1. Programing and Lists------------------------------------ 62
11.2. The Example of the Printed List ---------------------- 67
11.2. The Example of the Printed List ---------------------- 67
12 Troubleshooting Guide---------------------------------------- 72
12.1. Troubleshooting Summary----------------------------- 72
12.2. Error Messages-Display -------------------------------- 73
12.3. Error Messages-Report--------------------------------- 75
12.4. Remote Programming----------------------------------- 97
12.5. Troubleshooting Details ------------------------------ 101
12.2. Error Messages-Display -------------------------------- 73
12.3. Error Messages-Report--------------------------------- 75
12.4. Remote Programming----------------------------------- 97
12.5. Troubleshooting Details ------------------------------ 101
13 Service Fixture & Tools ------------------------------------- 137
14 Disassembly and Assembly Instructions------------- 138
14 Disassembly and Assembly Instructions------------- 138
14.1. General Section ---------------------------------------- 138
14.2. Disassembly Flowchart ------------------------------- 139
14.3. Disassembly Procedure ------------------------------ 141
14.2. Disassembly Flowchart ------------------------------- 139
14.3. Disassembly Procedure ------------------------------ 141
15 Maintenance ---------------------------------------------------- 164
15.1. Maintenance Items and Component Locations -164
15.2. Gear Section---------------------------------------------166
15.3. Jams -------------------------------------------------------173
15.4. Cleaning---------------------------------------------------175
15.2. Gear Section---------------------------------------------166
15.3. Jams -------------------------------------------------------173
15.4. Cleaning---------------------------------------------------175
16 Miscellaneous --------------------------------------------------177
16.1. Terminal Guide of the ICs Transistors and
Diodes -----------------------------------------------------177
16.2. How to Replace the Flat Package IC -------------- 179
16.3. Test Chart-------------------------------------------------181
16.3. Test Chart-------------------------------------------------181
17 Schematic Diagram -------------------------------------------184
17.1. Digital Board (PCB1) (KX-FP207RU)-------------- 184
17.2. Digital Board (PCB1) (KX-FP218RU)-------------- 188
17.3. Analog Board (PCB2) (KX-FP207RU) ------------192
17.4. Analog Board (PCB2) (KX-FP218RU) ------------194
17.5. Operation Board (PCB3) (KX-FP207RU)---------196
17.6. Operation Board (PCB3) / MIC Board
17.2. Digital Board (PCB1) (KX-FP218RU)-------------- 188
17.3. Analog Board (PCB2) (KX-FP207RU) ------------192
17.4. Analog Board (PCB2) (KX-FP218RU) ------------194
17.5. Operation Board (PCB3) (KX-FP207RU)---------196
17.6. Operation Board (PCB3) / MIC Board
(PCB10) (KX-FP218RU)------------------------------197
17.7. Power Supply Board (PCB4) ------------------------198
17.8. Interface Board (PCB5) ------------------------------- 199
17.9. Sensor Board (PCB6) ---------------------------------200
17.8. Interface Board (PCB5) ------------------------------- 199
17.9. Sensor Board (PCB6) ---------------------------------200
17.10. Film End SensorBoard (PCB7)---------------------200
17.11. Motor Position Sensor Board (PCB8) -------------200
17.12. Hook Switch Board (PCB9) --------------------------201
18 Printed Circuit Board-----------------------------------------203
18.1. Digital Board (PCB1)-----------------------------------203
18.2. Analog Board (PCB2) ---------------------------------205
18.3. Operation Board (PCB3)------------------------------207
18.4. Power Supply Board (PCB4) ------------------------209
18.5. Interface Board (PCB5) ------------------------------- 210
18.6. Sensor Board (PCB6) ---------------------------------210
18.7. Film End Sensor Board (PCB7)---------------------210
18.8. Motor Position Sensor Board (PCB8) -------------210
18.9. Hook Switch Board (PCB9) -------------------------- 211
19 Appendix Information of Schematic Diagram ------- 211
20 Exploded View and Replacement Parts List----------212
20 Exploded View and Replacement Parts List----------212
20.1. Cabinet, Mechanical and Electrical Parts
Location ---------------------------------------------------212
20.2. Replacement Parts List ------------------------------- 222
3
KX-FP207RU/218RU
1 Safety Precautions
1. Before servicing, unplug the AC power cord to prevent an electric shock.
2. When replacing parts, use only the manufacturer's recommended components.
3. Check the condition of the power cord. Replace if wear or damage is evident.
4. After servicing, be sure to restore the lead dress, insulation barriers, insulation papers, shields, etc.
5. Before returning the serviced equipment to the customer, be sure to perform the following insulation resistance test to prevent
the customer from being exposed to shock hazards.
1.1.
For Service Technicians
ICs and LSIs are vulnerable to static electricity.
When repairing, the following precautions will help prevent recurring malfunctions.
When repairing, the following precautions will help prevent recurring malfunctions.
1. Cover the plastic part's boxes with aluminum foil.
2. Ground the soldering irons.
3. Use a conductive mat on the worktable.
4. Do not touch the IC or LSI pins with bare fingers.
2. Ground the soldering irons.
3. Use a conductive mat on the worktable.
4. Do not touch the IC or LSI pins with bare fingers.
1.2.
AC Caution
For safety, before closing the lower cabinet, please make sure of the following precautions.
1. The earth lead is fixed with the screw.
2. The AC lead is connected properly to power supply board.
3. Wrap the earth lead around the core 5 times.
4. Wrap the AC lead around the core 5 times.
2. The AC lead is connected properly to power supply board.
3. Wrap the earth lead around the core 5 times.
4. Wrap the AC lead around the core 5 times.
4
KX-FP207RU/218RU
1.3.
Personal Safety Precautions
1.3.1.
Moving Sections of the Unit
Be careful not to let your hair, clothes, fingers, accessories, etc., become caught in any moving sections of the unit.
The moving sections of the unit are the rollers and a gear. There is a separation roller and a document feed roller which are
rotated by the document feed motor. A gear rotates the two rollers. Be careful not to touch them with your hands, especially
when the unit is operating.
The moving sections of the unit are the rollers and a gear. There is a separation roller and a document feed roller which are
rotated by the document feed motor. A gear rotates the two rollers. Be careful not to touch them with your hands, especially
when the unit is operating.
1.3.2.
Live Electrical Sections
All the electrical sections of the unit supplied with AC power by the AC power cord are live.
Never disassemble the unit for service with the AC power supply plugged in.
Never disassemble the unit for service with the AC power supply plugged in.
CAUTION:
AC voltage is supplied to the primary side of the power supply unit. Therefore, always unplug the AC power cord before disas-
sembling for service.
sembling for service.

